Invoice Summary
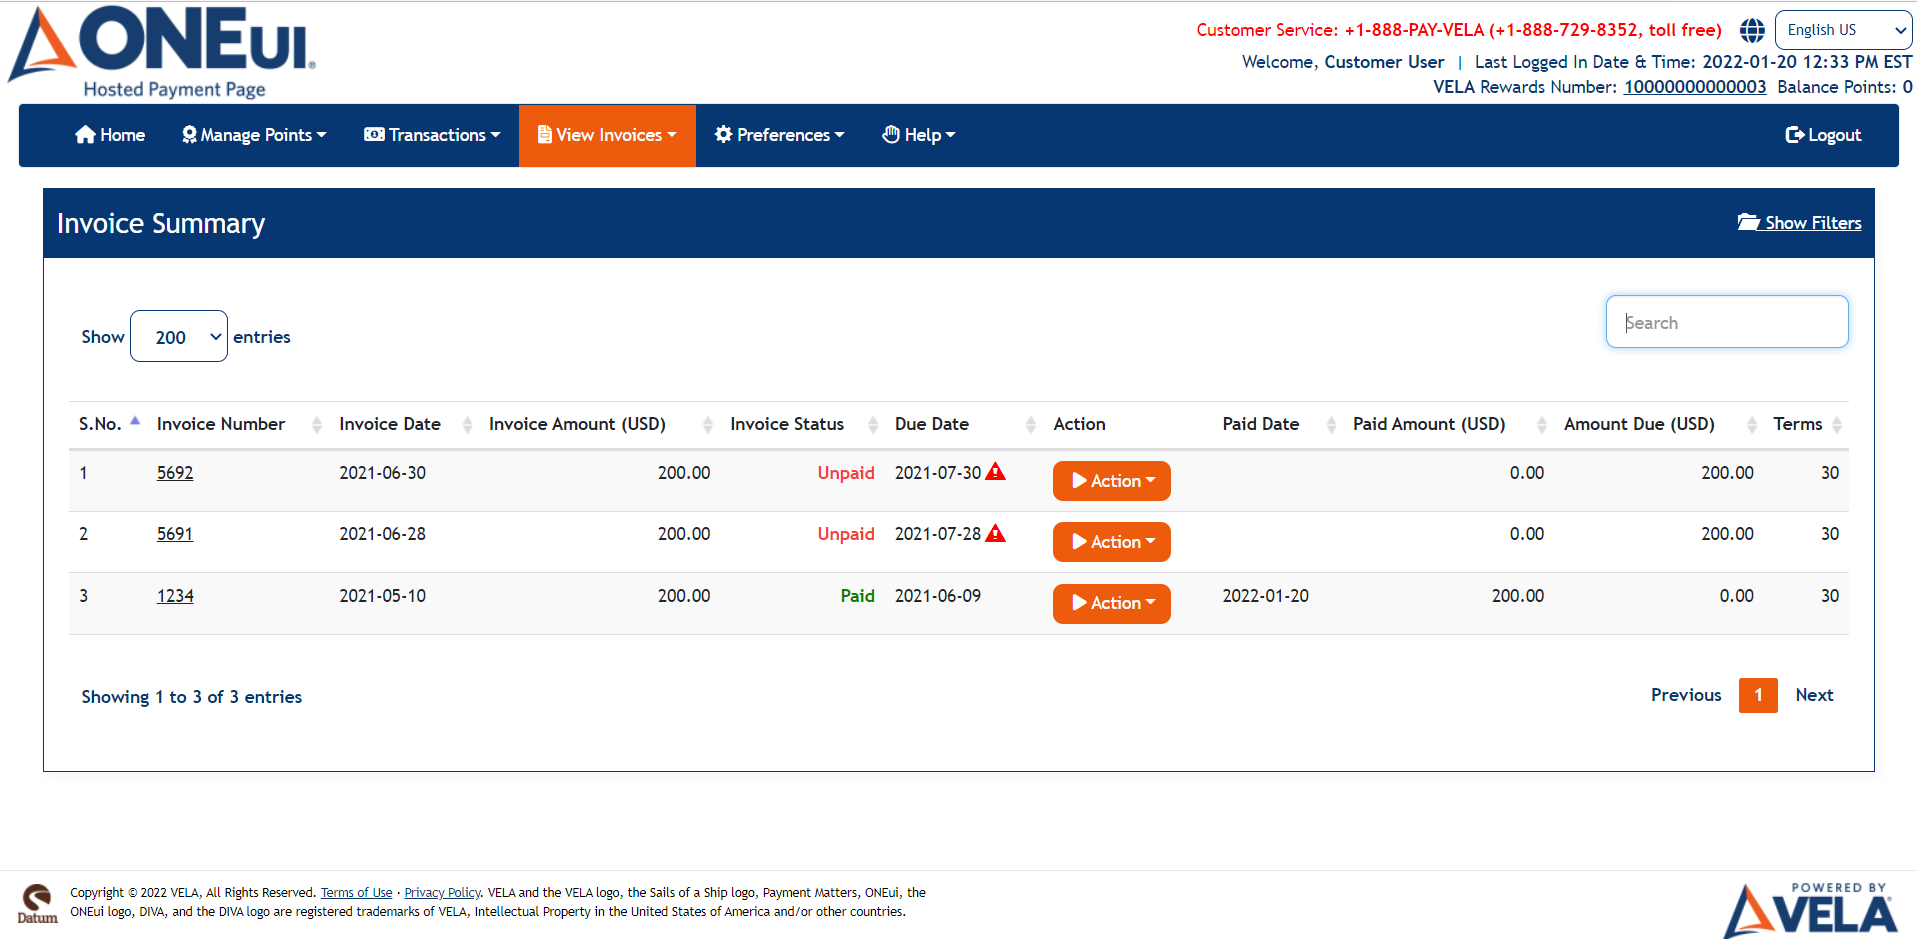
The Invoice Summary screen can be accessed by the View Invoices Menu link in the navbar or by clicking the link on the Home screen's Notifications tab.
The default screen looks as follows:
The screen contains the following elements:
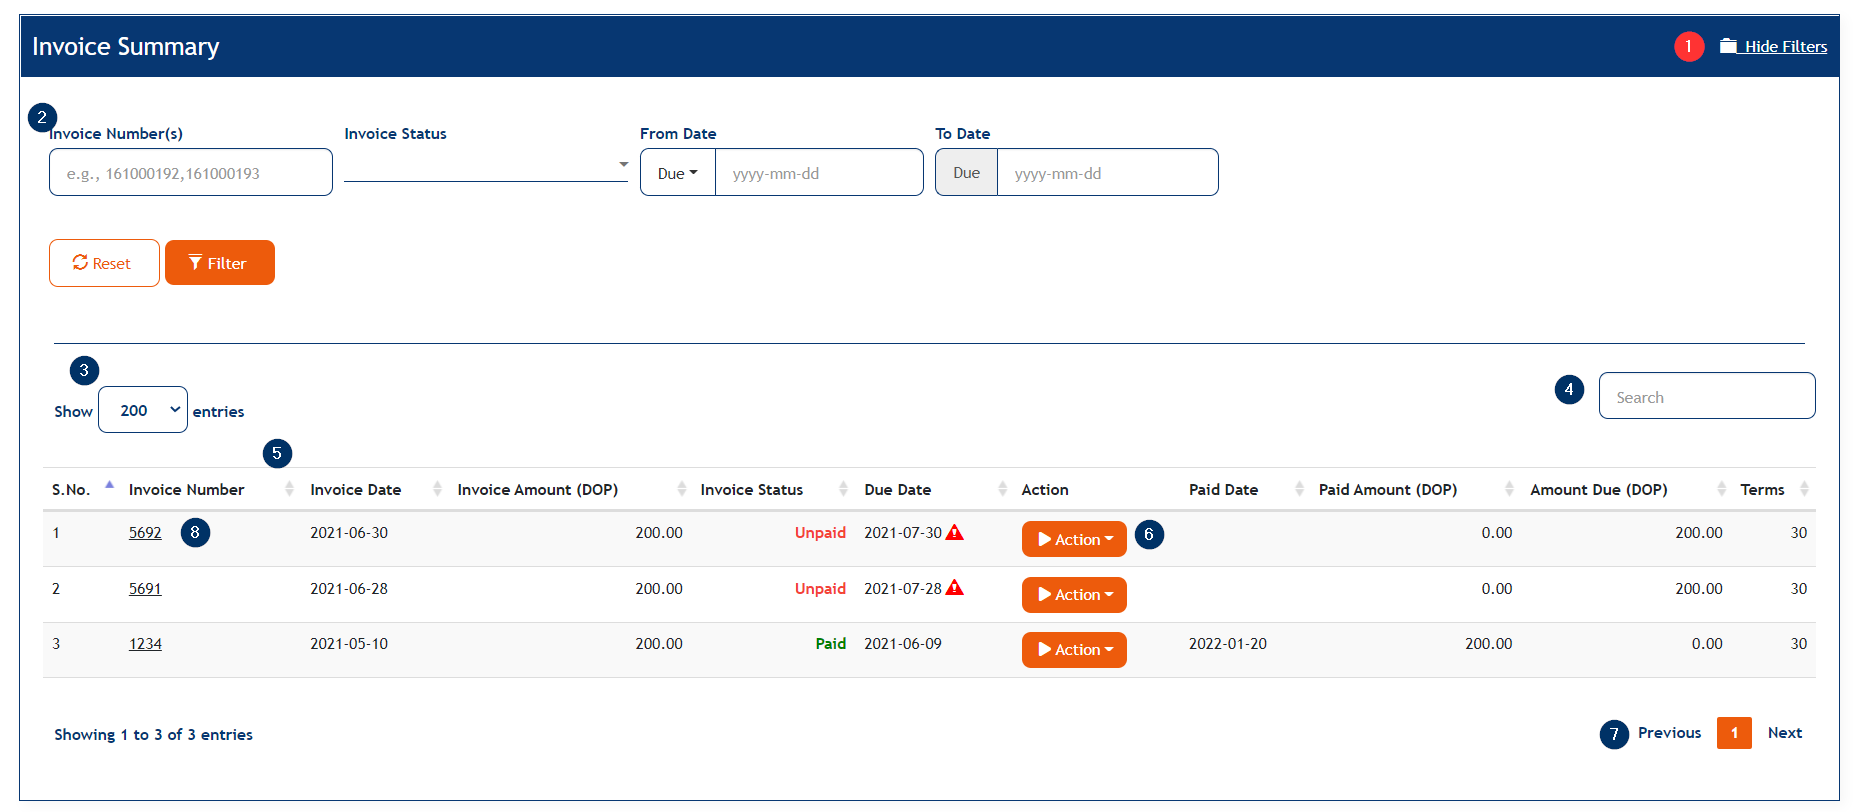
- A Hide/Show Filters link that will hide or show the filter dropdowns and buttons on the screen.
- Available filters and a Filter button that will filter the data displayed on the screen with Reset and Filter buttons
- Invoice Number(s) — Field to enter Invoice/Appointment Number
- Invoice Status — Drop-down to select and filter the screen by Invocie status
- From Date — Field to select the From date range
- To Date — Field to select the To date range
- A dropdown to change the number of rows displayed in the table.
- A dynamic search box that will show rows matching the user entered criteria.
- Table containing the user's invoices.
- S No. — The sequence number of the invoice in the table
- Invoice Number — The number of the invoice
- Invoice Date — The date that the invoice was created
- Invoice Amount — The amount of the invoice
- Invoice Status — Payment status of the invoice
- Credited — An invoice whose payment was credited by the Merchant
- Paid — An invoice that has been paid
- Paid Offline — An invoice that was paid "offline" (e.g., by check, cash, or some other method not utilizing the application)
- Partially Paid — An invoice that has been paid Partially
- Partially Paid Offline — An invoice that has been partially paid by the admin user on behalf of the customer user
- Unpaid — An invoice that has not been paid
- Voided — An invoice whose payment was voided by the Merchant
- Due Date — The date that the invoice is due. A red indicator will display for past-due invoices and a yellow indicator will display for invoices that are due today.
- Action — The action for a user to take against the invoice (e.g., pay it)
- Paid Date — The date that the invoice was paid
- Paid Amount — The Amount paid against the invoice
- Amount Due — The amount due against the invoice
- Terms — The payment terms for the invoice
- Action — A drop-down with View and Pay links that will take the user to the Invoice Detail or Make A Payment screen to pay the unpaid invoice(s). This button will not display for paid invoices.
- A Pager to go between pages in case there are more rows than what will fit on the screen.
- Invoice Number: Hyperlink, clicking upon this the user is taken to the Invoice Detail page.
The Action drop-down for the unpaid invoice row looks as follows:
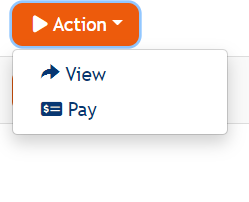
The Pay button will take the user to the Make A Payment screen where the user can pay the unpaid invoice(s).
Clicking upon the Invoice Number hyperlink or the View button under the Action drop-down in the table takes the user to the Invoice Detail Page.
The Action drop-down for the paid invoice row looks as follows:

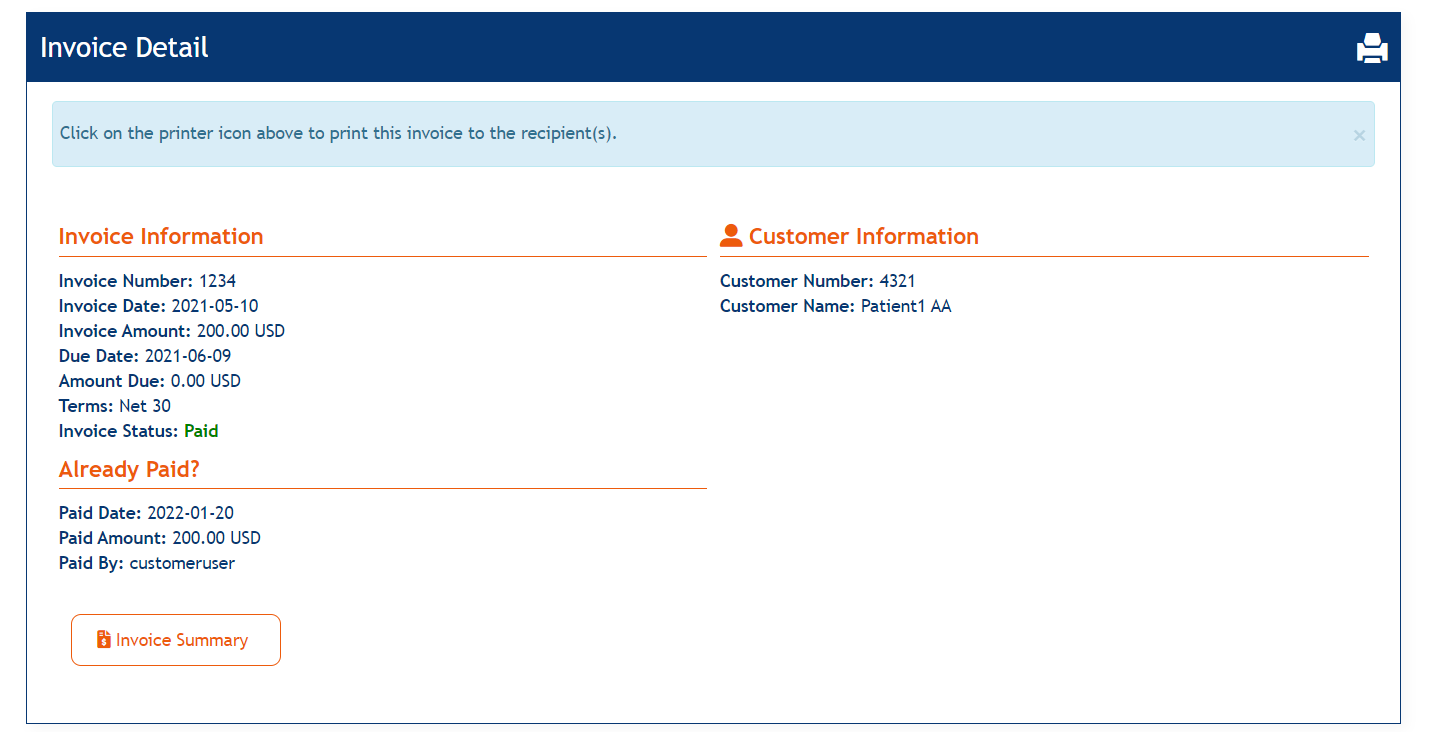
The Invoice Detail page looks as follows and contains the following elements:
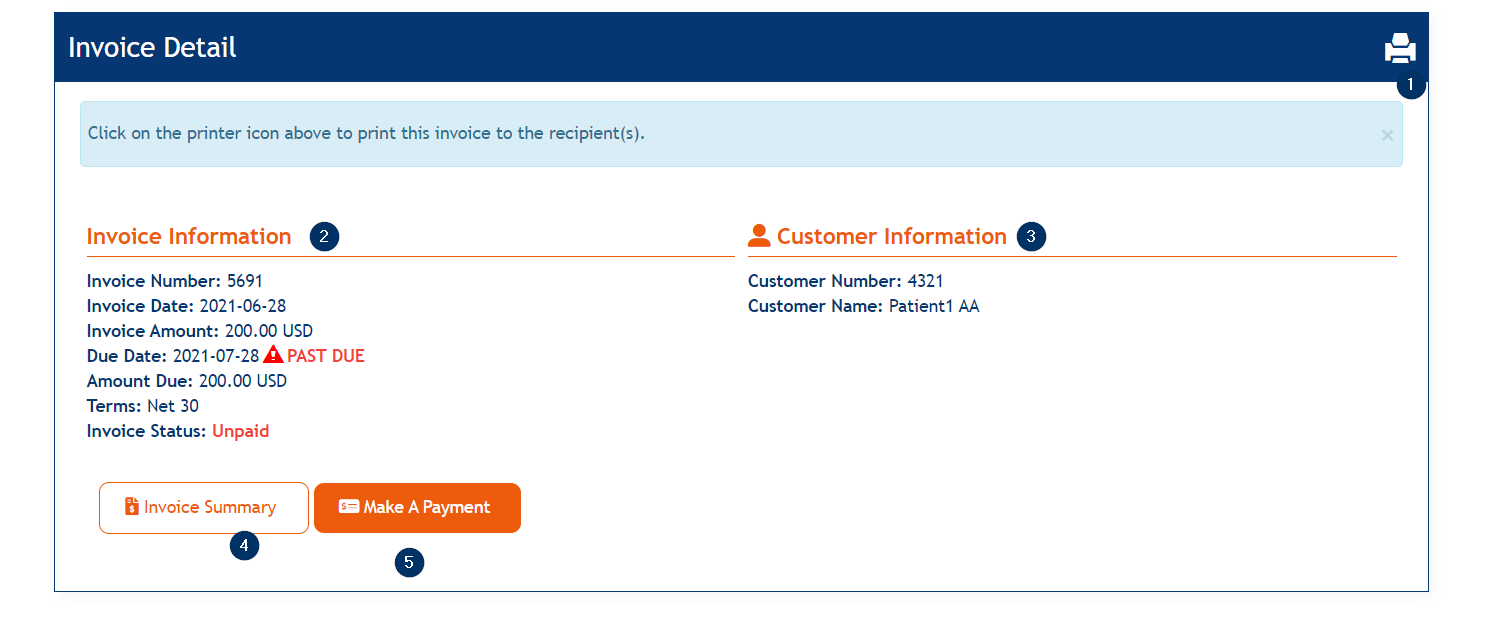
- Print — button to print the page details
- Invoice Information — Section which displays the details of the invoice like invoice number, invoice date, due date, Amount due and Invoice Status etc.
- Customer Information Section which includes the Customer Number, Customer Name, and Customer Type.
- Invoice Summary Button/link when clicked upon takes the user to the Invoice Summary page.
- Make A Payment Button/link which takes the user to the Make A Payment page to pay the Unpaid invoice.
If the Invoice has already been paid, the Make A Payment link will be hidden and an additional Section called Already Paid displays with the details like Paid date, Paid Amount, and Paid By etc.
Make A Payment
The Make A payment screen for invoices is same as "normal" Make A Payment screen, with the exception that the Amount field is pre-filled with the invoice amount and is disabled.
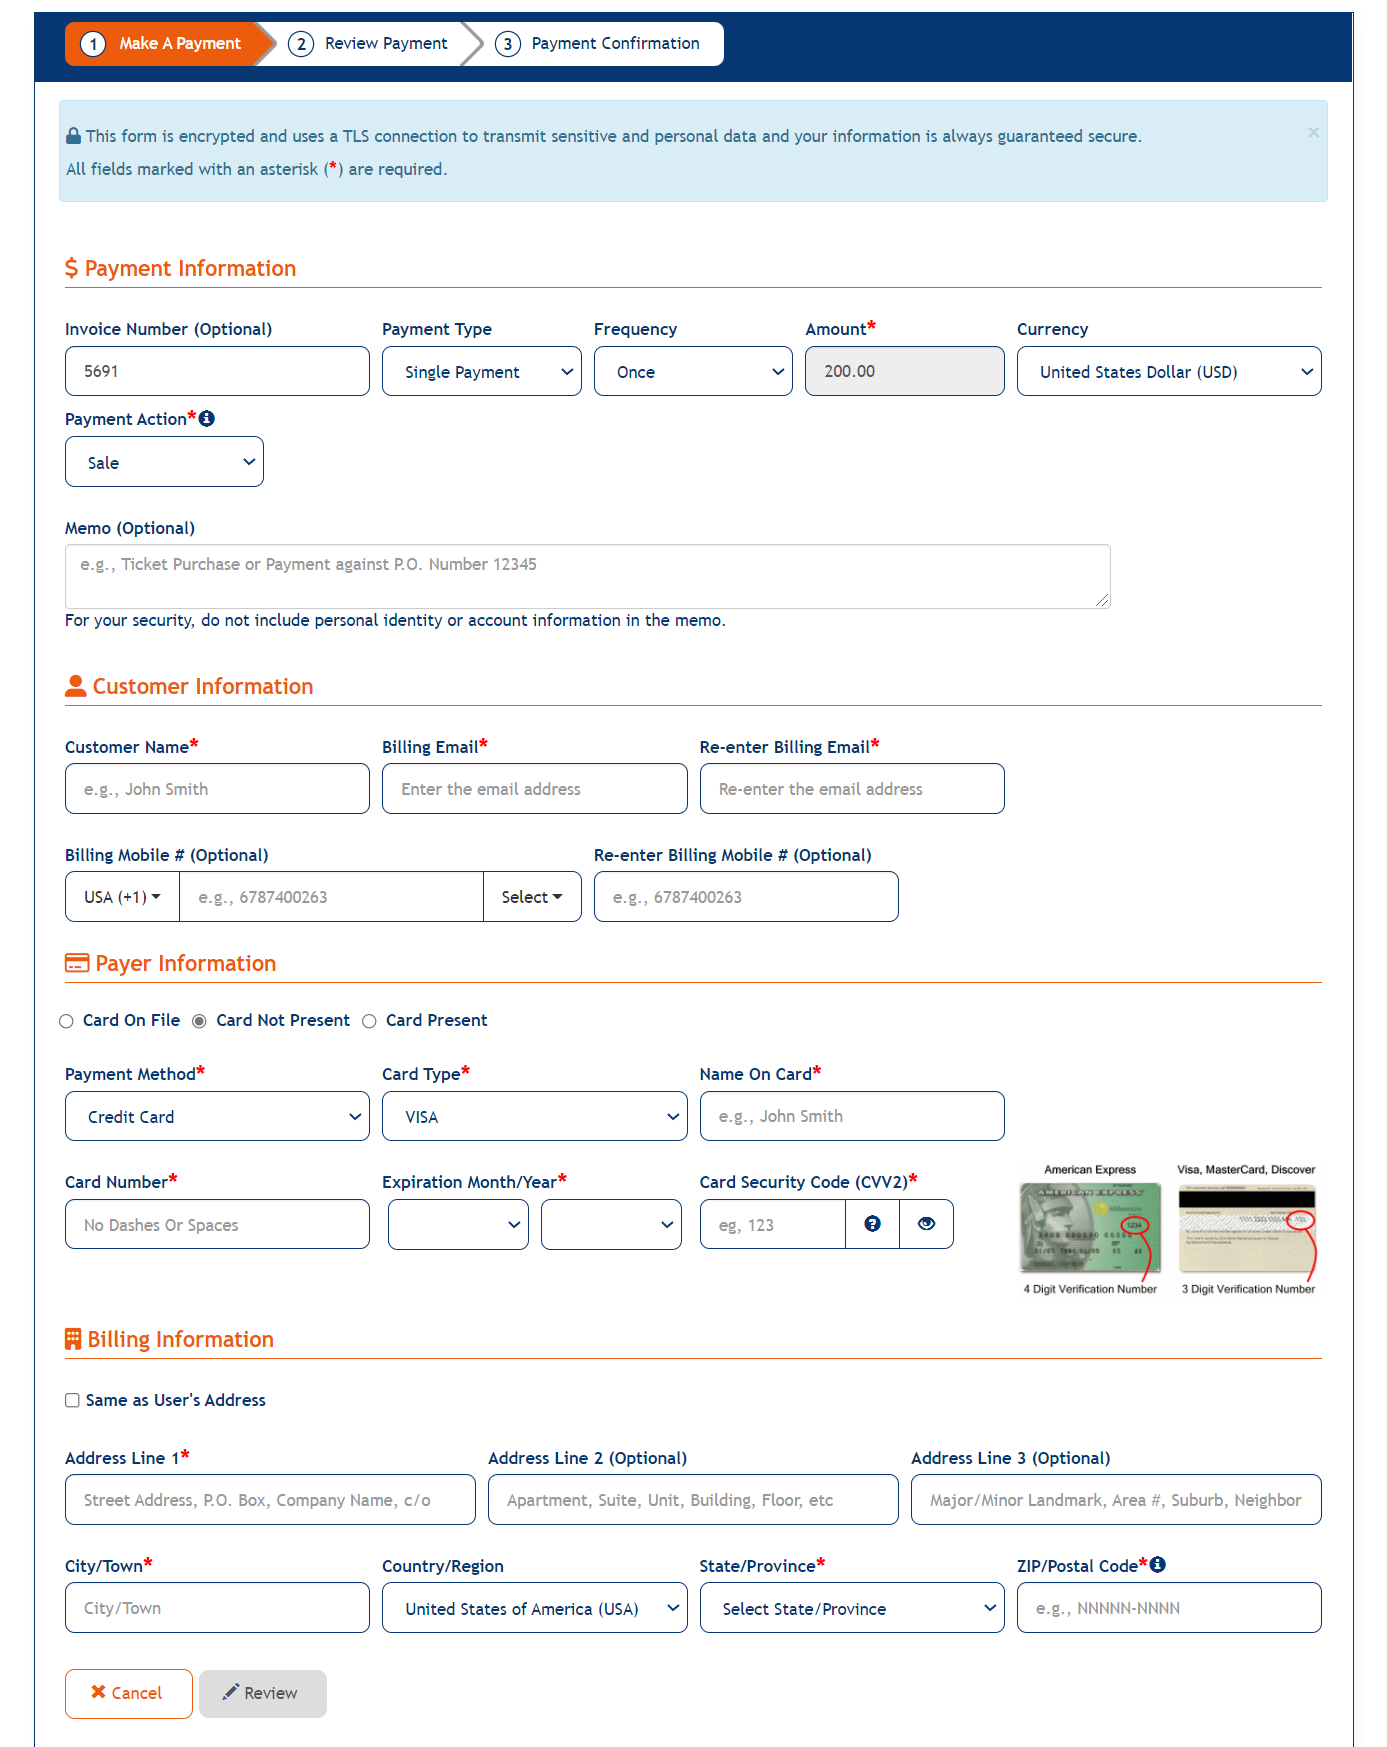
Irrespective of the payment methods the screen have the Cancel and Review buttons.

Clicking Cancel button will take the user back to the Invoice Summary screen.
Note
If the Partial Payments of the Invoices is allowed at the Merchant Level, then the Amount field is enabled and the user's can make partial payments by editing the field value.
Mobile view
The mobile view of the Invoice Summary screen uses a card interface in order to display as much data as possible while still making it viewable on a mobile device.
The screen contains the following elements:
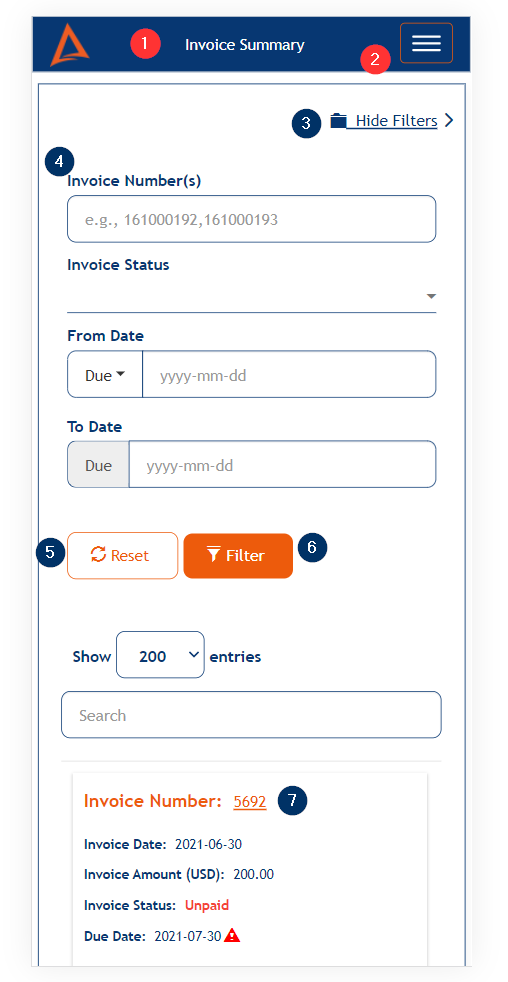
- Screen title
- Menu button
- Hide/Show Filters link that will hide or show the available screen filter
- Available filter dropdowns
- Reset button to reset the filters to the default values
- Filter button to filter the on-screen data based on the selected filter values
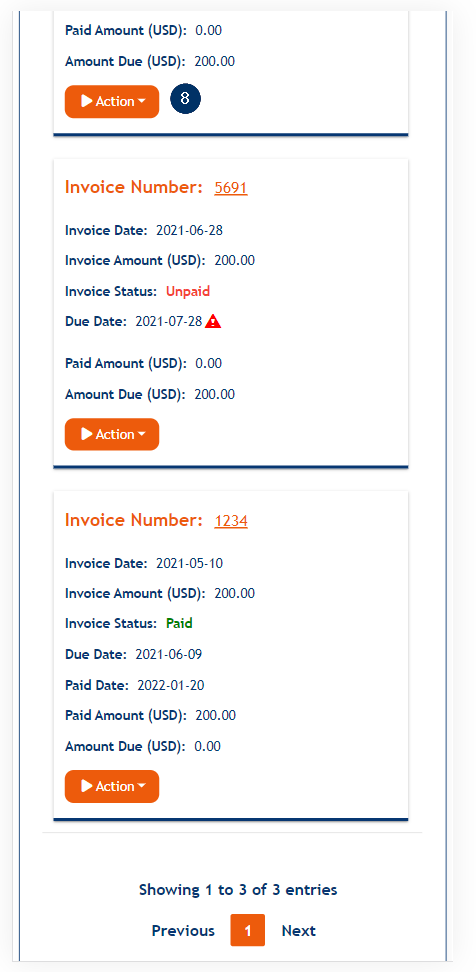
- A card that shows invoice-related information. Warning icons are displayed in red if the invoice payment is past due and in yellow if the payment is due today
- Action drop-down button is displayed with View and Pay links for the unpaid invoices, tapping on which will takes the user to Make A Payment screen to pay the invoice with the amount field pre-filled.
Updated As Of Version 5.0.0.8