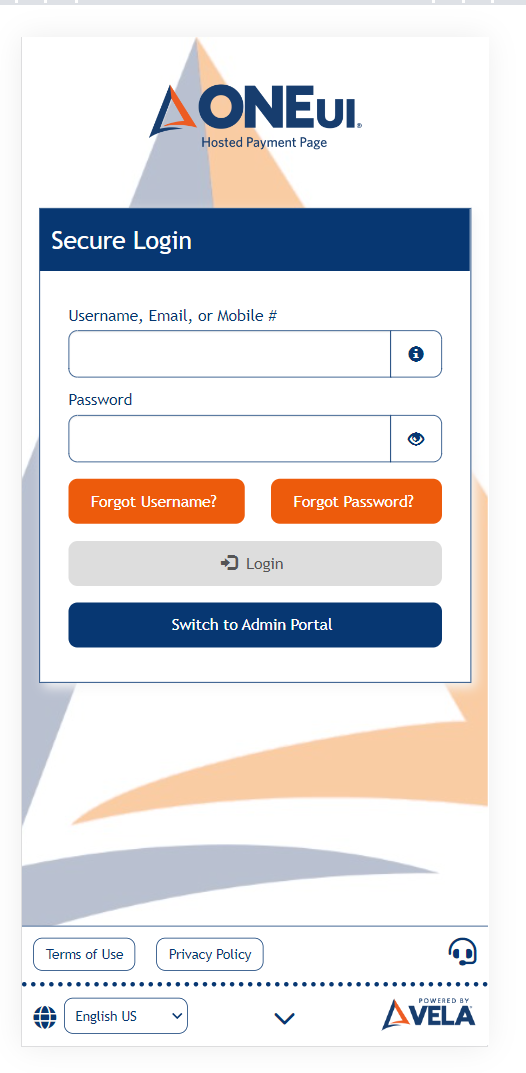
Login
The login screen is the first screen that displays when the user loads ONEui.
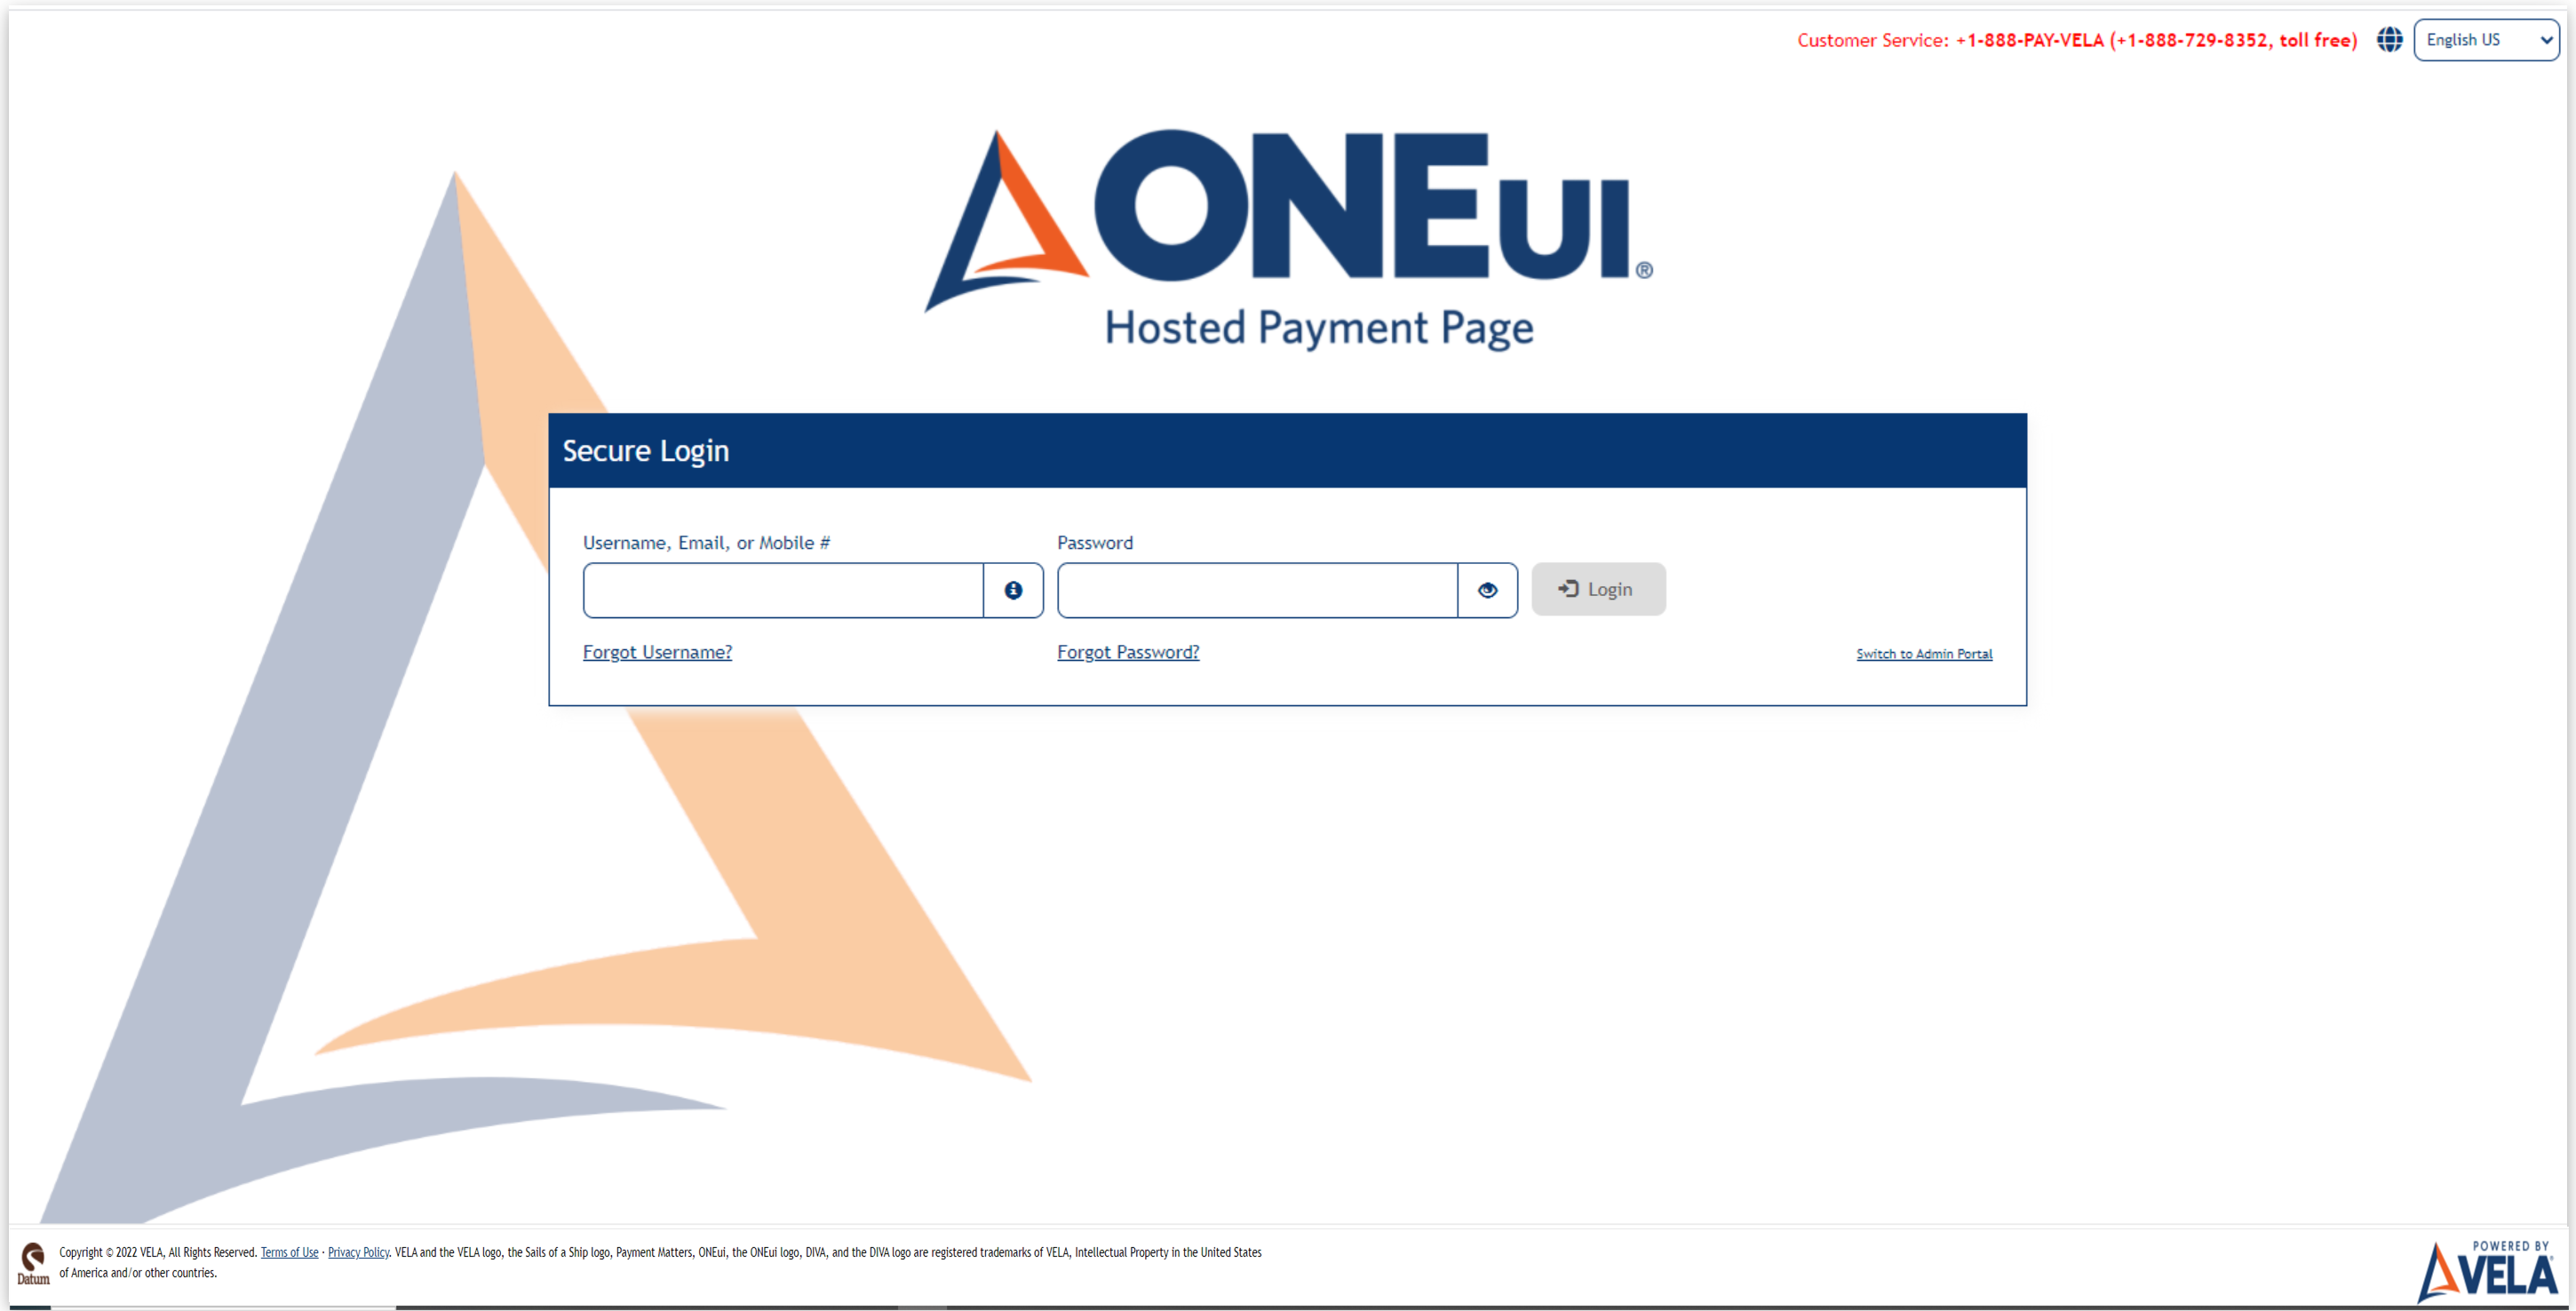
The Login screen contains the following elements:
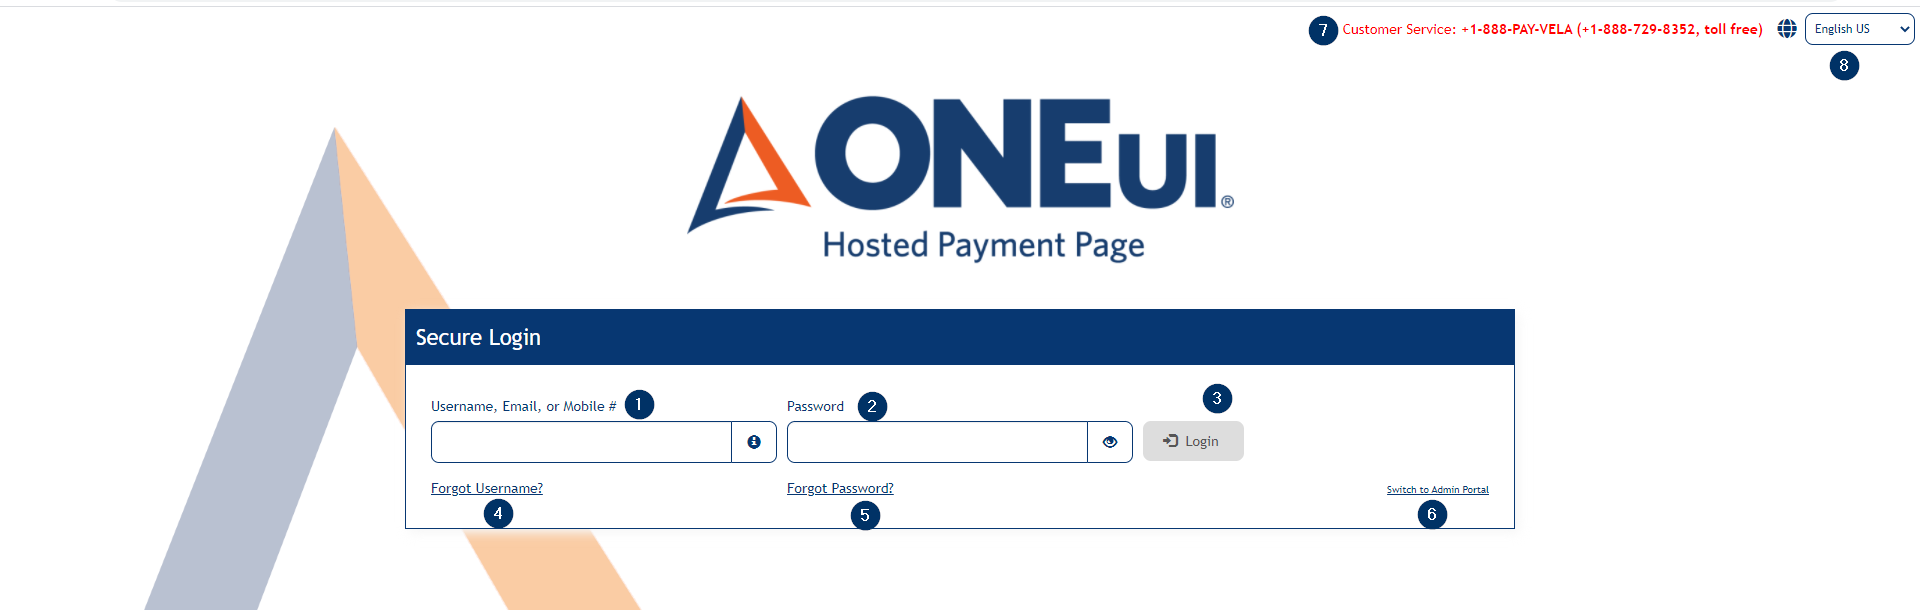
- Username, Email, or Mobile # field
- Password field
- Login button, which is disabled by default
- Forgot username? link
- Forgot password? link
- Switch to Admin Portal link
- Header Frame with Customer Service Information and
- Language drop-down with the list of application supported languages.
In order to log in to the application, a user must enter his or her correct username, email, or mobile number and password and click the Login button.
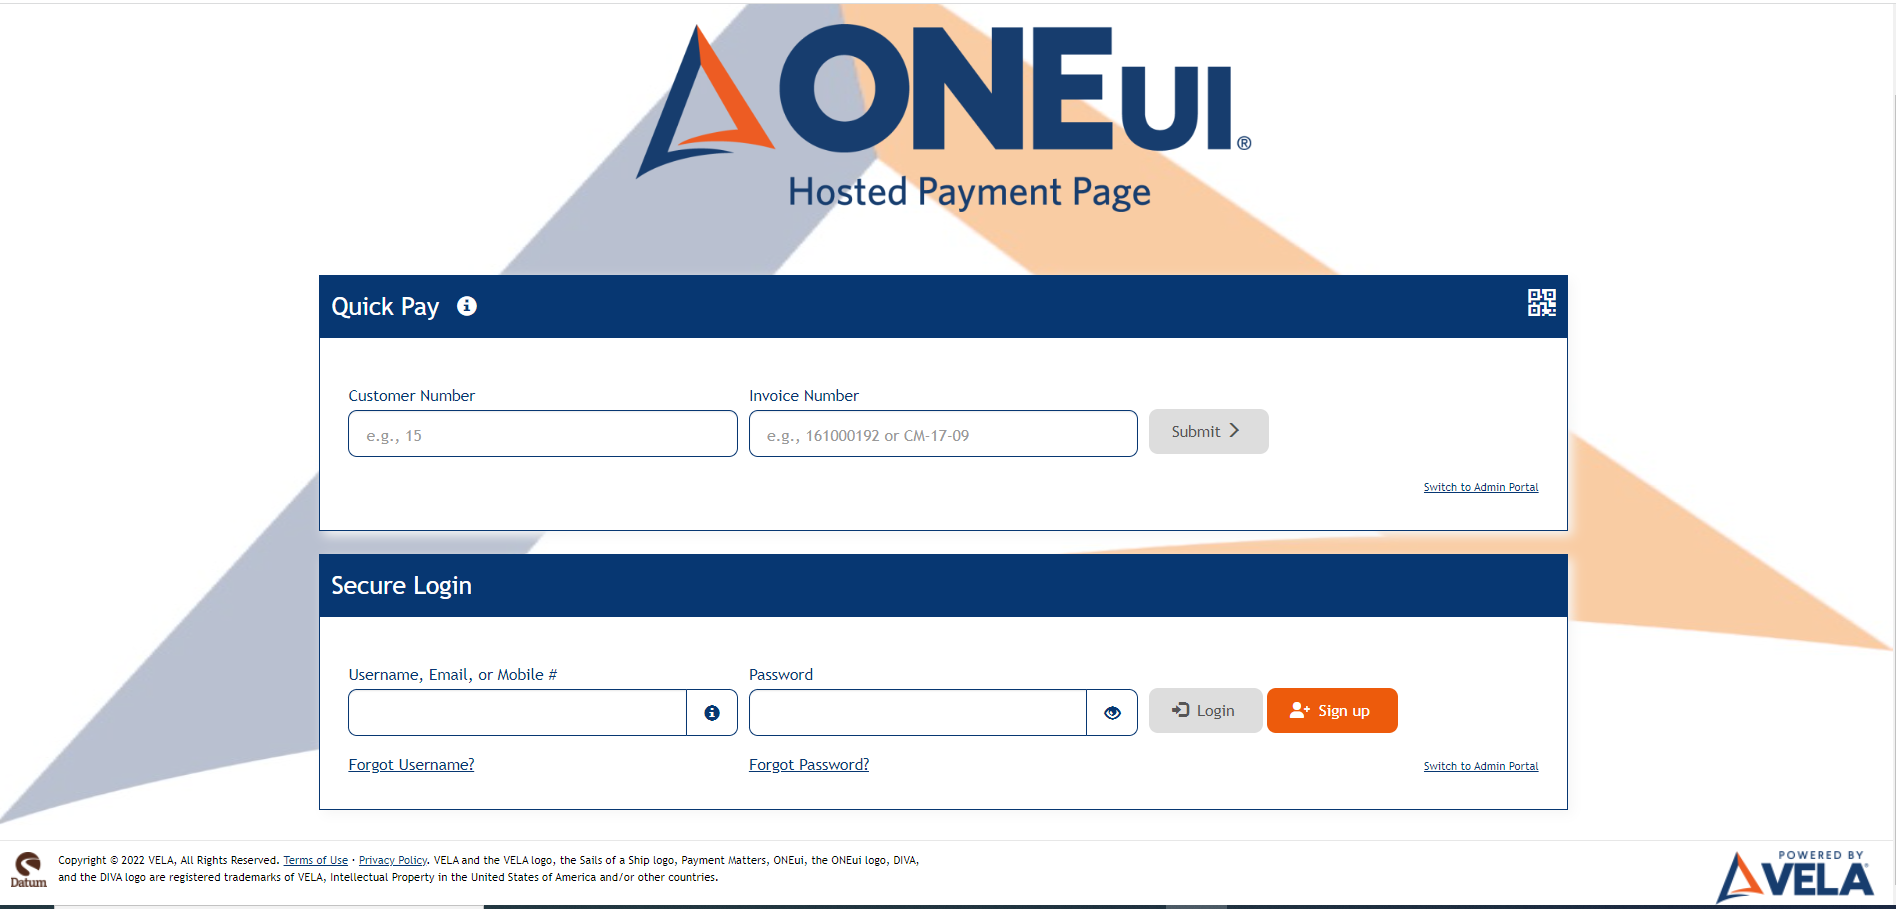
When the Invoices Module is turned ON along with the Sign Up Switch at the Merchant level, then the users can self Enroll and the Sign Up button will be shown on the Login screen.
The Login page would be as follows in that scenario:
The users are allowed to make a payment without logging in also, provided the "Allow Payments without Logging In" switch is turned ON at the Merchant level settings. The login page for those users under that Merchant displays as follows:
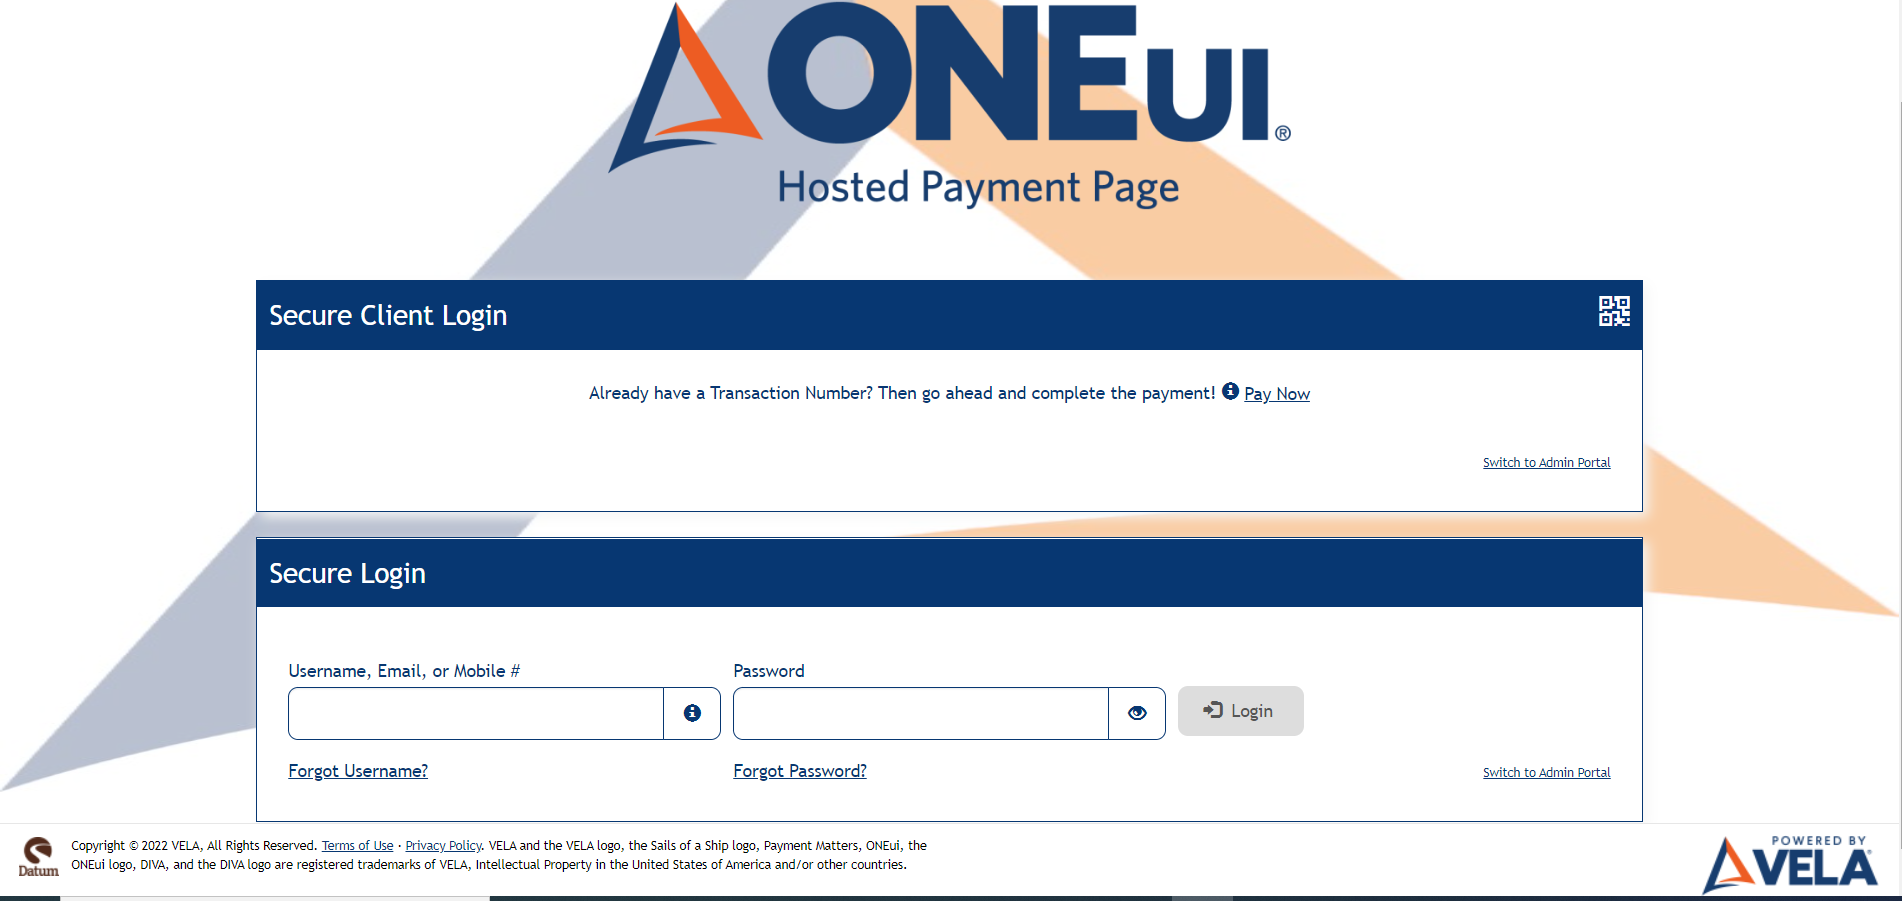
By clicking on the "Pay Now" link the user is navigated to the Make A Payment page where he/she can make a Payment.
First-time Login
Upon successful login, users that have not registered are directed to the first-time user registration screen, where they are forced to change their passwords, confirm their email address, and accept the applications terms of use and privacy policy.
The first-time user registration screen contains the following elements:
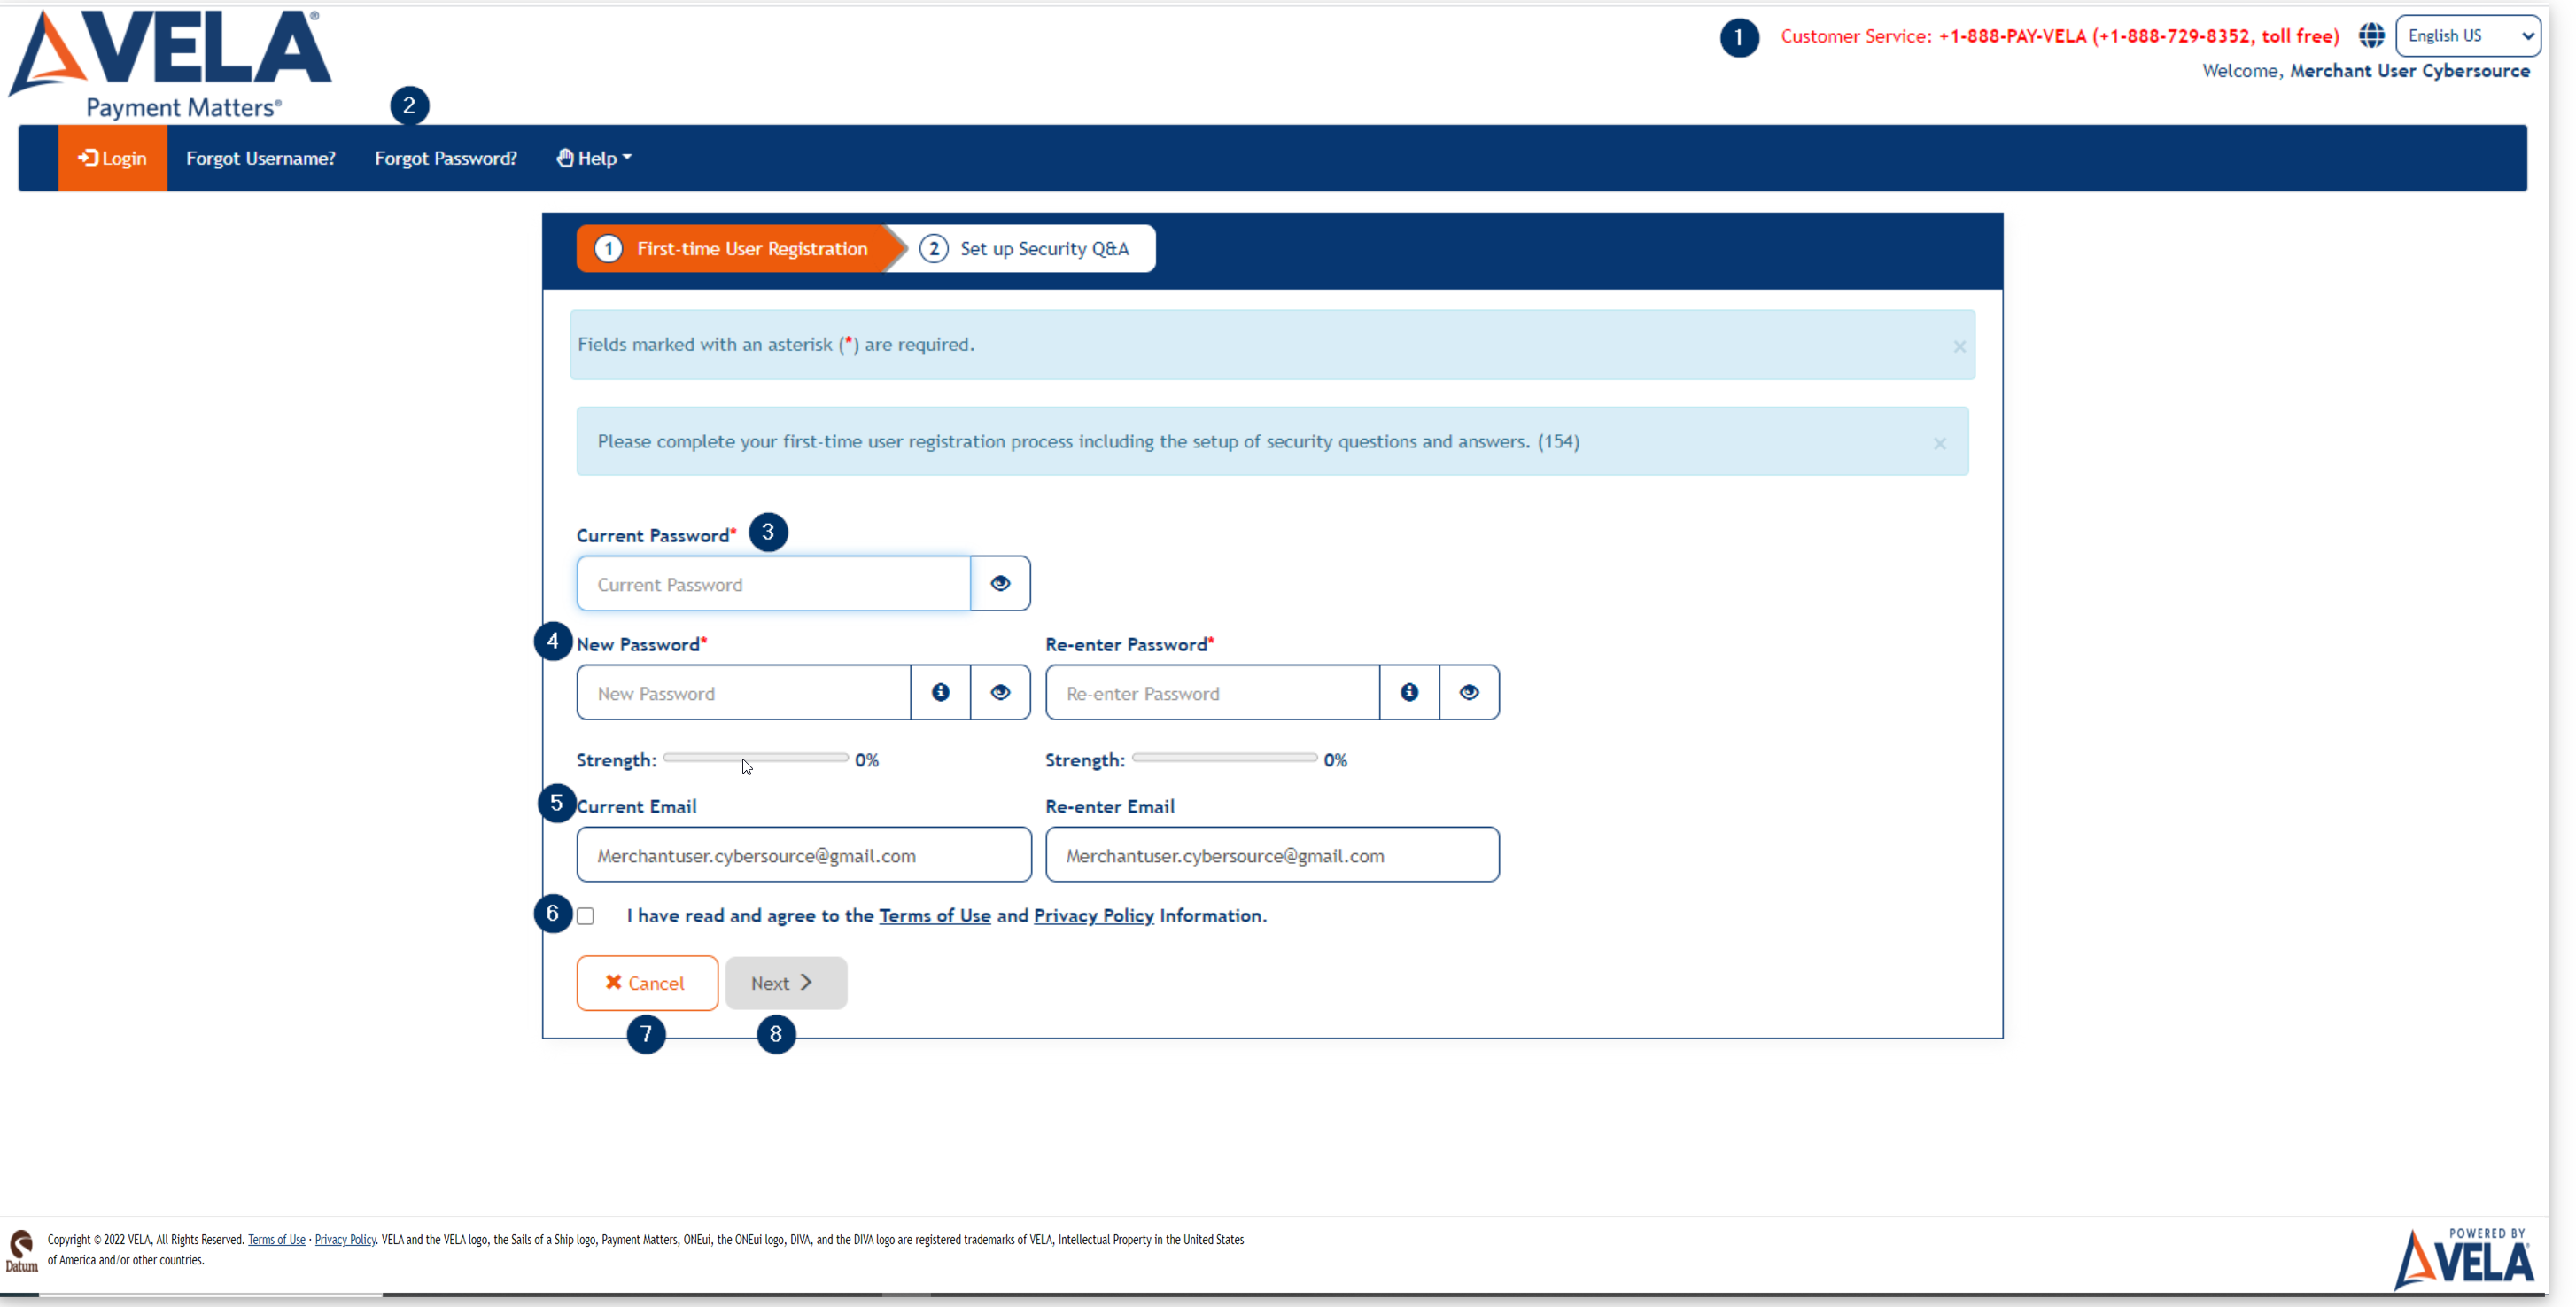
- Header with Customer service information and First and Last Name of the user
- Navbar with links to go to a specific page
- Current Password field
- New Password and Re-enter Password fields, as well as password strength meters
- Current Email and Re-enter Email fields
- A checkbox for the user to accept the terms of use and privacy policy
- Cancel button
- Next button, which is disabled by default
Note
Password must be at least 12 characters in length including 1 uppercase letter(s), 1 lowercase letter(s), 1 number(s), and 1 special character(s).
Clicking the Cancel button will take the user back to the login screen. He or she will be taken back to the first-time user registration screen after the next successful login. After filling out all required fields, and clicking the Next button, the user is taken to the security questions screen.
The security question screen contains the following elements:
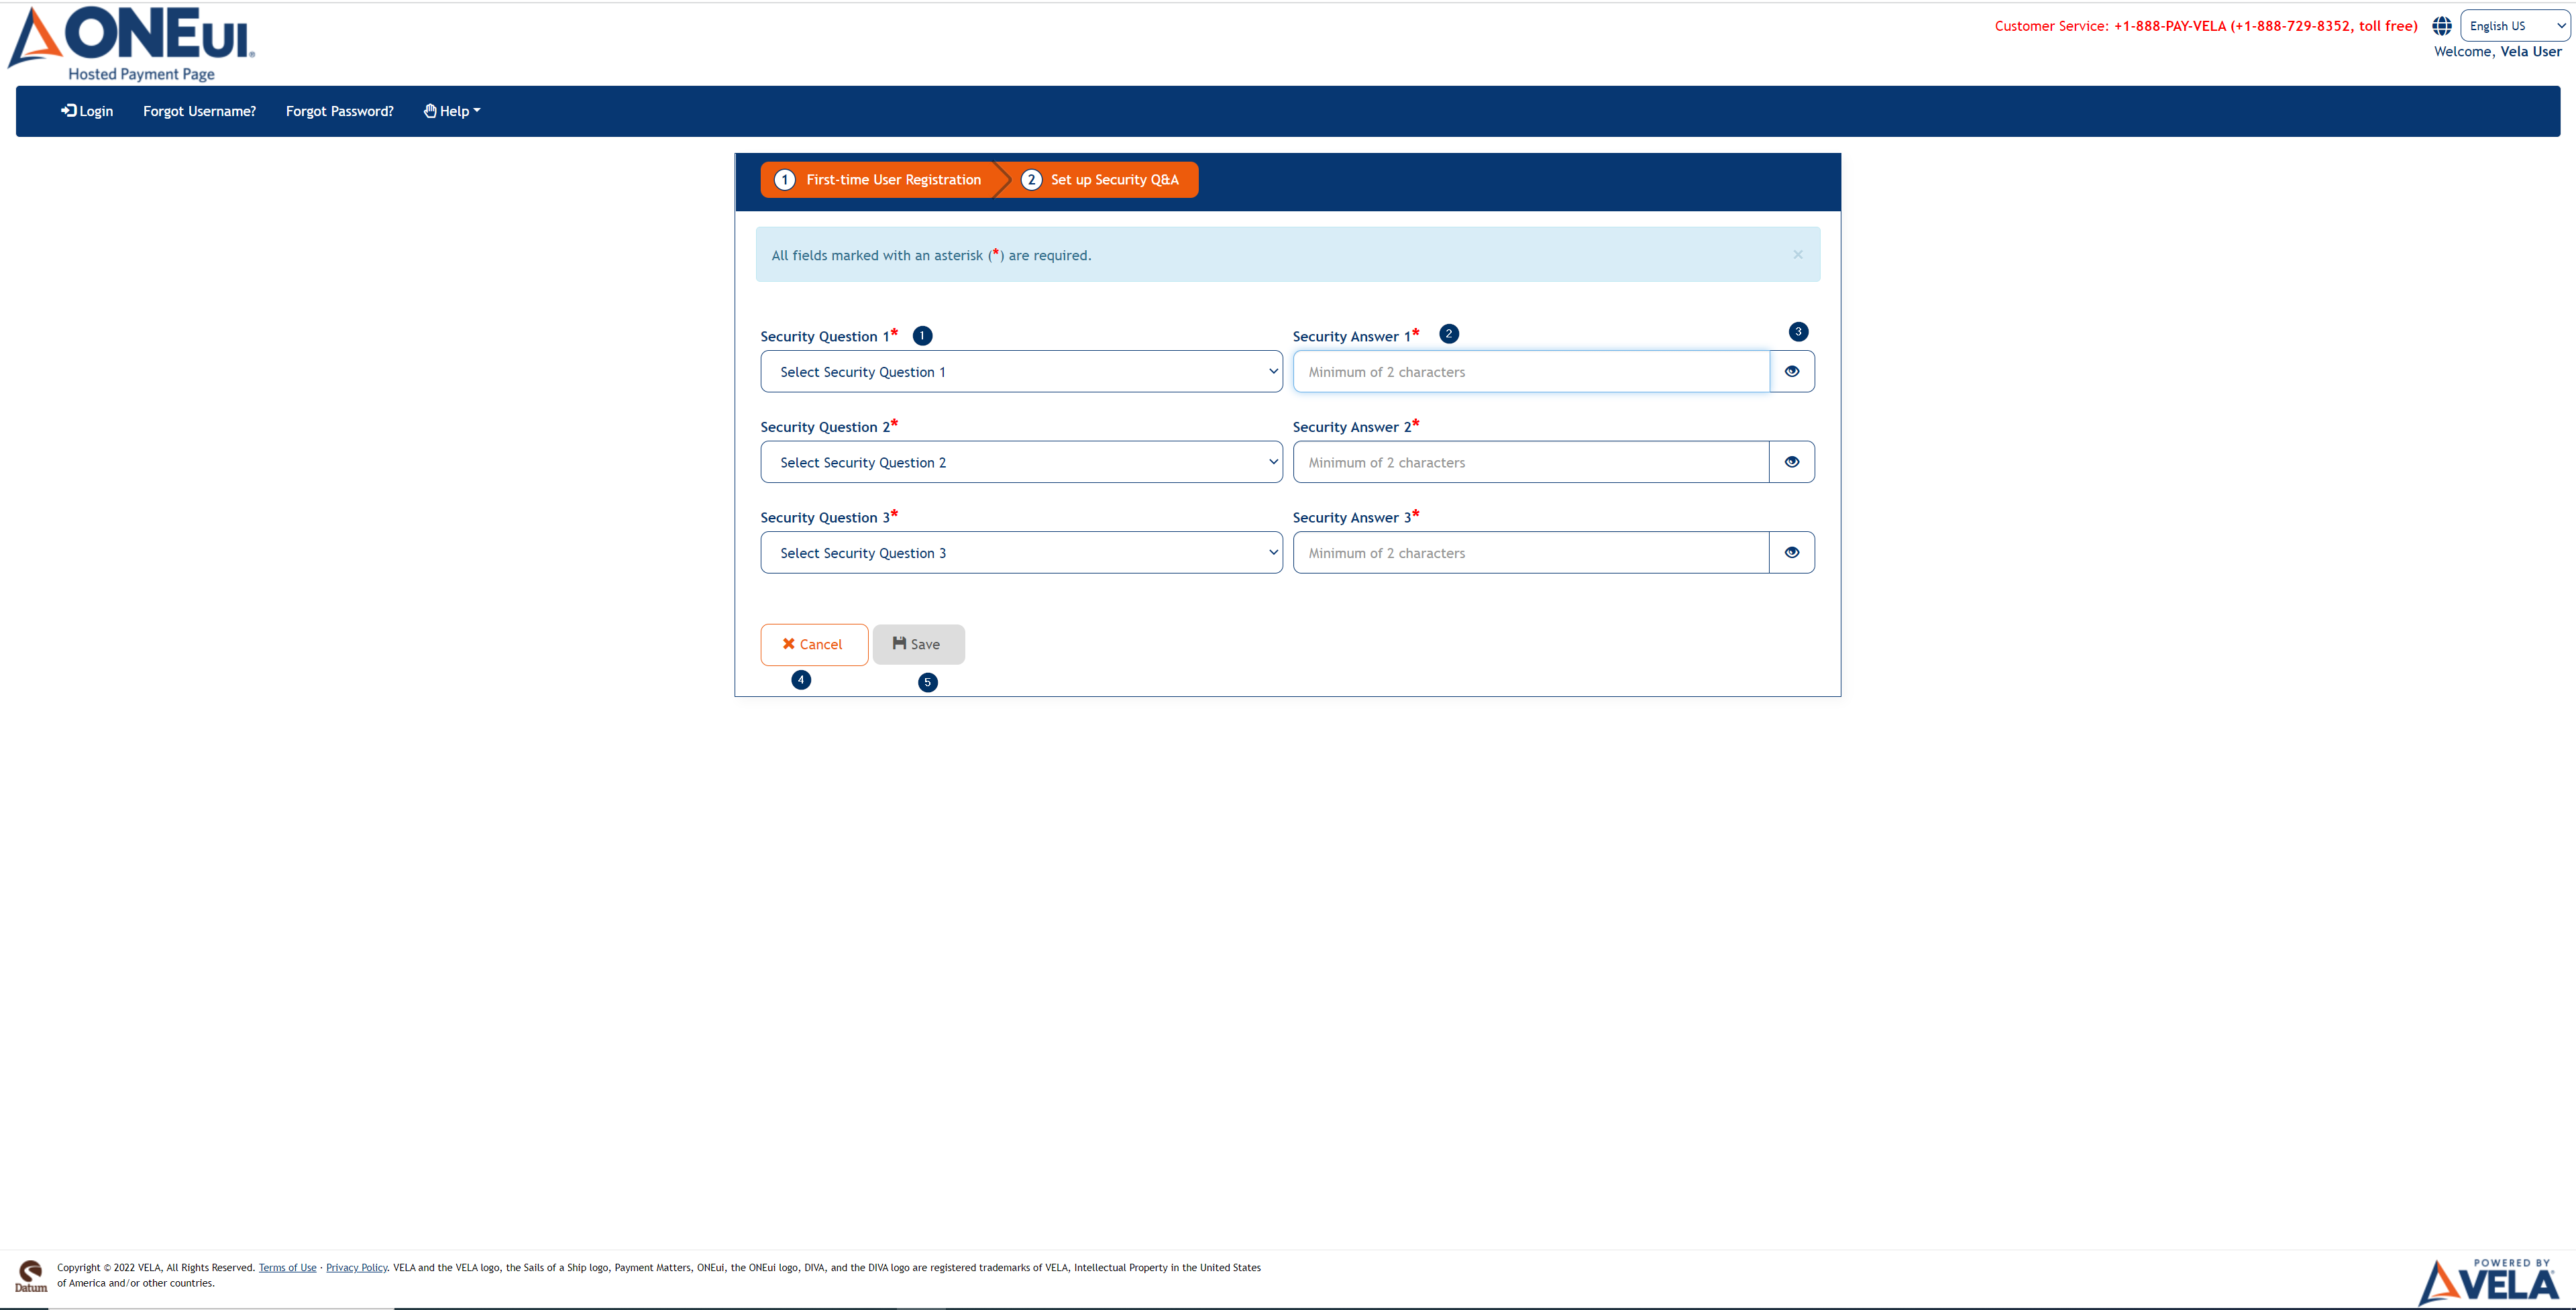
- Security Question 1/2/3 dropdowns
- Security Answer 1/2/3 fields
- A button to un-mask the contents of the security answer fields
- Cancel button
- Save button, which is disabled by default
Clicking the Cancel button will cancel the first-time registration process and take the user back to the login screen. The user will be forced to set up security questions and answers after the next successful login.
Note
In regards to Security, protect User's Identity and avoid account compromise, the Users cannot set all Security Answers as the same including the case sensitivity of the text.
The user will be taken back to the login screen with a success message if the registration was successful.

Mobile View
The Mobile login screen looks as follows:
Updated As Of Version 5.5.1.1