Quick Pay
When Invoices Module enabled
The Login screen display with Quick Pay section when the Invoices Module is turned ON at the merchant level.
This section of the Login screen allows users to pay the invoices without logging into the application.
The screen looks as follows:

The quick Pay section of the Login screen contains the following elements:
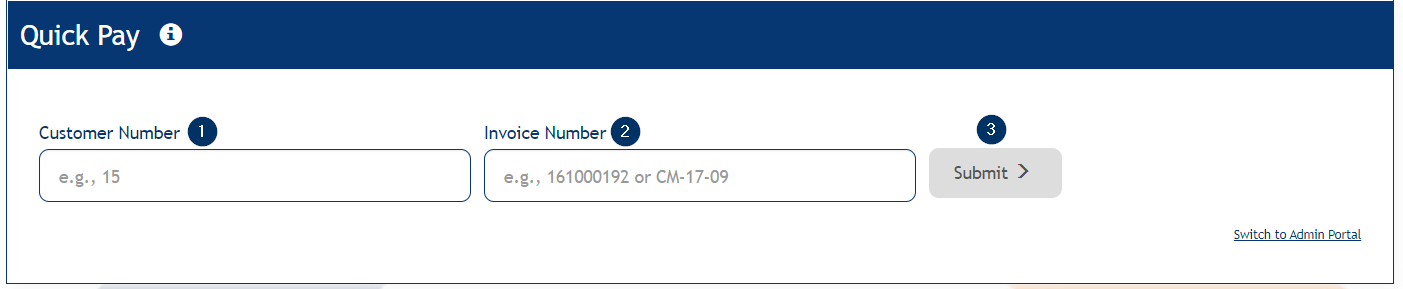
- Customer Number — Field to enter Customer Number
- Invoice Number — Field to enter the invoice number of the customer for which the payment is being made
- Submit — Button to submit the entered information
Clicking upon Submit button the user is taken to the Make A Payment screen.
The navbar contains the following elements:

- Transactions — Payment tab with Make A Payment link.
- Exit This Site — Link which takes to the user to the main login page of the application.
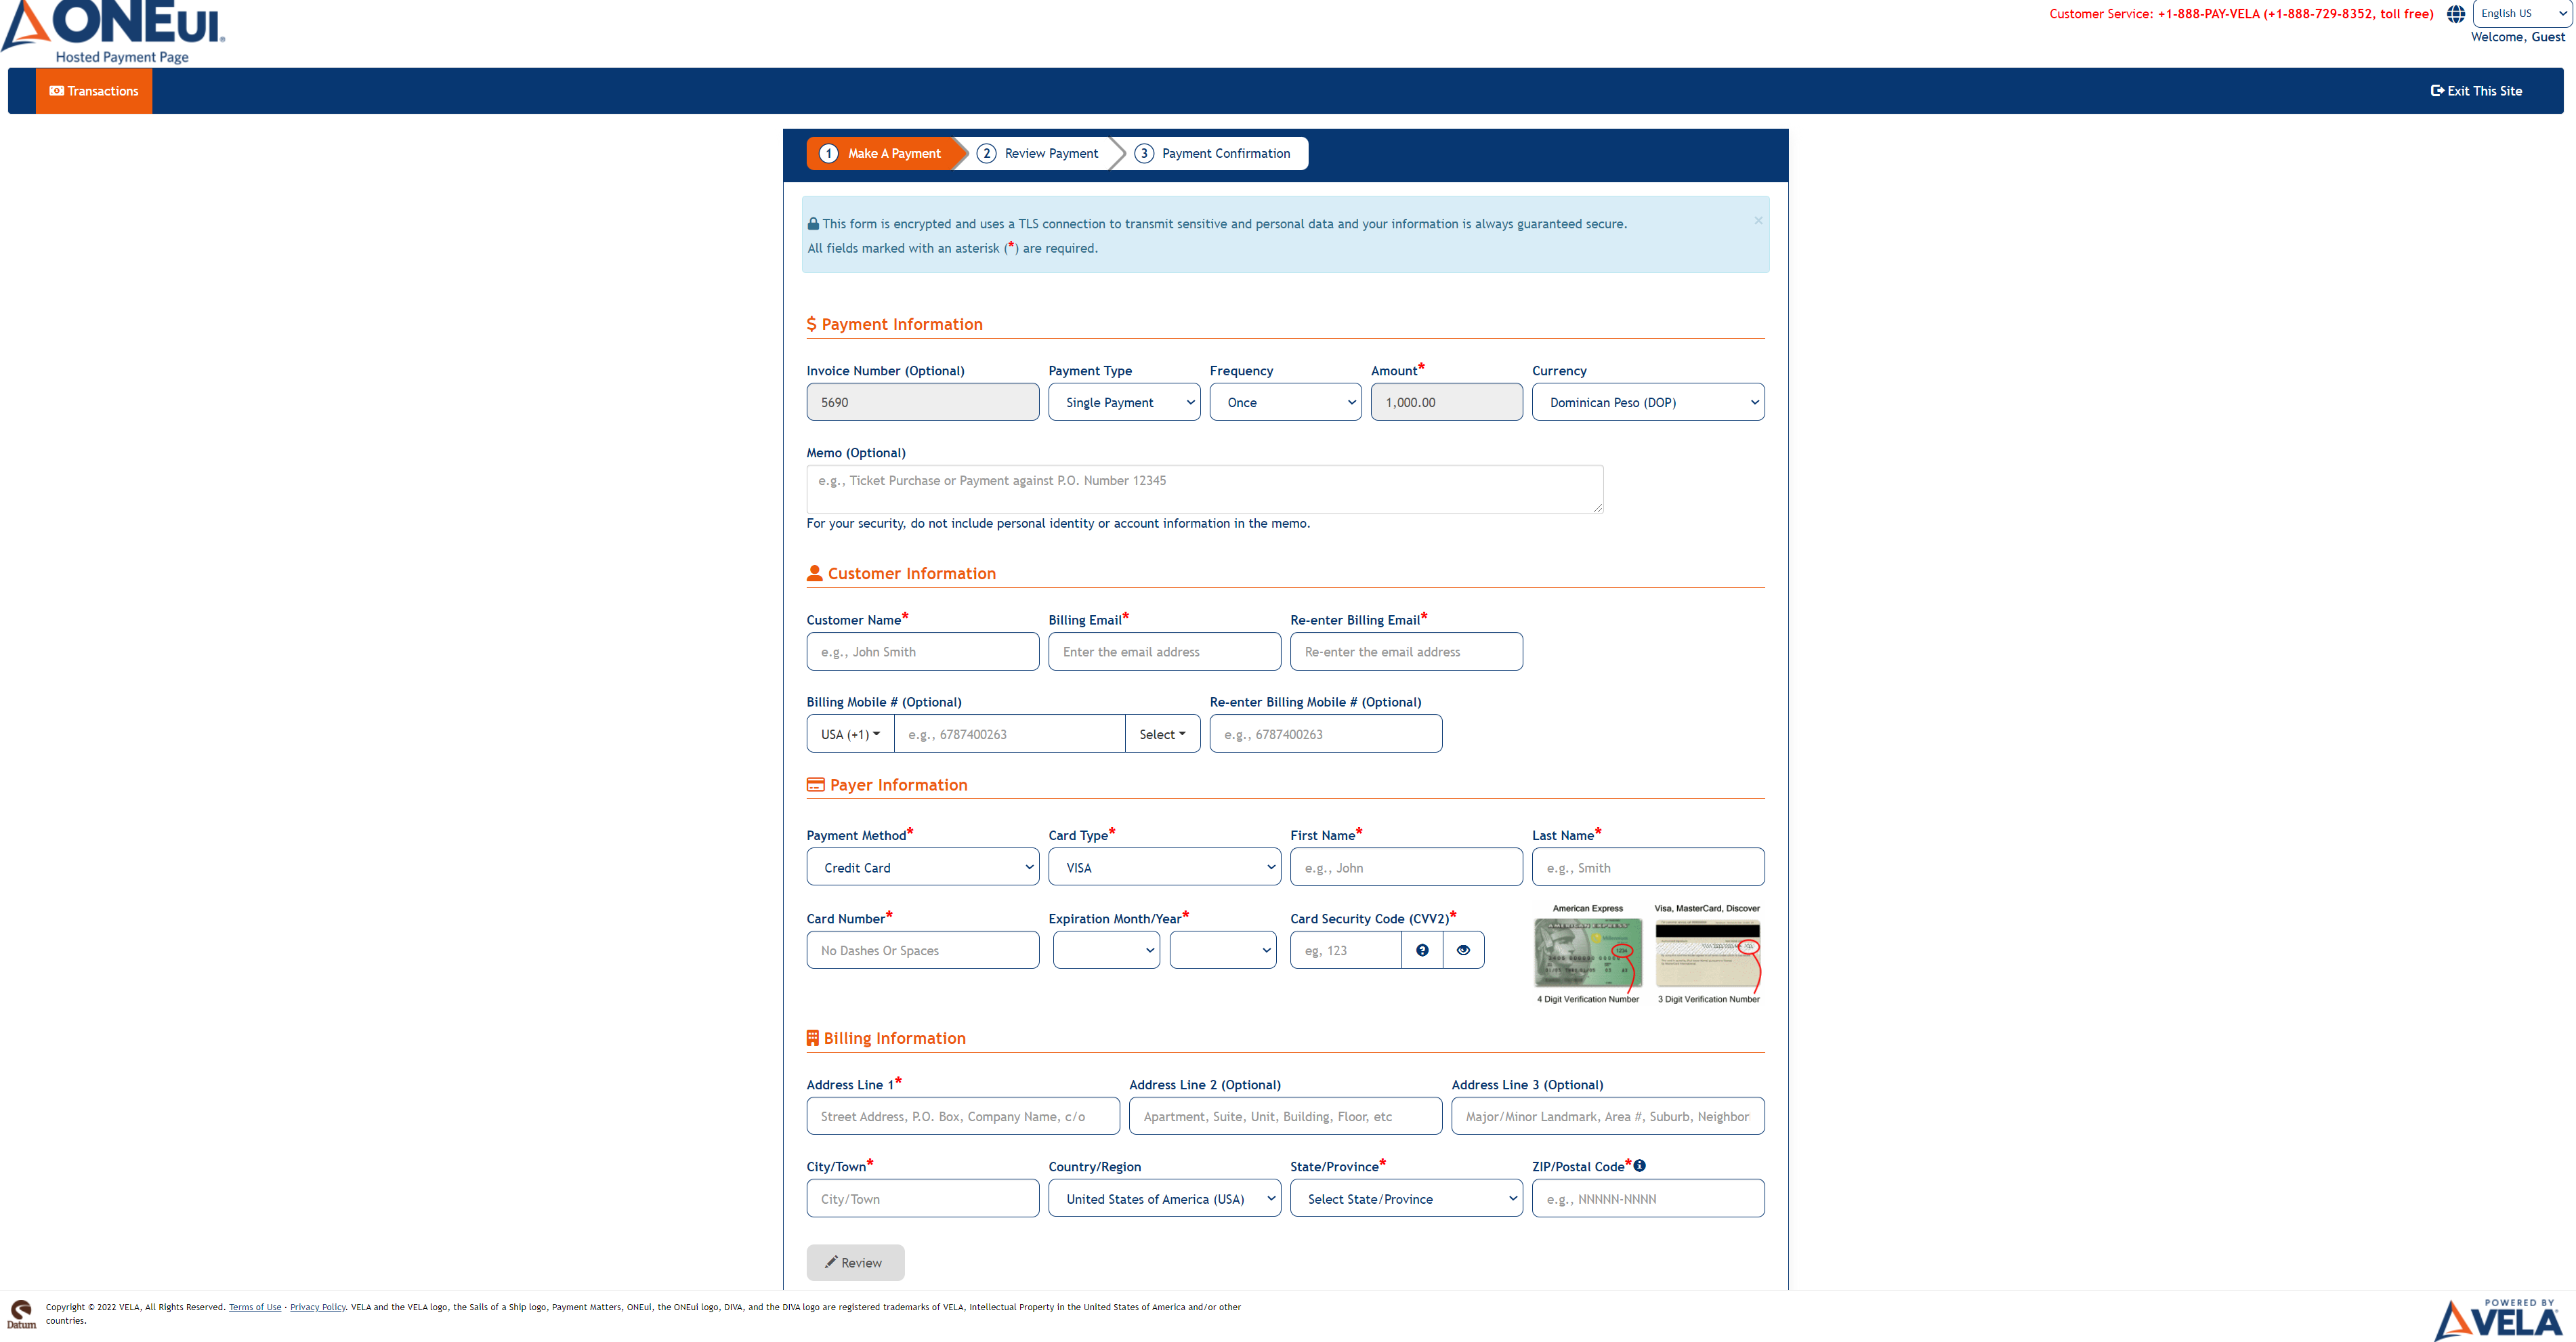
The Make A Payment screen displays with the Invoice Number and Amount fields being auto-filled and disabled.
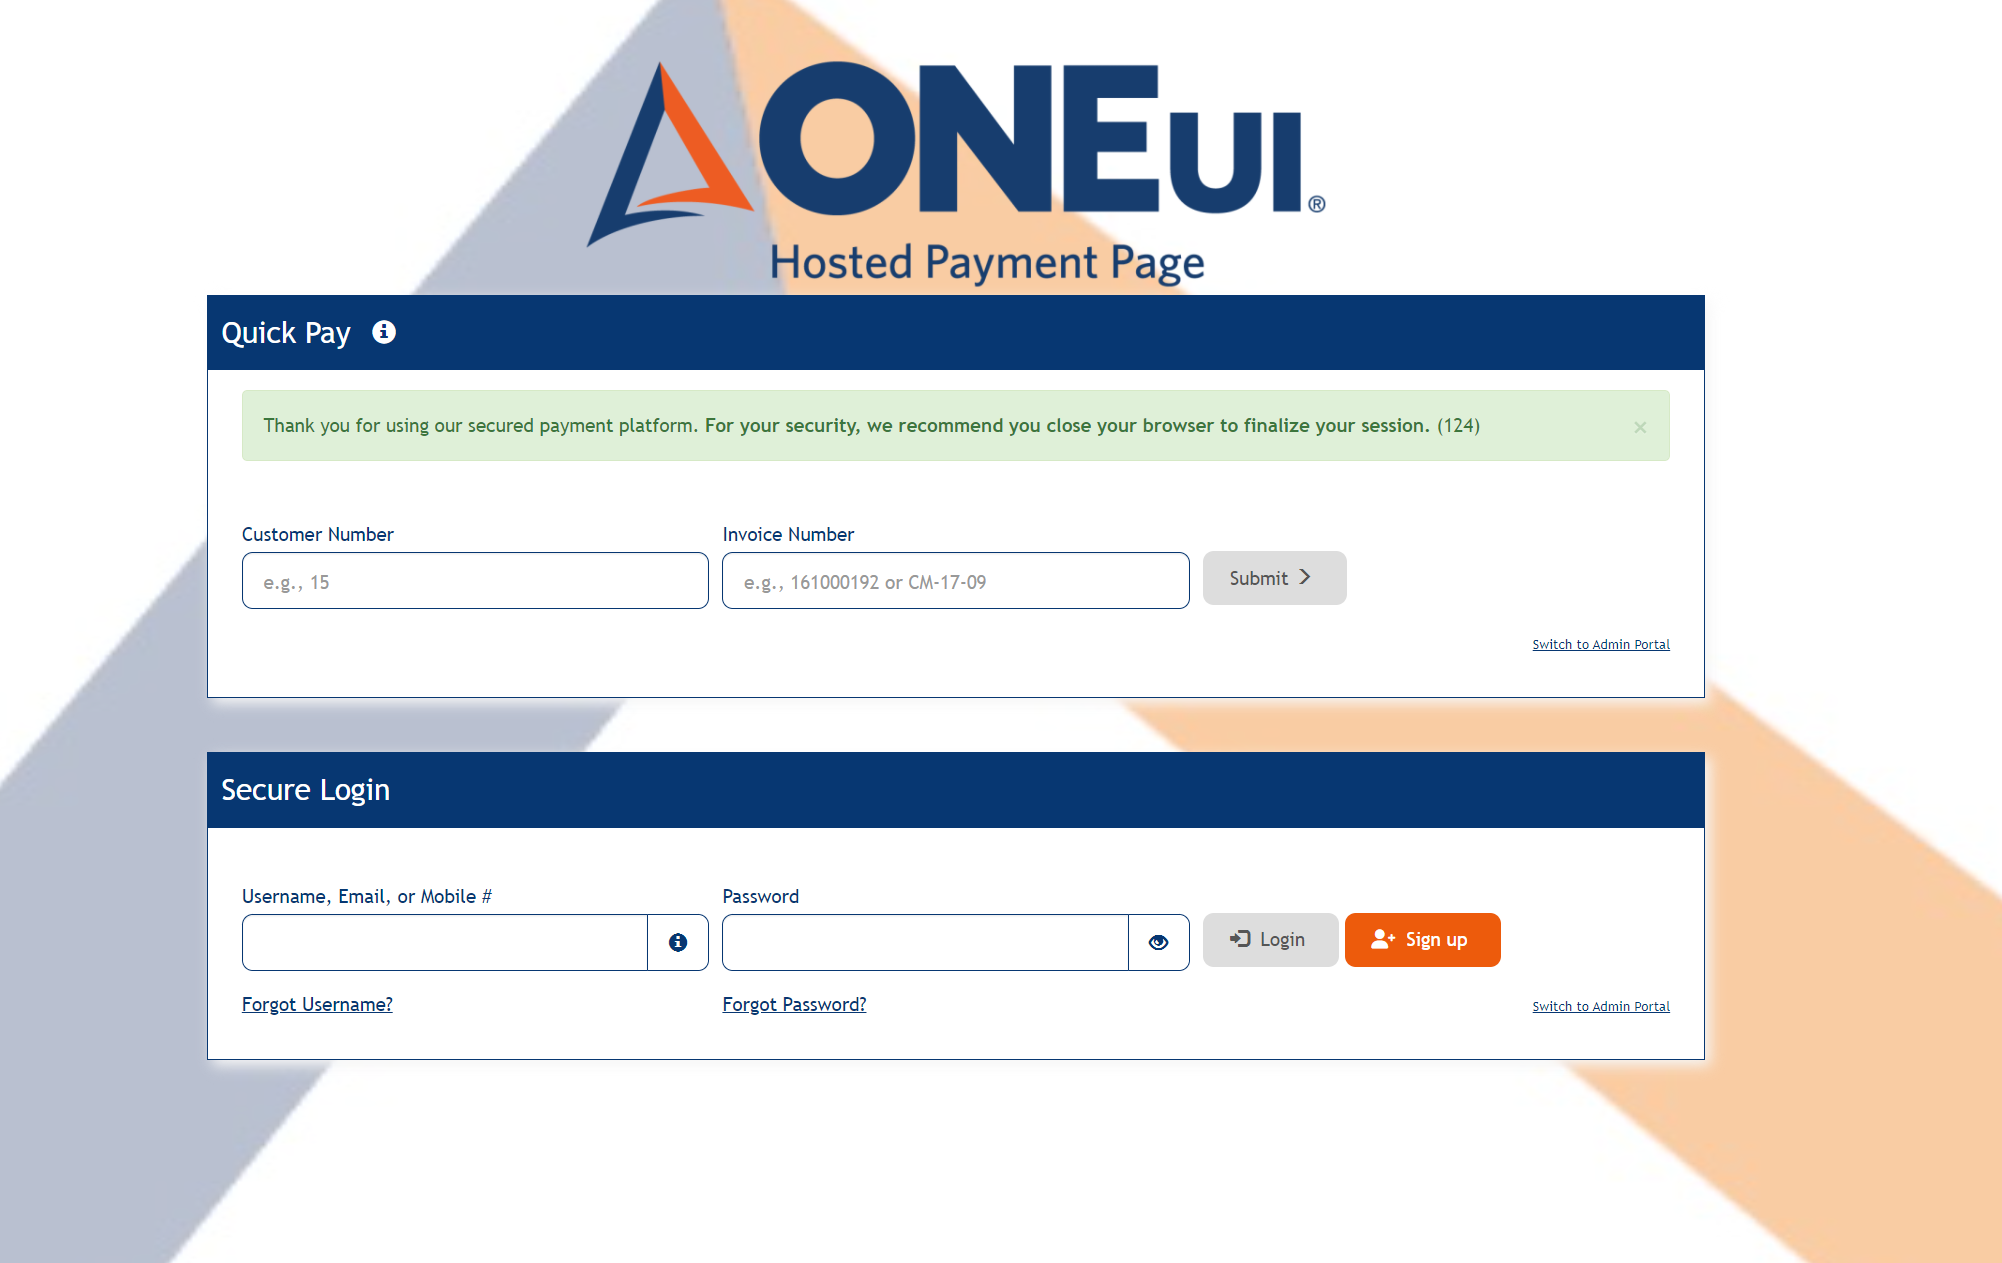
Clicking upon Exit This Site link in the navbar, the user is taken to the login screen of the application.
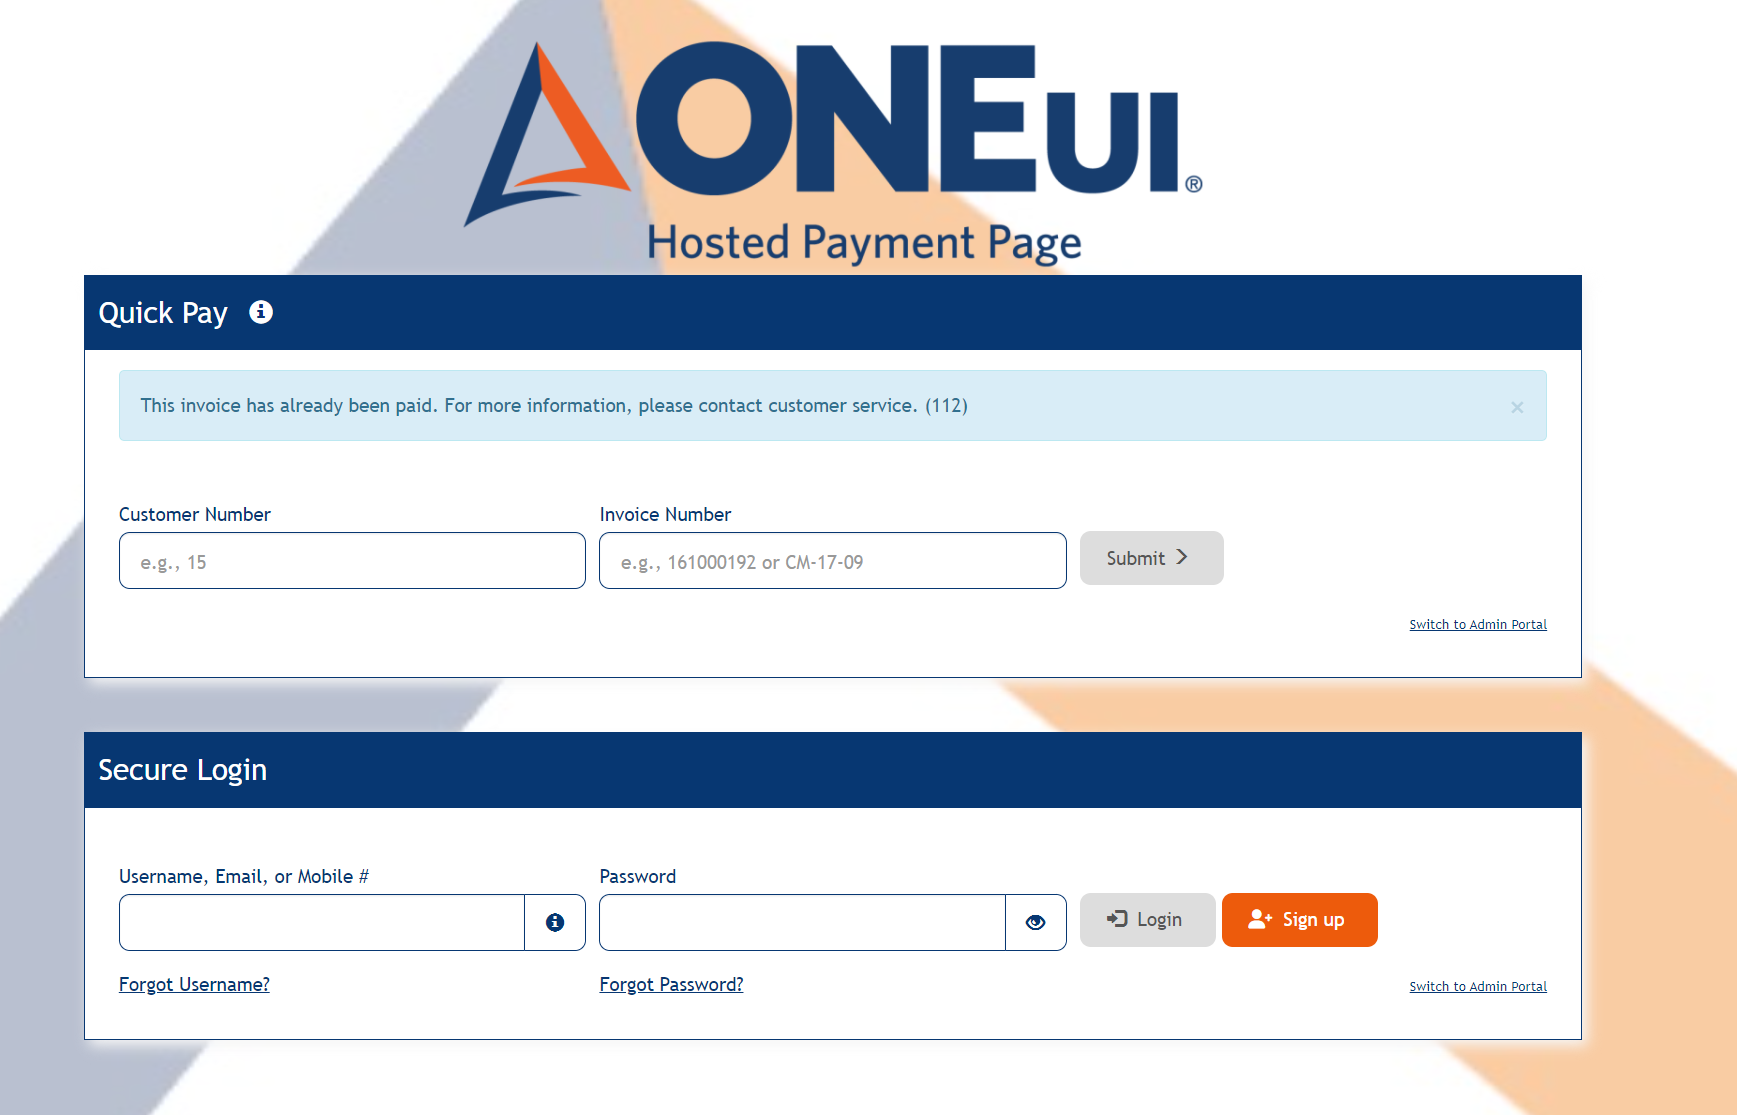
If the user has already paid the invoice then, after entering the required fields in the Quick Pay section, clicking upon Submit button will display with the following message:
Convenience Fees
If the Convenience Fees is enabled at the Merchant level, then the Make A Payment page displays as below:
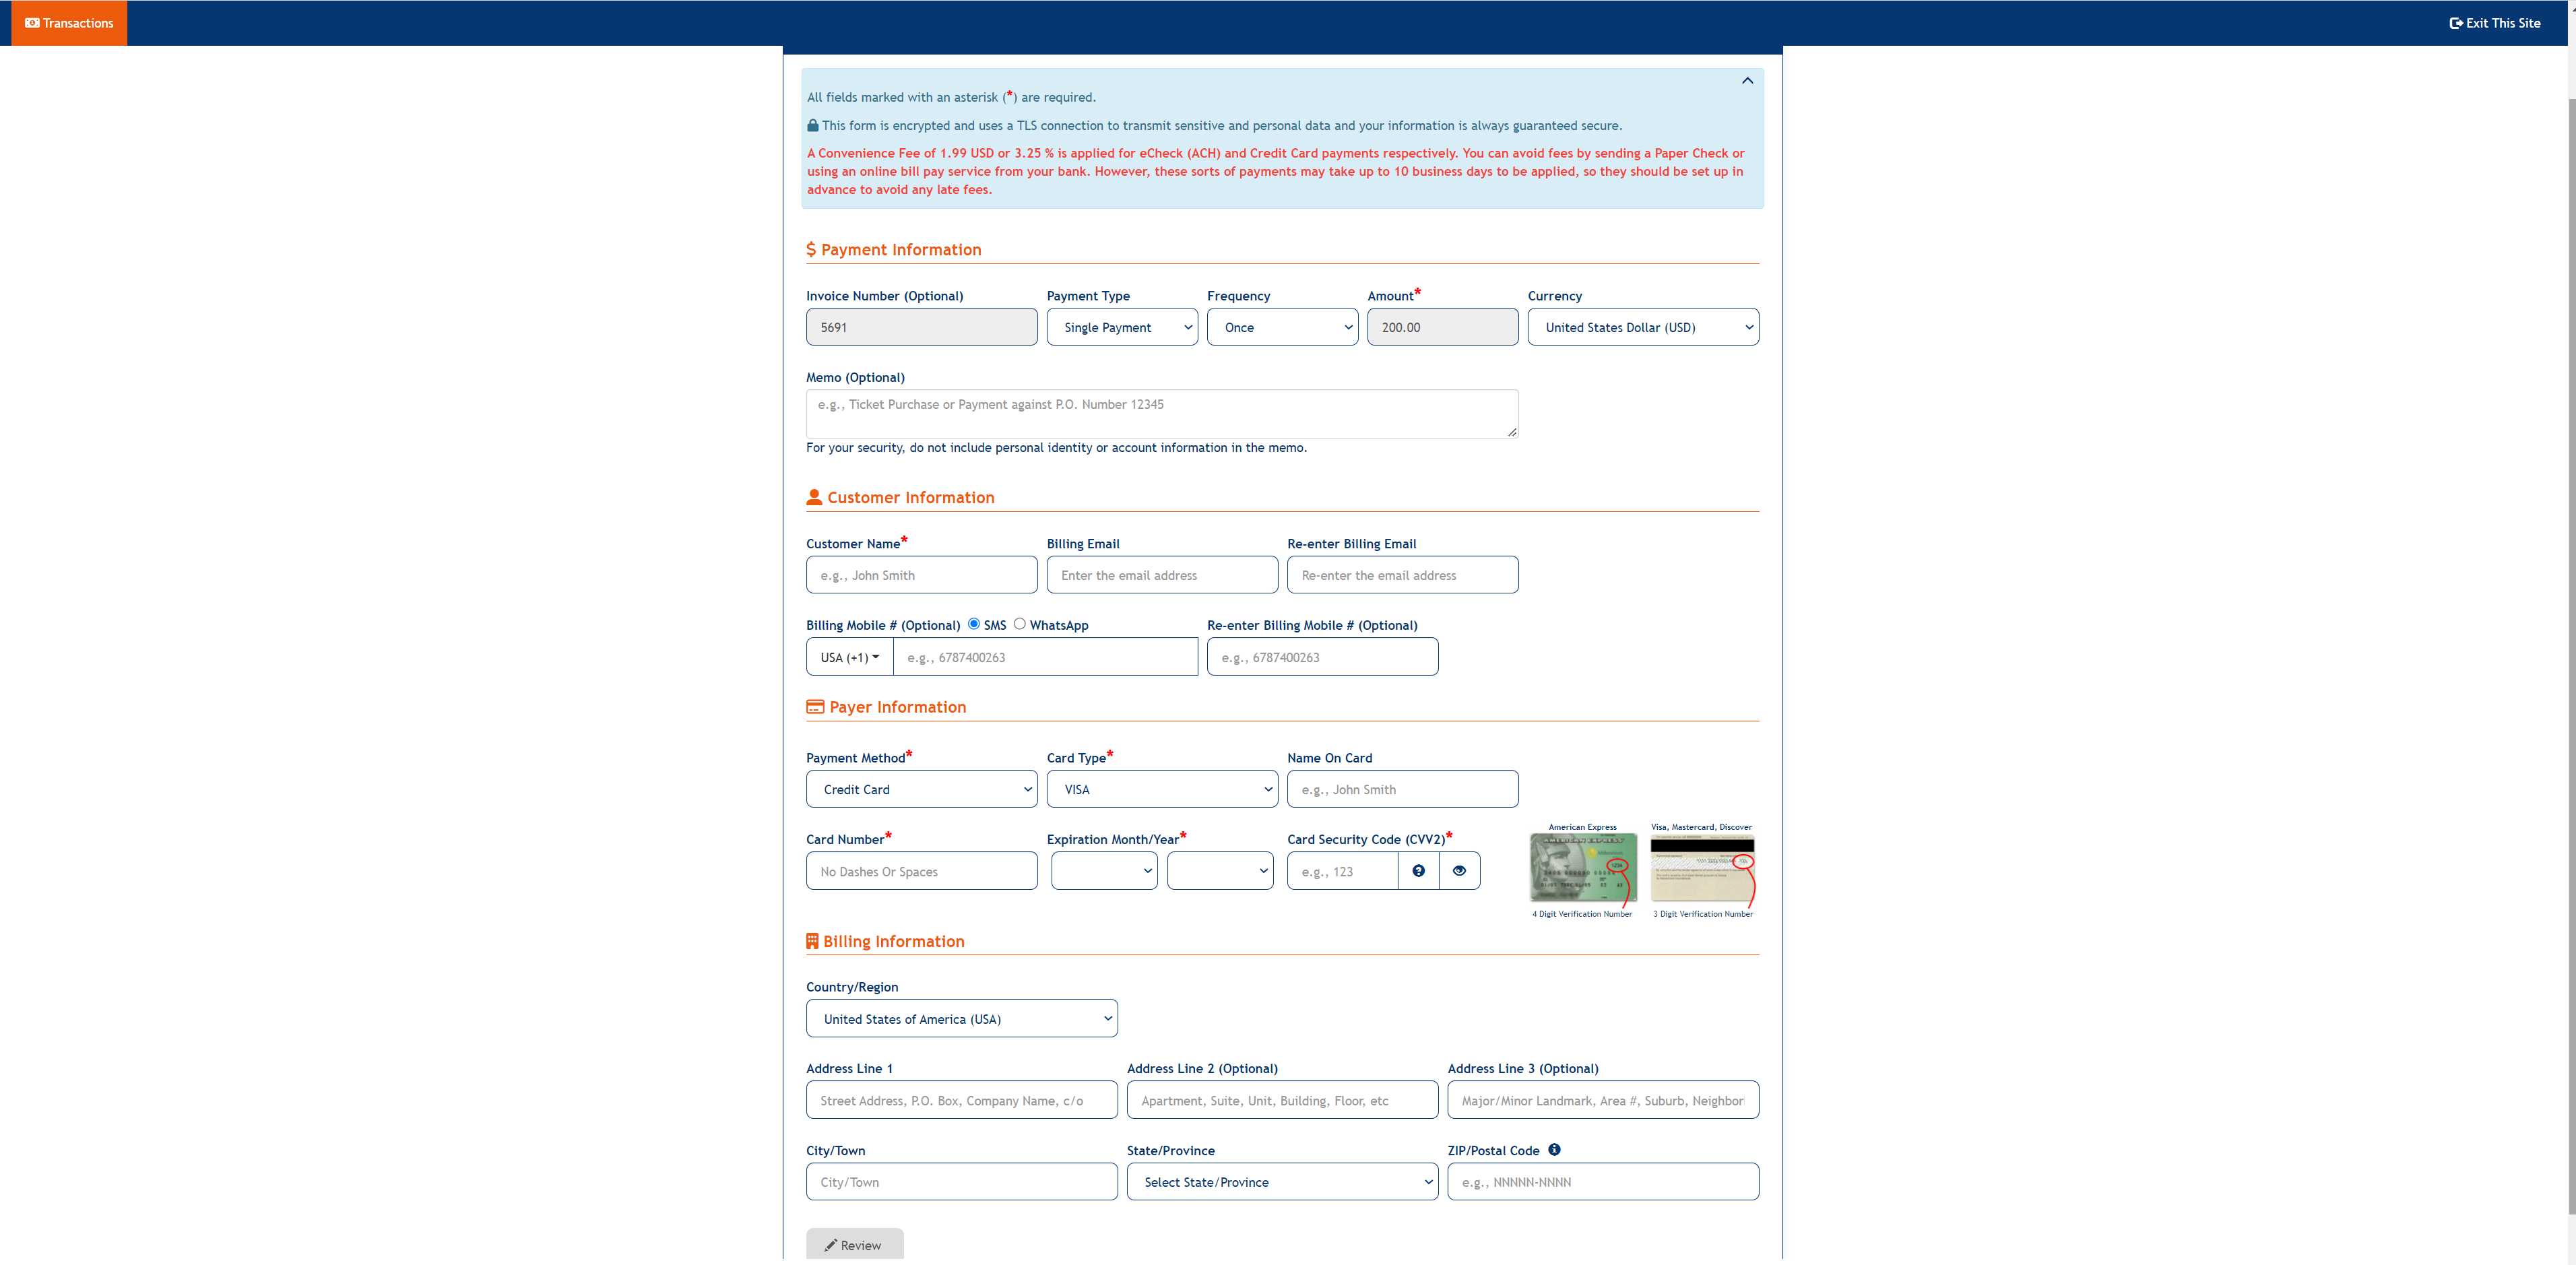
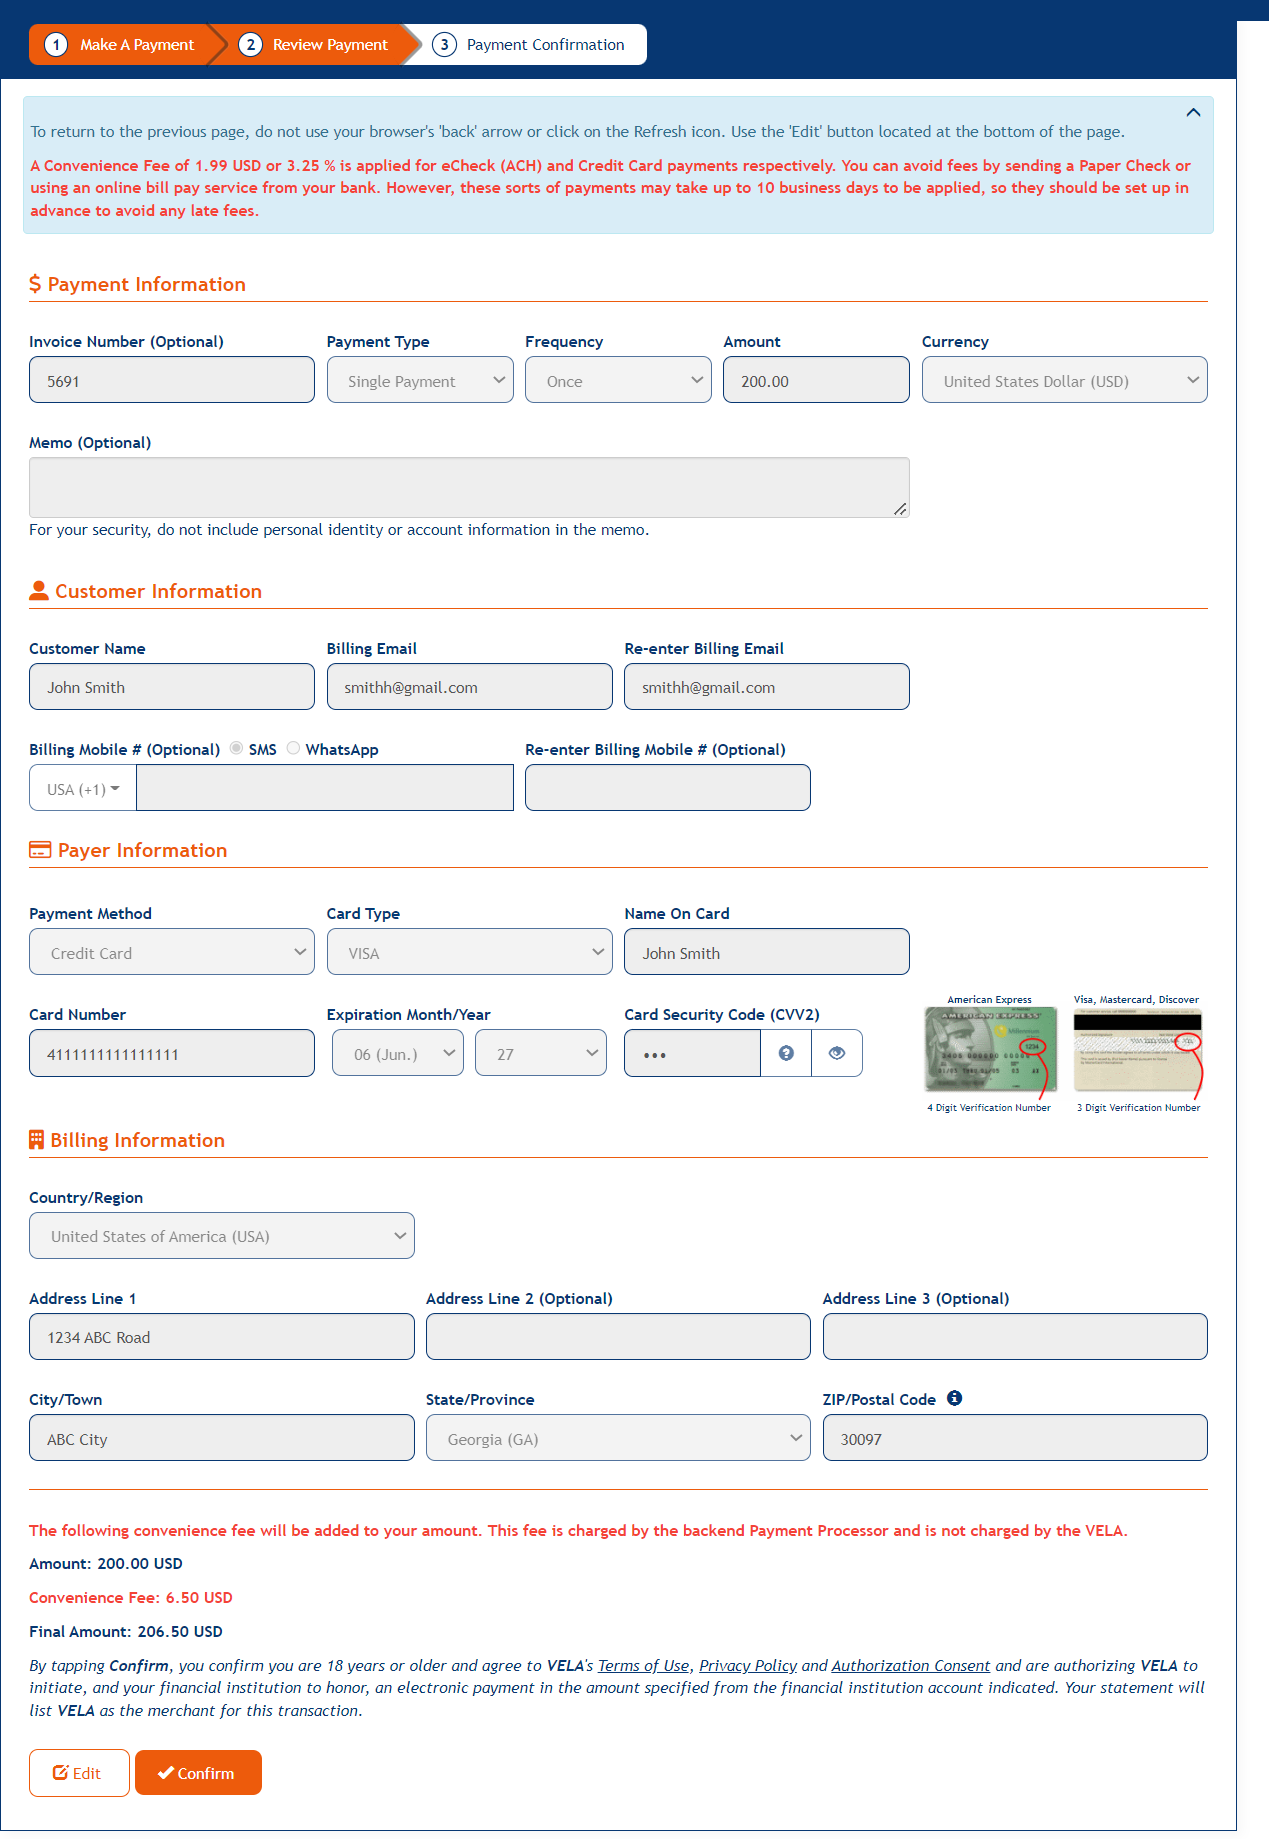
The Convenience Fees will be computed depending upon the Payment Method and the Review Payment page displays with the respective details as below:
Pay Without Logging In
When Booking Information is enabled
Users can make the Payments without logging into the application also. This feature is available only if the "Allow Payments Without Logging In" switch at the Merchant level is turned ON and the Invoices Module is turned OFF.
The login page for the users displays as follows:
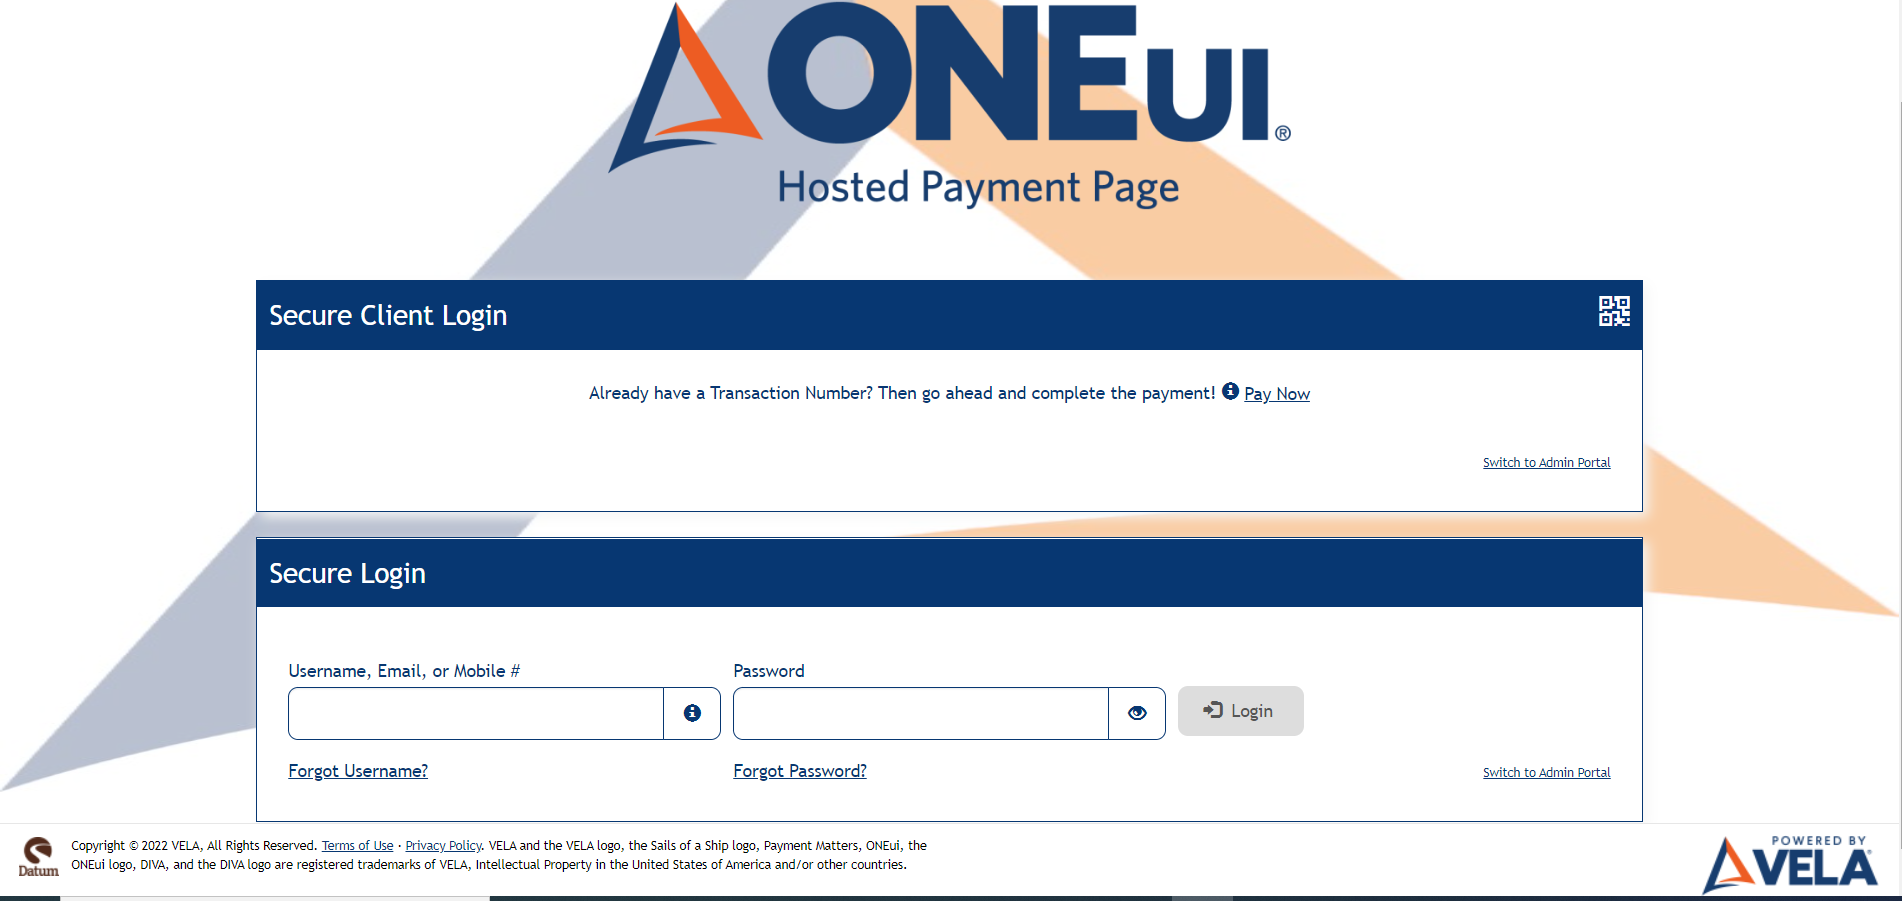
When clicked on "Pay Now" link the user is navigated to the Make A Payment page.
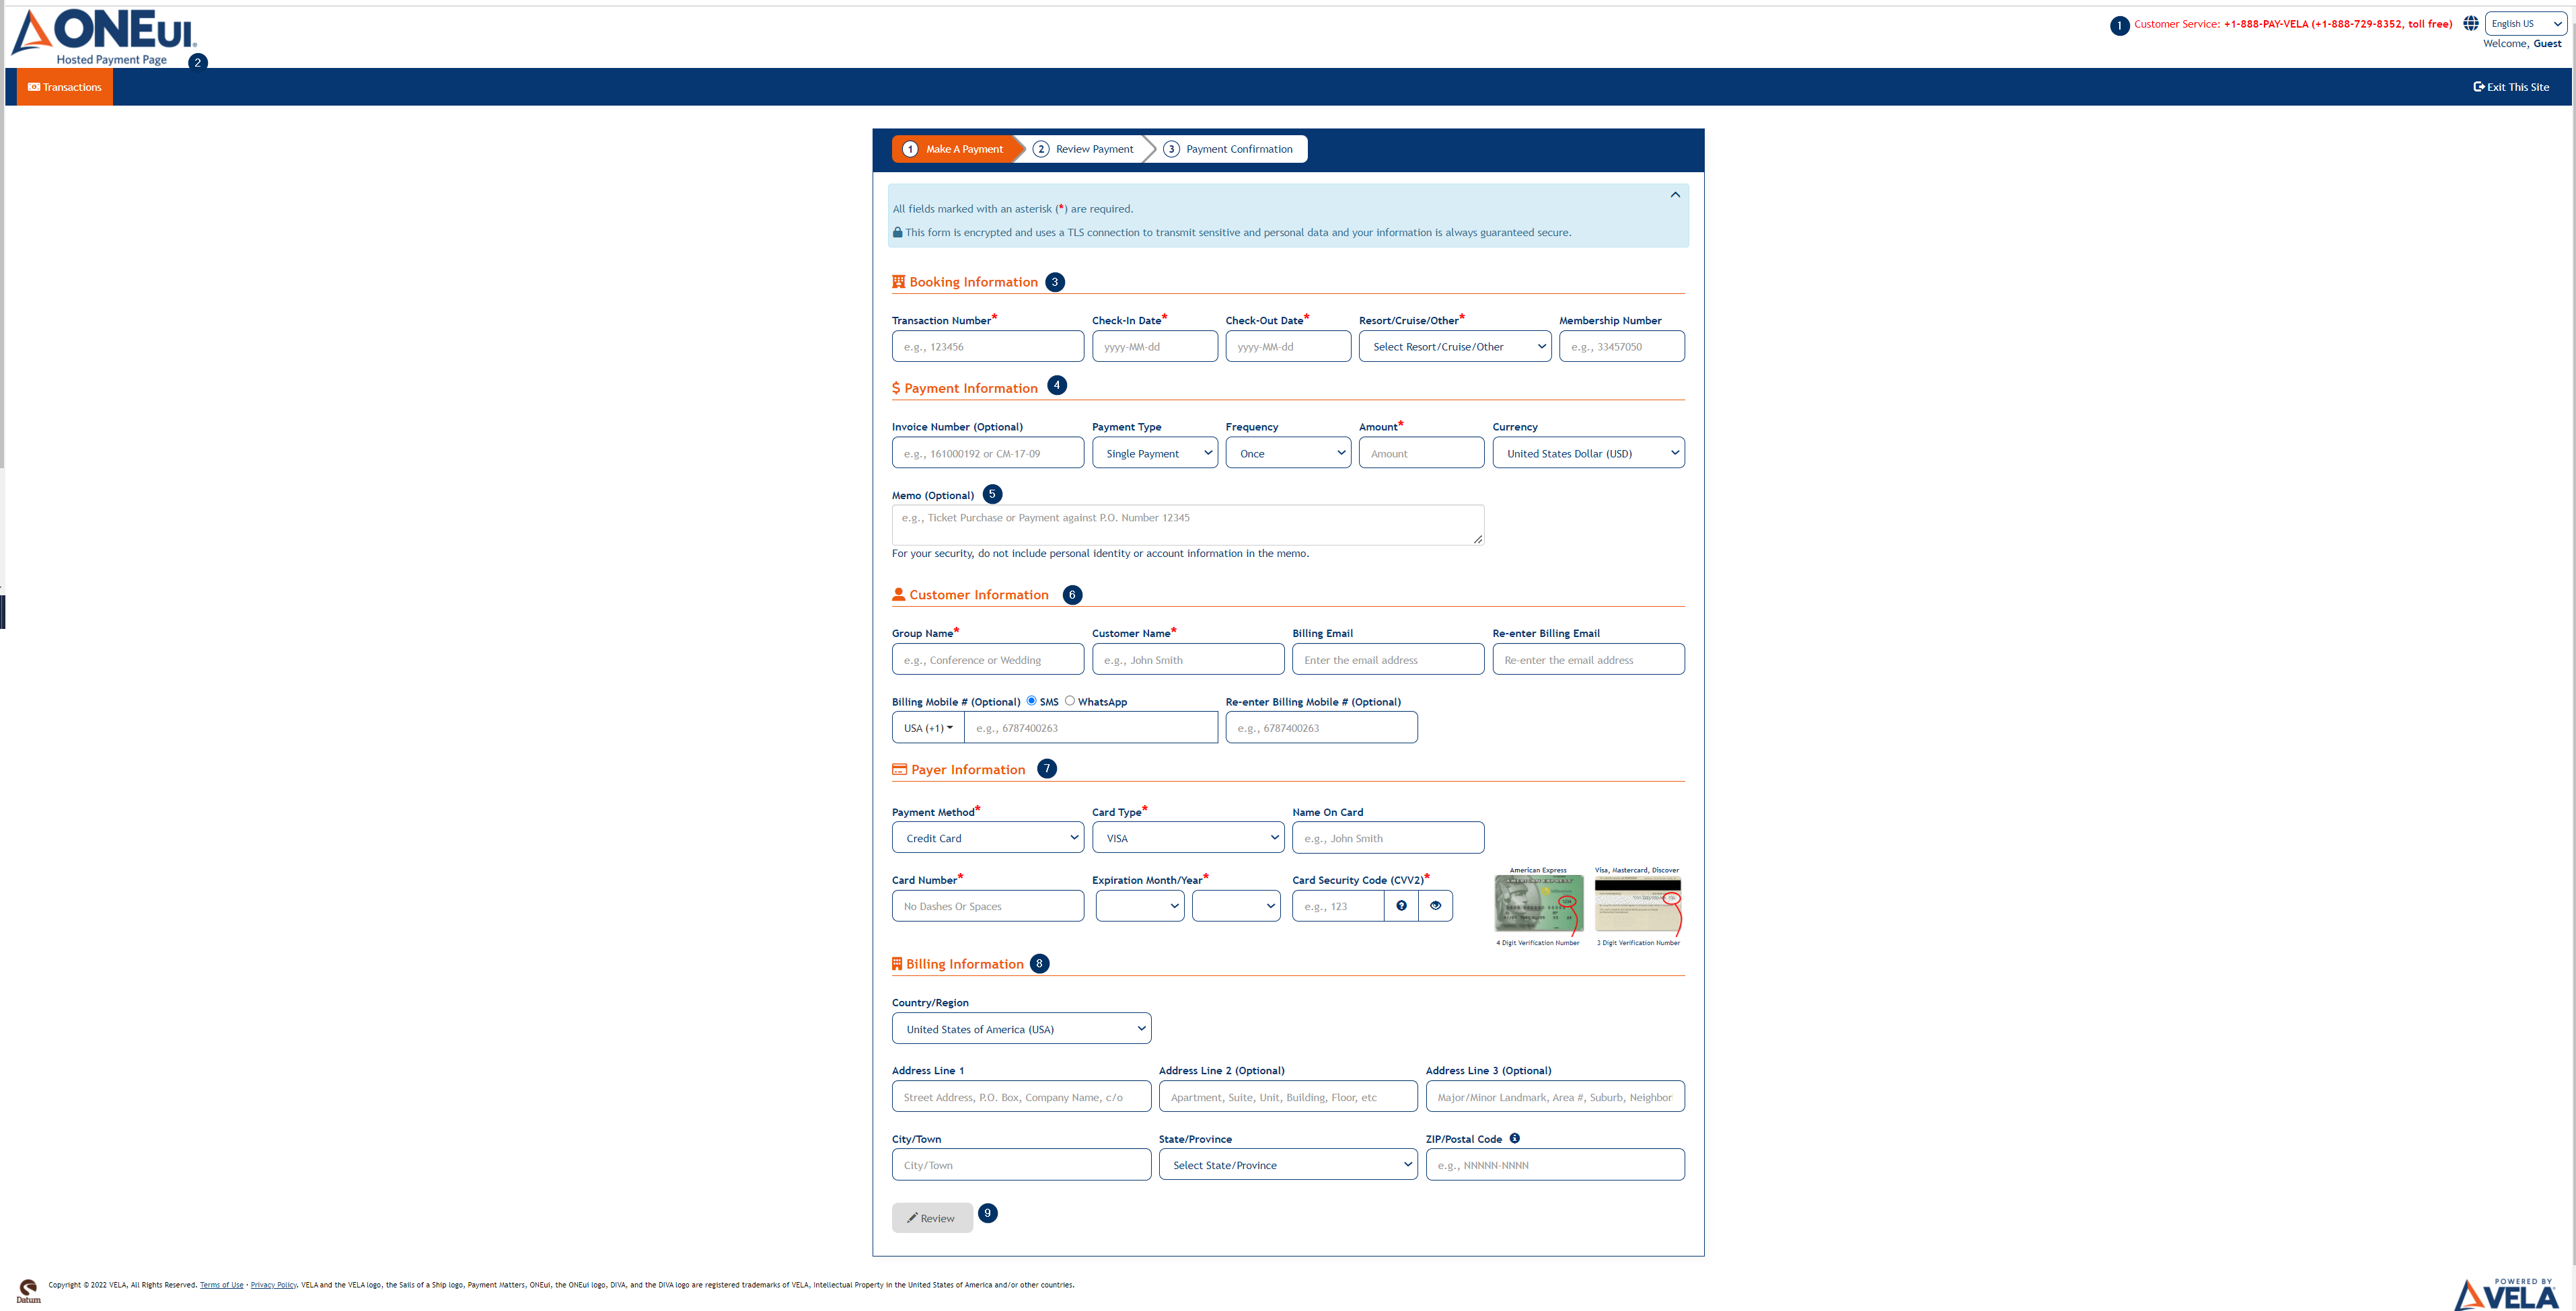
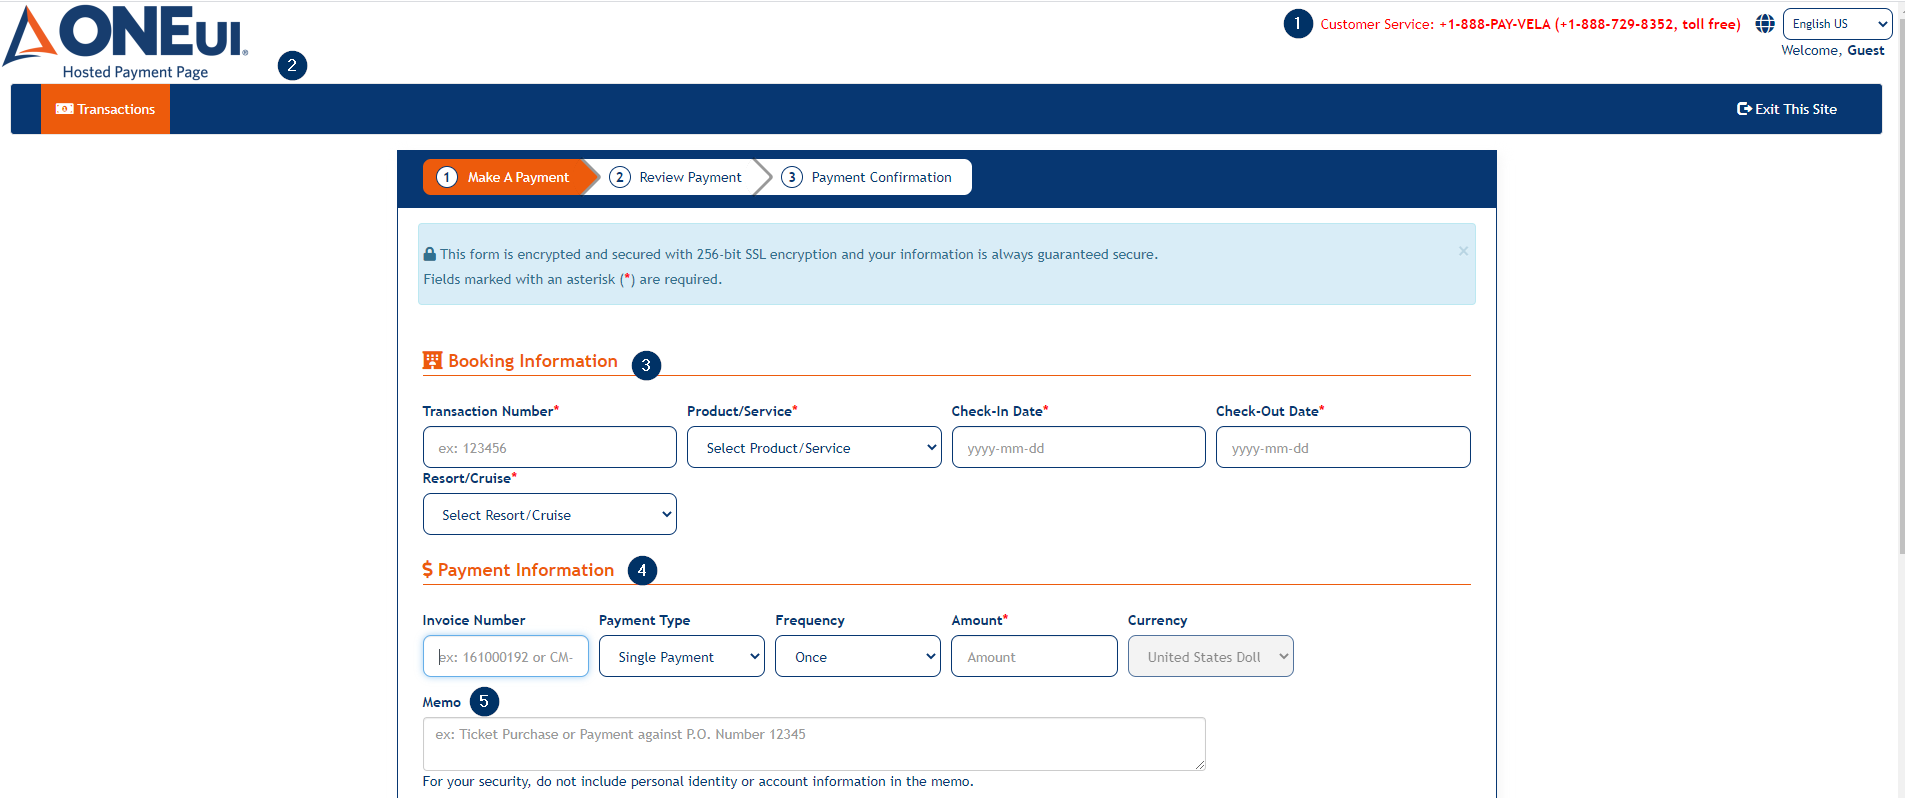
The page contains the following elements:
- Header Frame which includes Customer Service information, Language drop-down along with Welcome text.
- Navbar with Payments tab. "Exit This Site" link also exists on the Right hand corner of the navbar.
- Booking Information — Section related to provide the details of the Customer Folio.
- Transaction Number — Field to enter the booking number associated with the customer.
- Check-In Date — displays Calendar when clicked to select the date of Check In.
- Check-Out Date — displays calendar when clicked to select a date for Check-Out.
- Resort/Cruise — Drop-down with a list of available Resorts/Cruise to choose
- Payment Information — Fields to enter Invoice Number, Payment Type, Amount, Currency etc.
- Memo — Field to enter a memo related to the Payment.
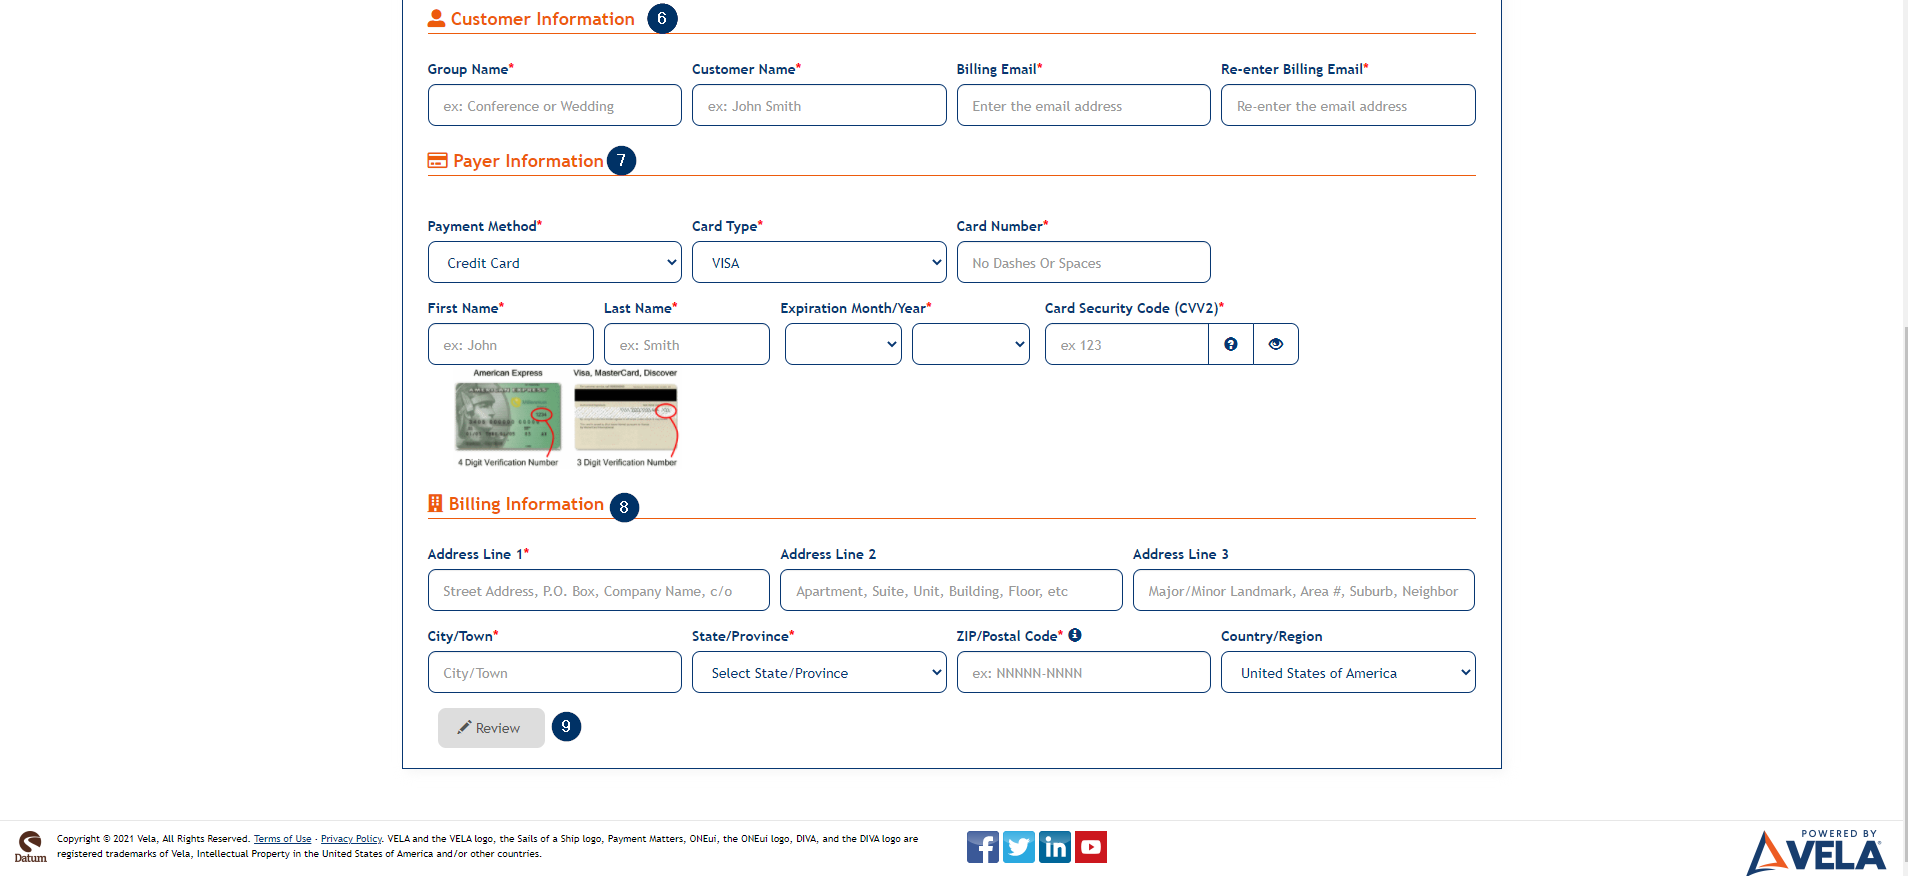
- Customer Information — Section which include the following customer related information
- Group Name — Field to enter a group name.
- Customer Name — Field to enter the Customer Name.
- Billing Email — Field to enter the email address of the Customer.
- Re-enter Billing Email — Field to re-enter the billing email address of the Customer.
- Payer Information — Section which displays the information related to the payment which includes the following:
Payment Method — Drop-down to select a Payment Method.
Card Type — Drop-down which auto-populates with the Correct Card Type when Card Numebr is entered.
Card Number — Field to enter the Card Number.
First Name & Last Name — Fields to enter the First Name and Last Name of the Cardholder.
Expiration Month/Year — Drop-down to select the expiration month/year of the card.
Card Security Code — Field to enter the 3/4 digit card security code. - Billing Information — Section with the field to enter the biling information along with Zip/Postal Code.
- Review — Button which is disabled by default, gets enabled when all the required fields are entered.
Clicking upon Review button the user is taken to the Review Payment page in a disabled state.
The page contains Confirm and Modify buttons.
Clicking on Modify button takes the user to the Make A Payment page with the preserved values and the user can modify the Payment information. Clicking upon the "Confirm" button the Payment gets submitted and the user is taken to the Payment Confirmation page with all the Payment details.
Clicking upon Exit This Site button in the navbar, the user is taken to the Login page of the application with the following message.

When Products/Services Module enabled
When Products/Services module is enabled at the merchant level, then the login page displays with Pay Now link.
Clicking on Pay Now link, the user is taken to the Make A Payment page where they can submit the payment by entering the required data.
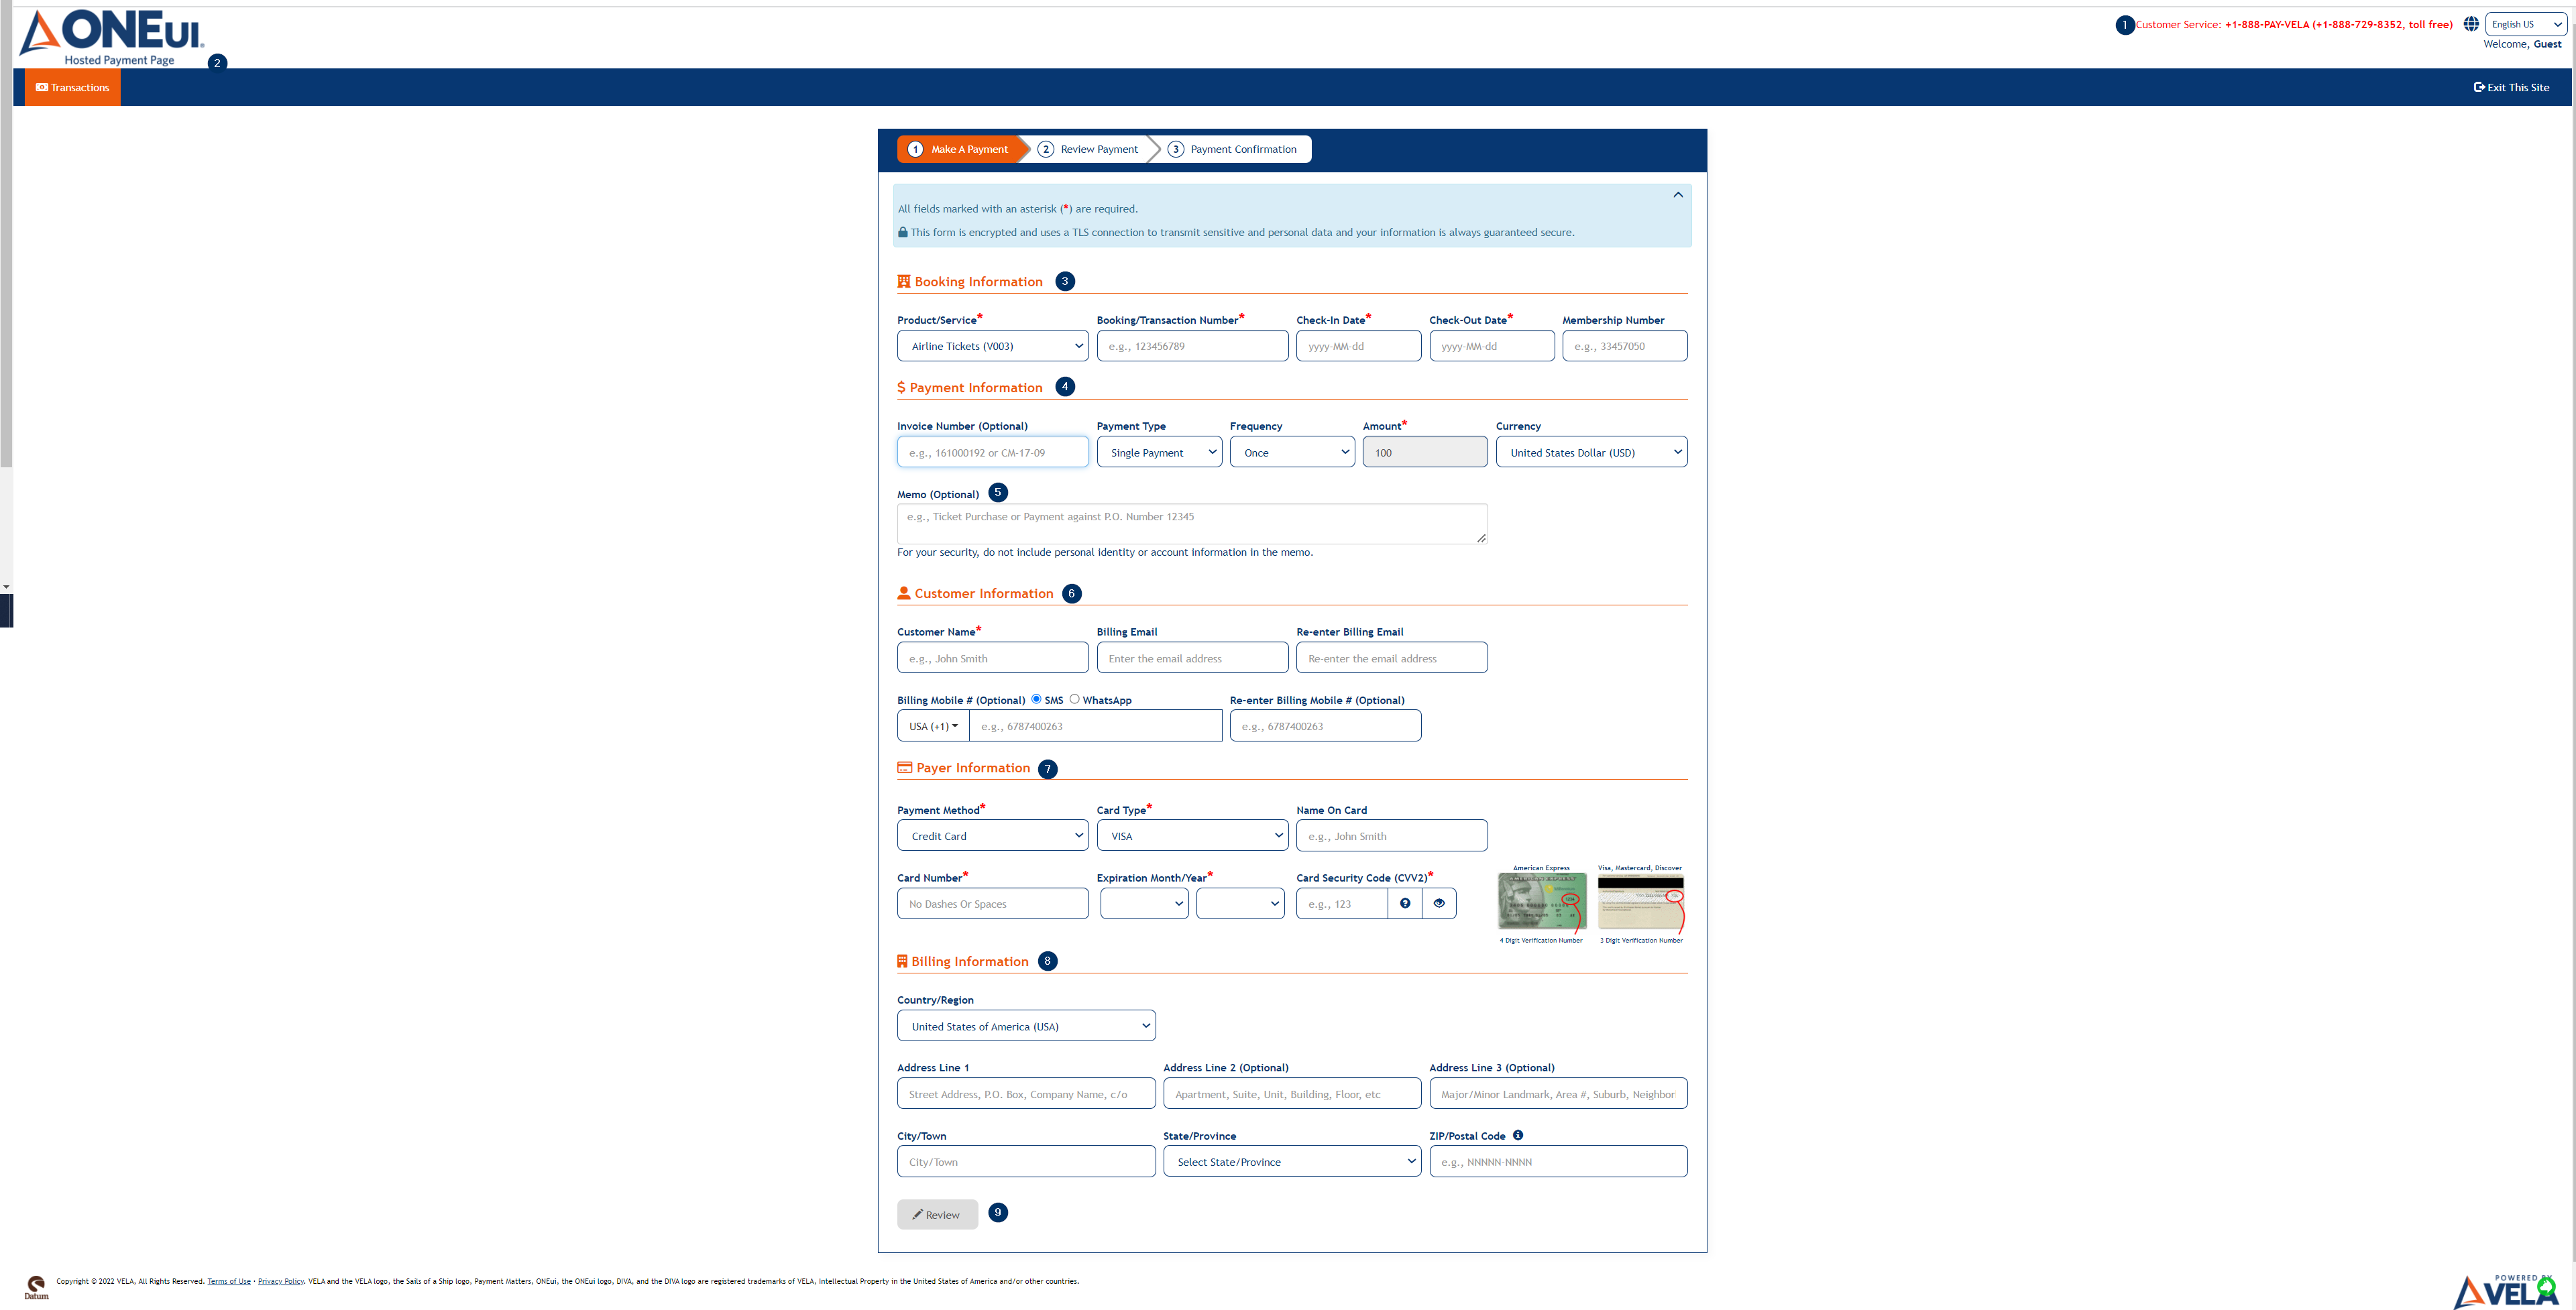
The page contains the following elements:
- Header Frame which includes Customer Service information, Language drop-down along with Welcome text.
- Navbar with Transactions tab. "Exit This Site" link also exists on the Right hand corner of the navbar.
- Booking Information — Section which includes the following Booking related information
- Product/Service — Drop-down to select a Product or service.
- Booking Number — Field to enter the Booking number of the Product/service.
- Check-in Date — Field to select the Check-in Date.
- Check-Out Date — Field to select the Check-out date.
- Payment Information — Fields to enter Invoice Number, Amount, Currency etc.
- Memo — Field to enter a memo related to the Payment.
- Customer Information — Section which include the following customer related information
- Customer Name — Field to enter the Customer Name.
- Billing Email — Field to enter the email address of the Customer.
- Re-enter Billing Email — Field to re-enter the billing email address of the user.
- Payer Information — Section which displays the information related to the payment which includes the following:
Payment Method — Drop-down to select a Payment Method.
Card Type — Drop-down which auto-populates with the Correct Card Type when Card Numebr is entered.
Card Number — Field to enter the Card Number.
First Name & Last Name — Fields to enter the First Name and Last Name of the Cardholder.
Expiration Month/Year — Drop-down to select the expiration month/year of the card.
Card Security Code — Field to enter the 3/4 digit card security code. - Billing Information — Section with the field to enter the biling information along with Zip/Postal Code.
- Review — Button which is disabled by default, gets enabled when all the required fields are entered.
Updated As Of Version 5.0.0.8