Sign Up
Click the Sign up button on the login screen to sign up for a guest account.

Note
The Sign Up link displays only if the Sign Up switch at merchant level is turned ON, otherwise users cannot self Enroll and the Sign Up button is hidden.
Users can self-enroll only if the Invoices Module is Enabled at the Merchant level along with the Allow Users to Self Enroll option is turned ON.
The Account Verification screen will display first if the Invoices module is enabled.
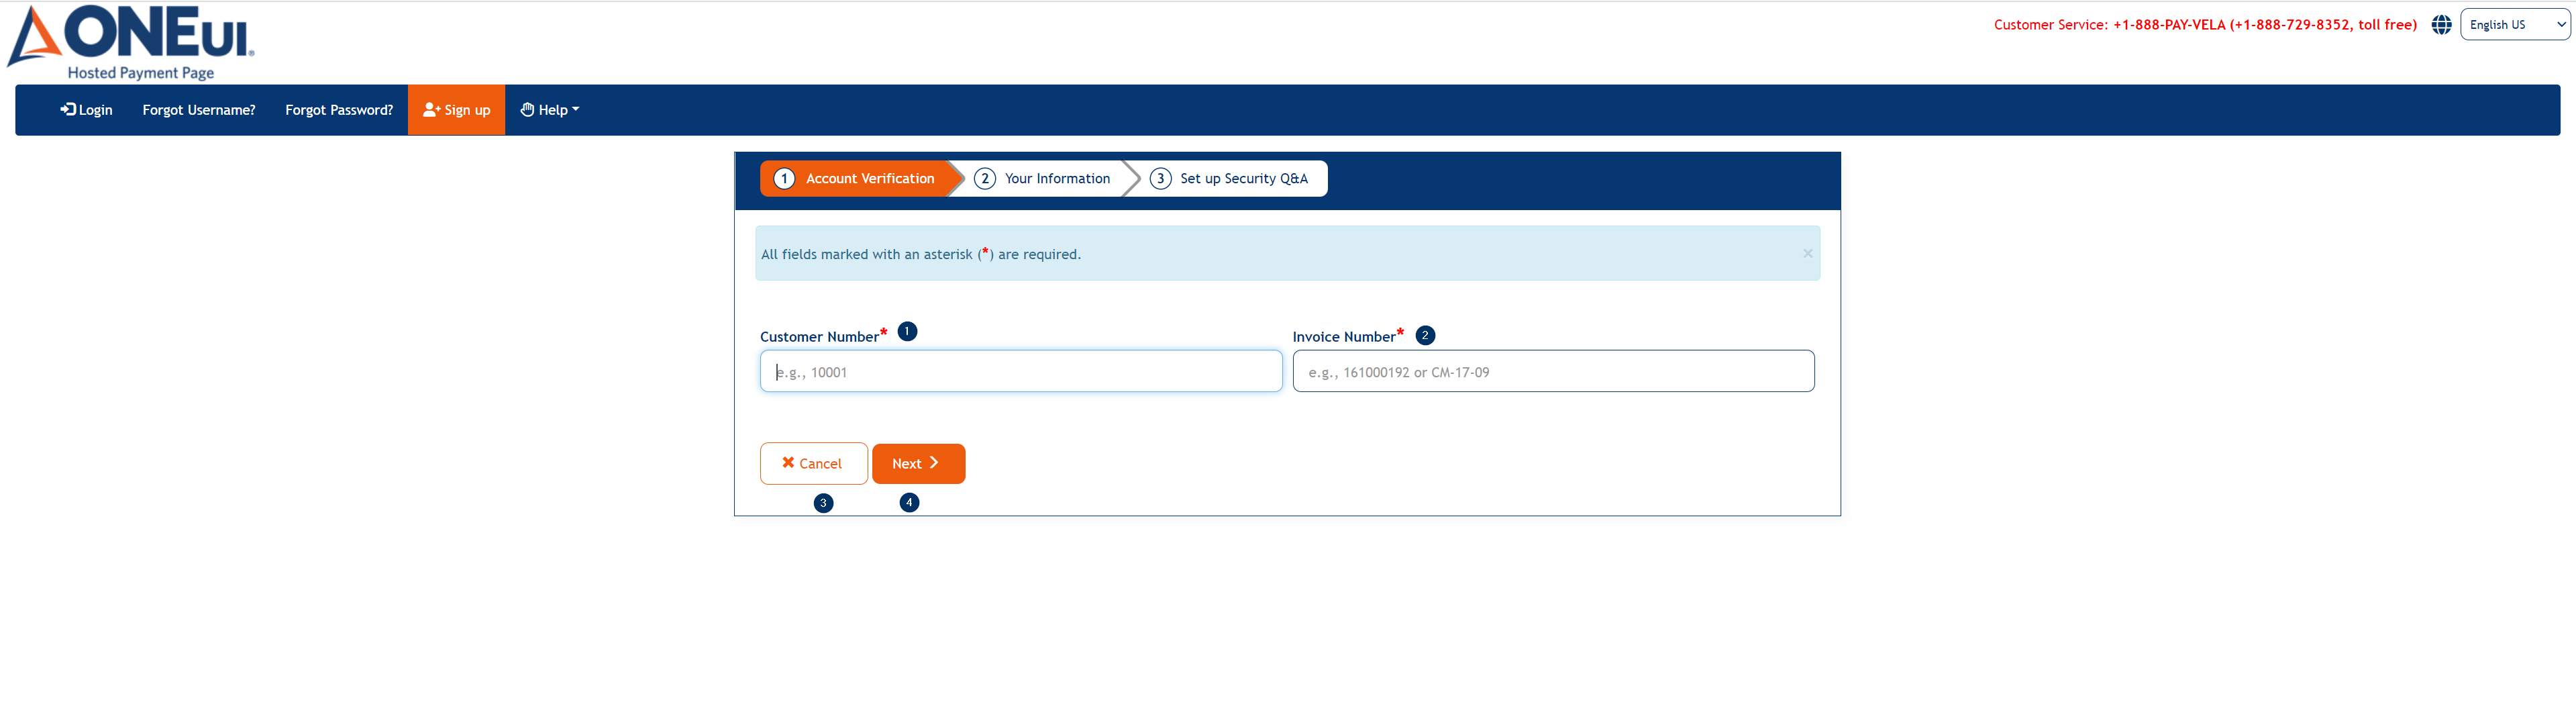
The screen contains the following elements:
- Customer Number — A field for the user to enter the identifier associated with his/her Customer in the system.
- Invoice Number — The number of a past or future invoice for verification of the customer's identifier.
- Cancel button.
- Next button, which is disabled by default.
Clicking the Next button will take the user to the Your Information screen.
The user must enter both a Customer Number and Invoice Number before proceeding to the next screen. An error will display if there is a mismatch in either the Customer Number or Invoice Number.

The user will enter his or her preferred username, password, and demographic information on the Your Information screen.
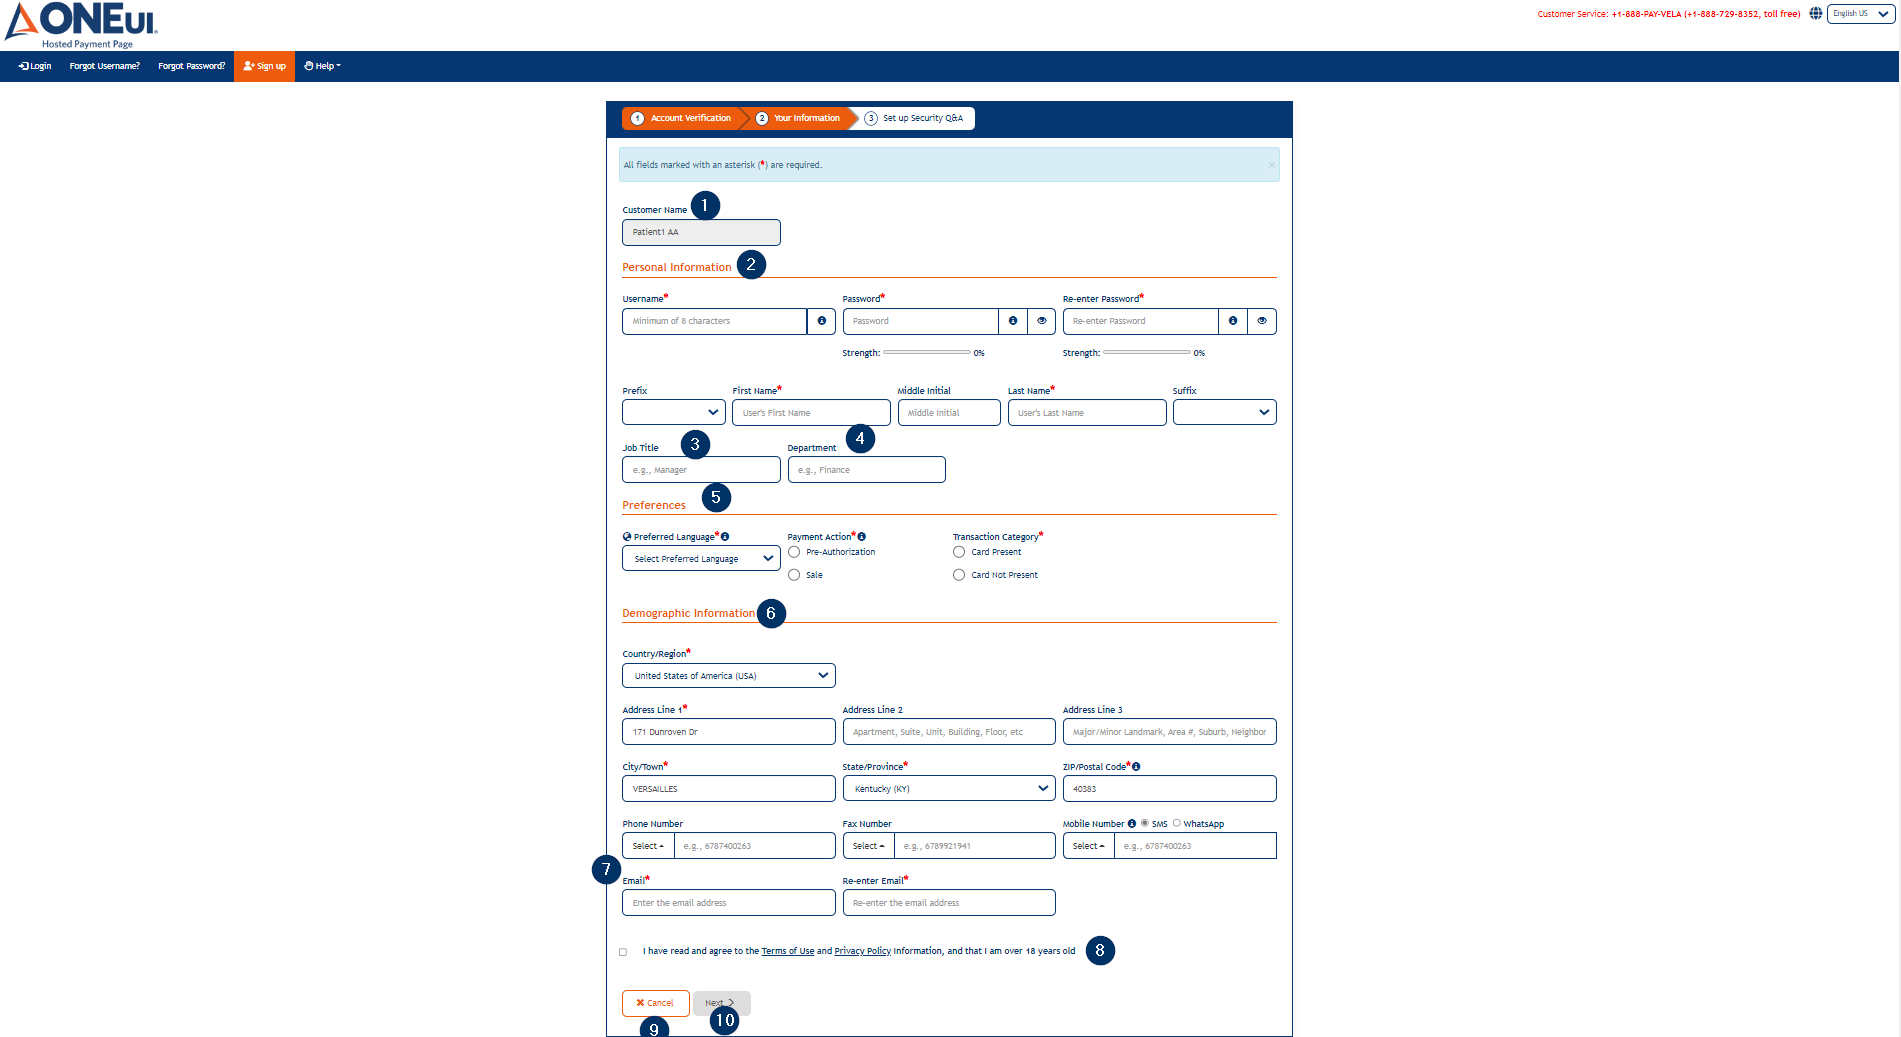
The screen contains the following elements:
- Customer Name — Field which displays with the Customer Name with which the user is associated.
- Personal Information — Section which displays with the fields realted to the user's Personal information like
- Username — Field to enter the Username of the user.
- Password & Re-enter Password — Fields to enter and re-enter Password.
- Fields to enter the user's first name, middle initial, last name, and a prefix and suffix if applicable.
- Job Title — Field to enter Job Title of the user.
- Department — Field to enter the name of the Department.
- Preferences — Section to enter the user's preferences like
- Language — A dropdown to select the user's preferred language.
- Payment Action — A Payment Action with radio buttons of Pre-Authorization and Sale, the way user wants to submit the payment.
- Transaction Category — Transaction category how the user wants to make a payment, either Card Not Present or Card Present terminal.
- Demographic Information — Section which includes the fields to enter the user's demographic information like the address, city, state etc. including the phone/mobile/fax numbers.
- A set of fields for the user's email address.
- A checkbox acknowledging that the user accepts the application's terms of user and privacy policy.
- Cancel button.
- Next button, which is disabled by default and will be enabled when all the required information is filled.
The user can click the Cancel button to return to the login screen or click the Next button (once the required fields are filled out) to proceed to the Set up Security Q&A screen.
The screen contains the following elements:
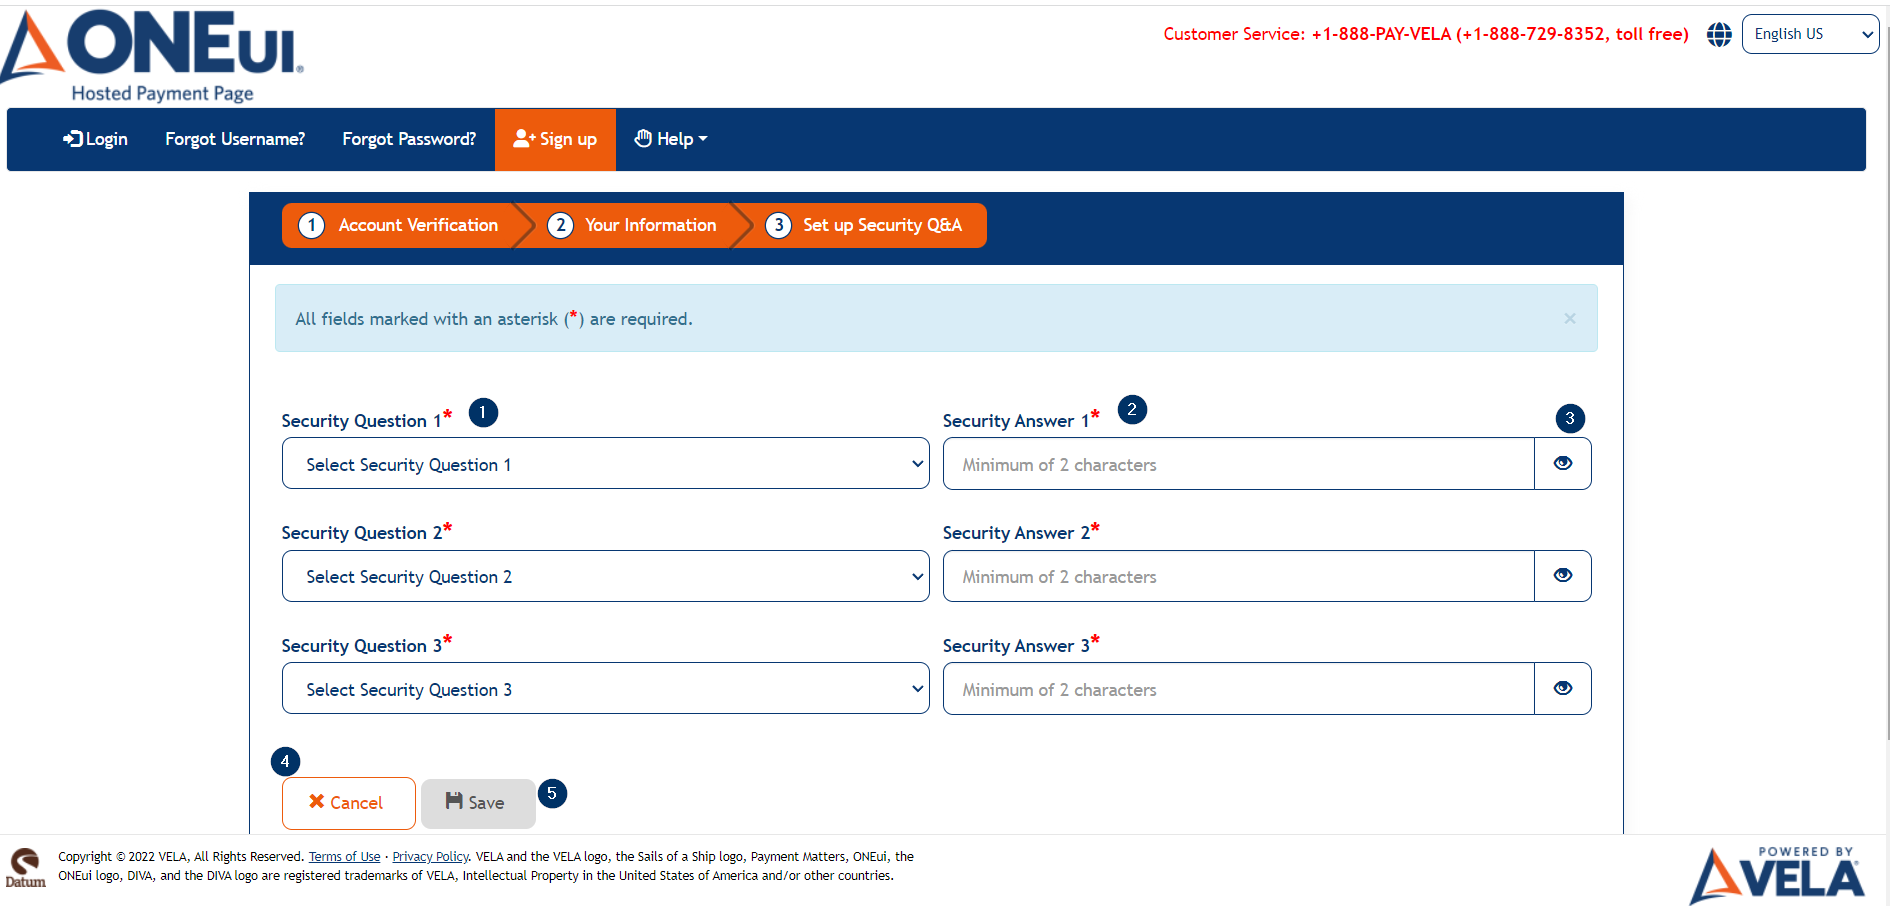
- Security Question 1/2/3 dropdowns
- Security Answer 1/2/3 fields
- A button to un-mask the contents of the security answer fields
- Cancel button
- Save button, which is disabled by default
Note
In regards to Security, protect User's Identity and avoid account compromise, the Users cannot set all Security Answers as the same including the case sensitivity of the text.
The user can click the Cancel button to return to the login screen after confirming that he or she would like to cancel the signup process. The user will be prompted to set up security questions on the next login attempt.
The user will be redirected to the login screen with a success message if the signup was successful.

The users will receive an email and text message confirming their new account and welcoming them to the application.
Updated As Of Version 5.0.0.8