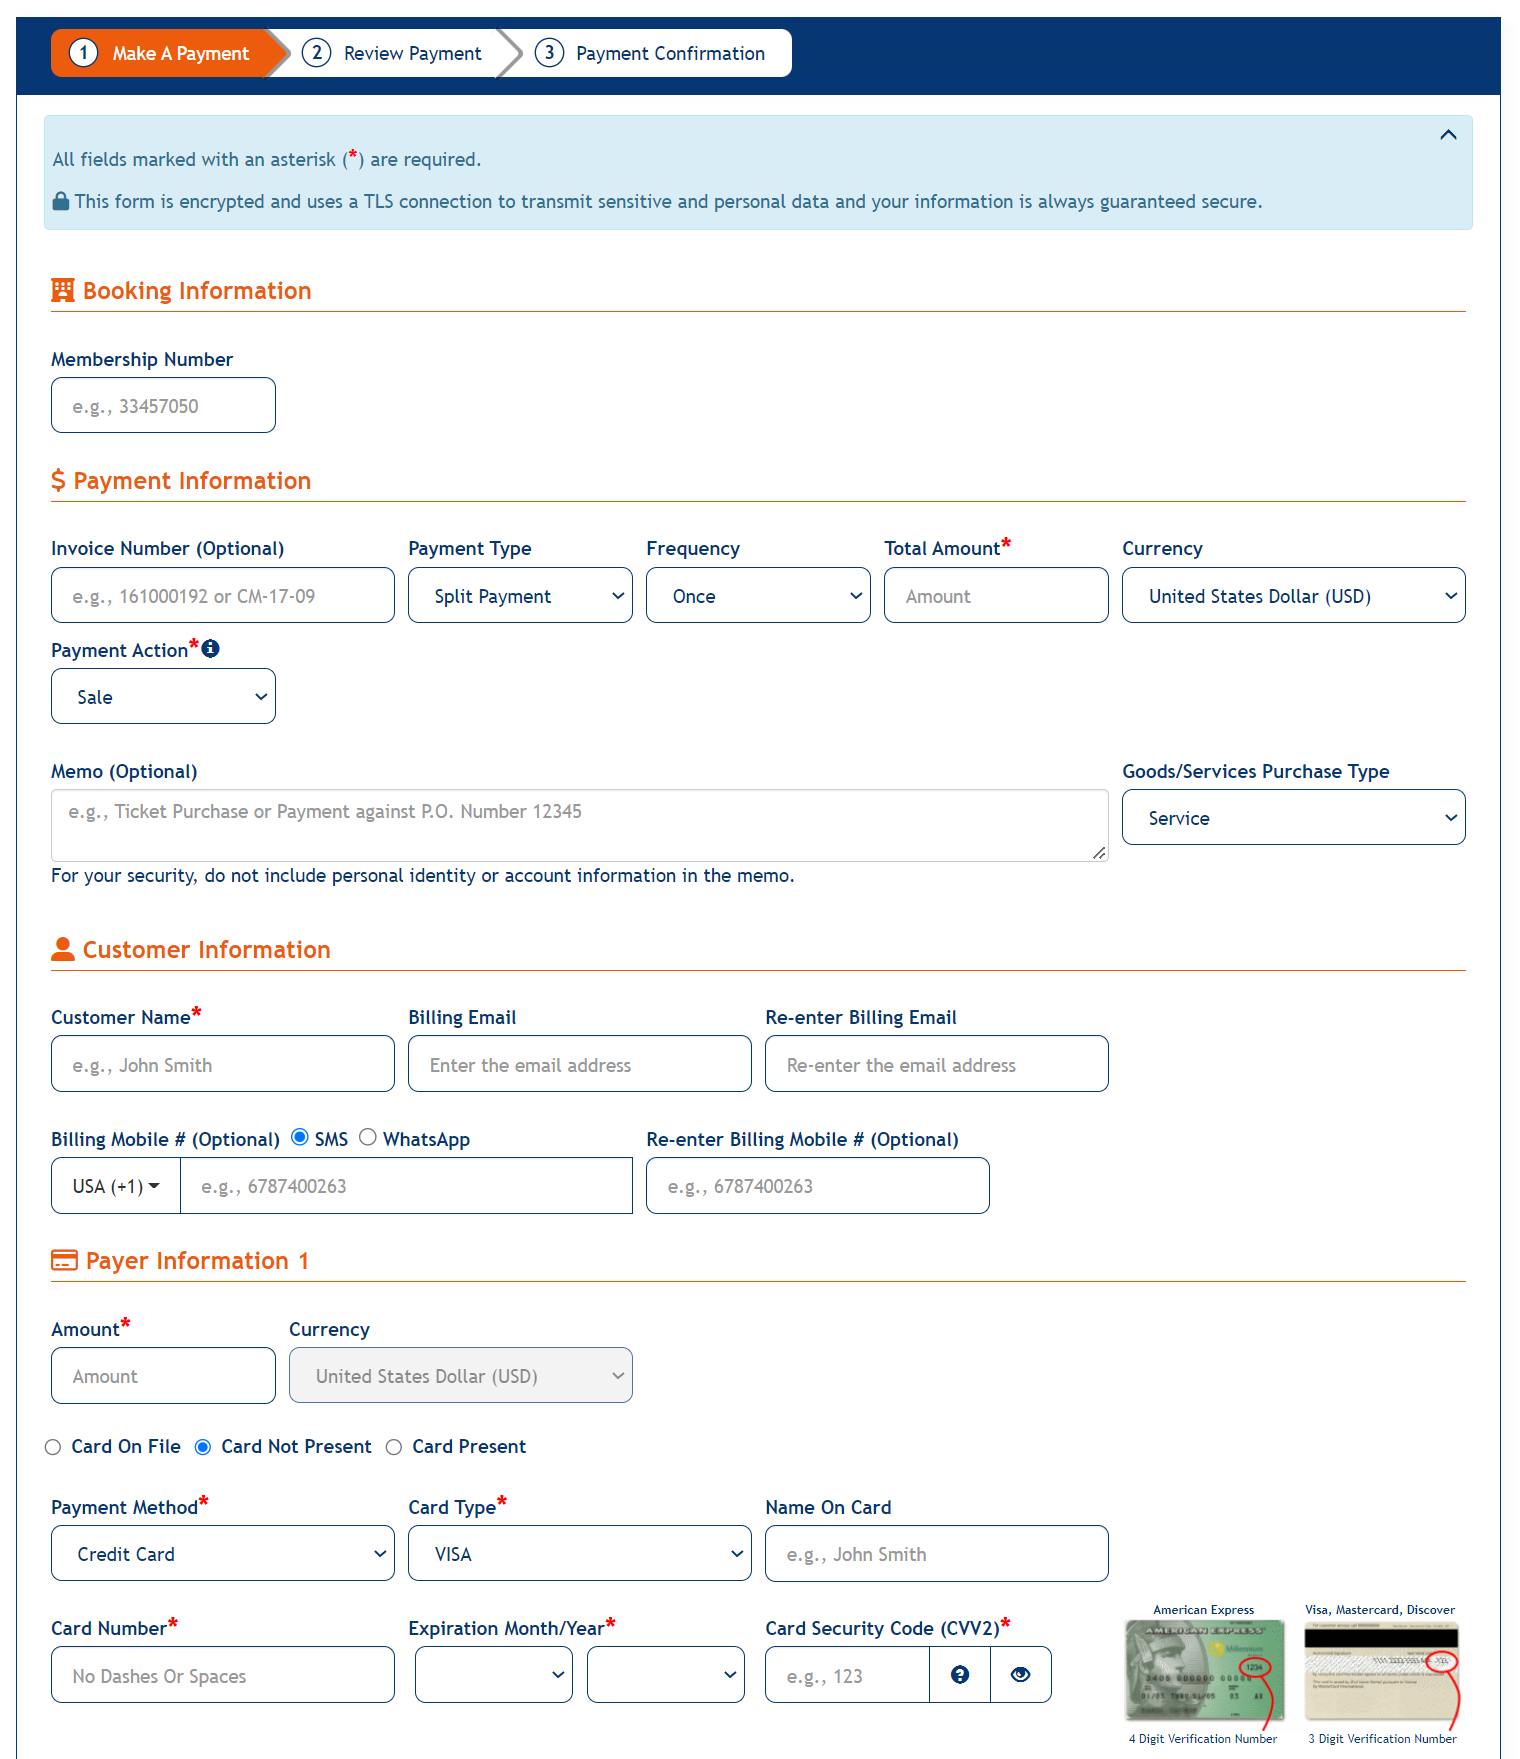
Make A Payment
Make A Payment is the screen where users enter their payment information and submit payments.
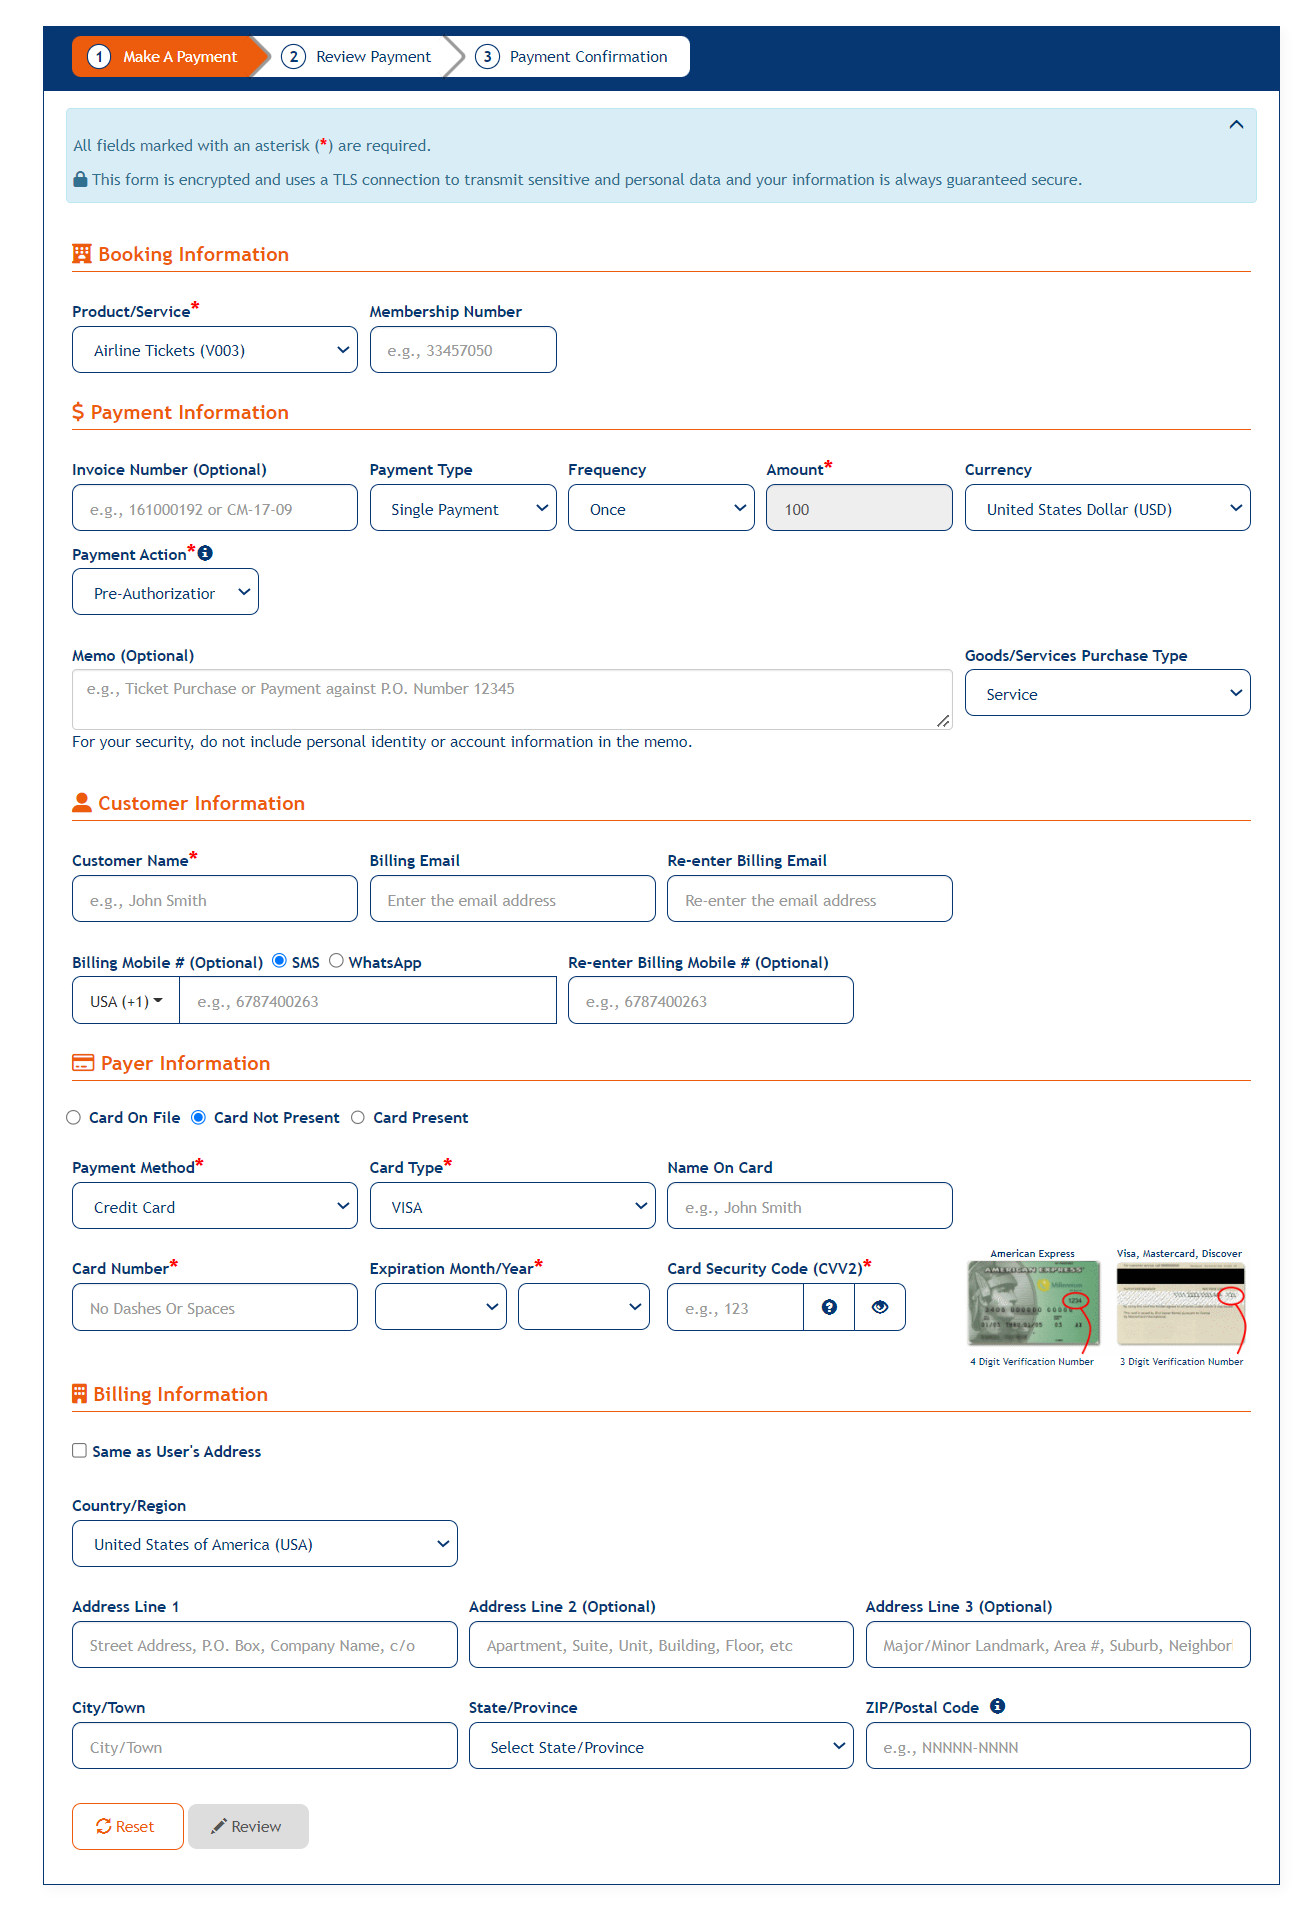
The default Make A Payment screen looks as follows if the Transaction Category of the user has been set up as Card Not Present:
Single Payment
The Make A Payment screen for a Single payment looks as follows and contains the following elements:

- Booking Information: Booking Information related fields for the payment
- Payment Information: Payment Information section contains
- Invoice Number — The invoice Number of the Payment
- Payment Type — Whether the payment is a single or split payment. A single payment uses only one payment method whereas a split payment uses two or more payment methods.
- Frequency — Whether the payment will occur once or on a recurring basis
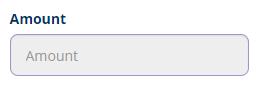
- Amount — The payment amount
- Currency — The currency of the payment
- Payment Action — Drop-down to select a Payment Action
Note
The Currency drop-down will be disabled with an auto-populated value set at the Merchant level. The Merchant can allow Multi-Currency pricing by turning the switch ON at the merchant level which enables the drop-down to select the Currency.
The Payment Action drop-down displays with the options of $0 Authorization, Balance Inquiry, Force Capture Pre-Authorization, and Sale to select from, to perform the transactions as per user's needs.
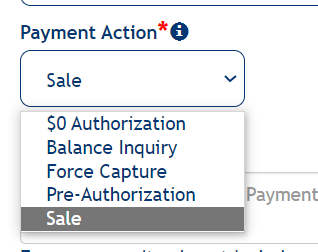
The Payment Action will be ignored for eCheck and PINless Debit transactions while submitting payment information.
Balance Inquiry option will get displayed only if the Gift Cards Module enabled at the Merchant level and if the User selects Gift Card as a Payment method.
Memo
A Memo field displays that will allow the user to enter any additional information that they would like to accompany for their payment.

The field would be especially useful for cash, check, and money order payment methods on the Make A Payment screen.
Customer Information
Customer Information — The Customer Information section includes
* Customer Name — Field to enter the name of the Customer.
* Billing Email — Field to enter the billing email address of the Customer to which the payment details are sent when a payment has been made.
* Re-enter Billing Email — Field to re-enter the billing email adress of the customer.
* Billing Mobile# — Filed to enter the mobile number of the customer.
* Re-enter Billing Mobile# — Field to re-enter the billing mobile number.
If the Booking Information is enabled at the Merchant level, then the users will see and additional field called Group Name under the Customer Information section.

An additional section display on the Make A Payment page before Payment Information section when the Booking Information section is enabled at the Merchant level and contain the following elements:

Booking Information — This section display with the following information:
Transaction Number — Field to enter a 6-digit transaction number.
Check-In Date — Field to select a Check-In Date from the calendar available.
Check-Out Date — Field to select a Chec-Out Date from the calendar available.
Resort/Cruise — Drop-down with the available Resort/Cruise list to select from.
All the above fields are required when the Booking Information feature is enabled at the merchant level. These fields are hidden if the setting is disabled at the Merchant level.
Payer Information — The Payer Information section contains
* Payment Method — Credit Card for a credit card payment
* Card Type — The type of credit card being used for the payment
* Name On Card — The cardholder's name
* Card Number — The full number on the front of the credit card
* Expiration Month/Year — The expiration date (2-digit month and year) of the credit card
* Card Security Code — The 3- or 4-digit code on the back of the card
* Eye and information icons — to unmask the security code field value and to display card security code information text
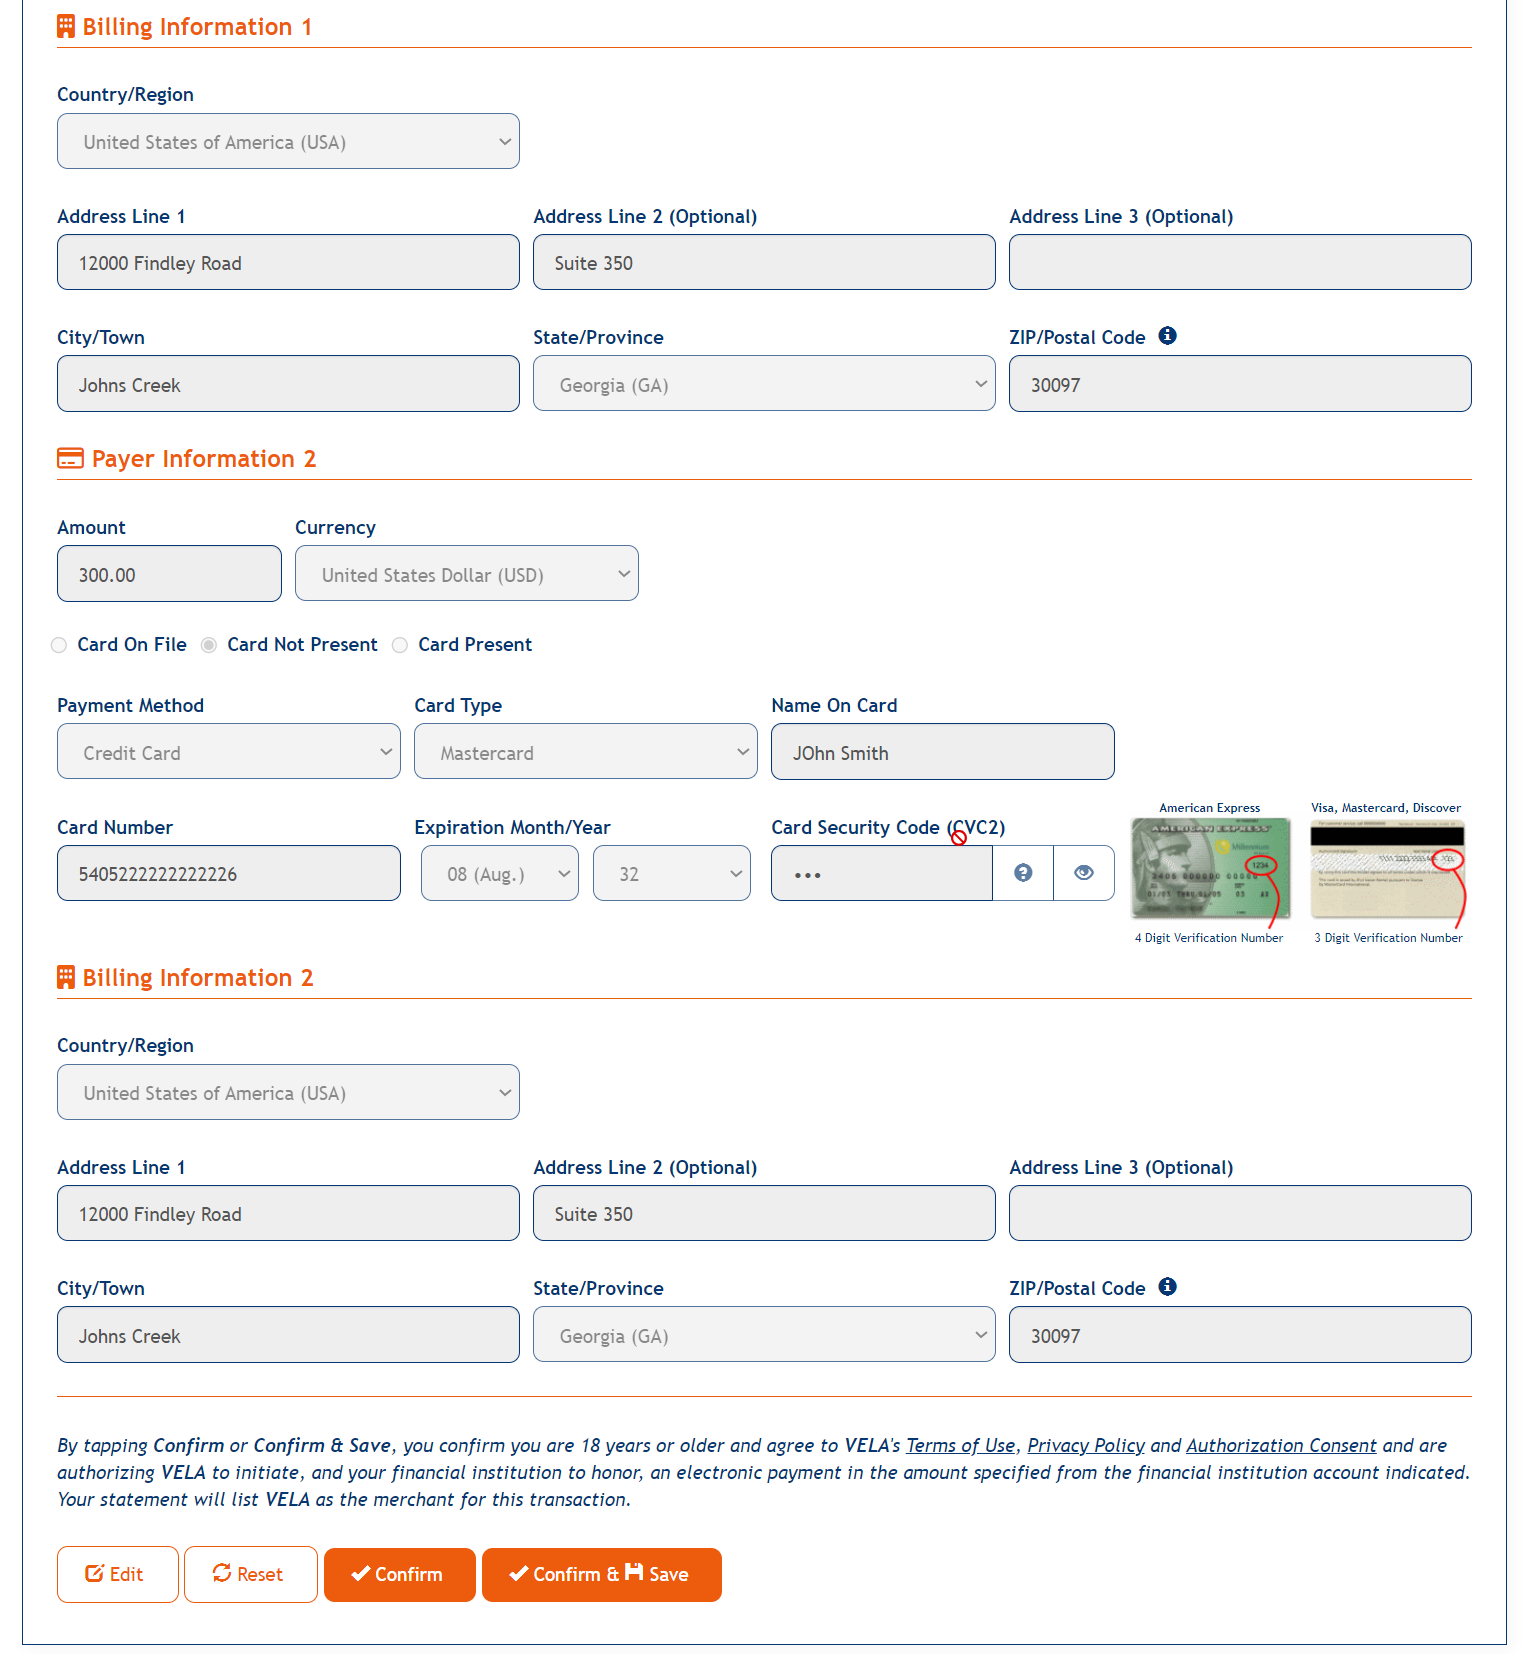
Billing Information — The Billing Information section includes
* Address Line 1 — Field to enter the address of the user
* Address Line 2 — Field to enter the address line 2 of the user if exists
* Address Line 3 — Field to enter the address line 3 of the user if exists
* City/Town — Field to enter the City of the user
* Country — Drop-down to select a country from the list available
* State/Province — Drop-down to select the State
* Zip/PostalCode — Field to enter the Zip code
Clicking upon the Review button, the user is taken to the Review Payment page with all the values preserved.
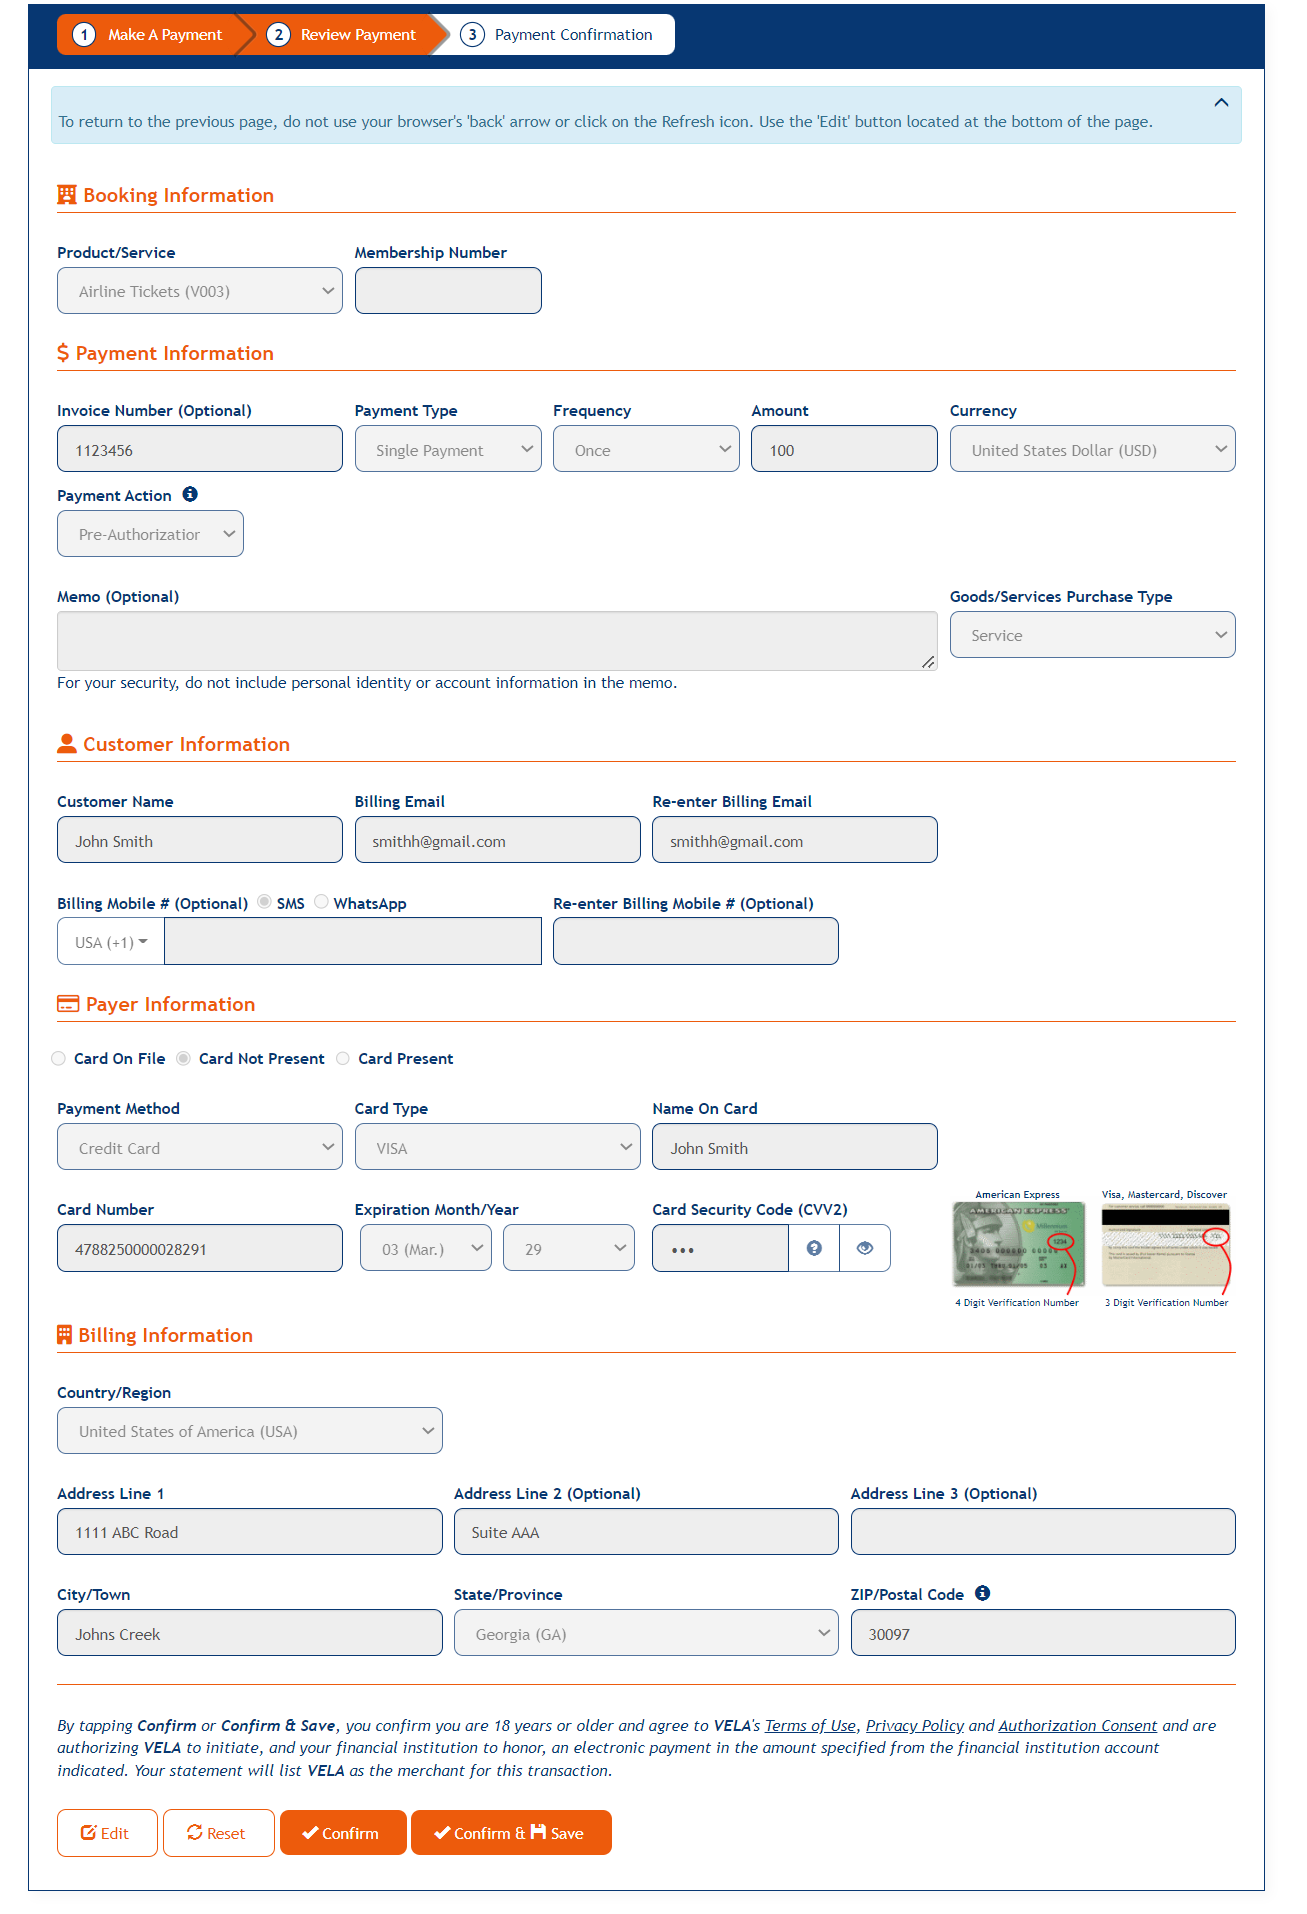
The Review payment screen looks exactly like the Make A Payment screen with the following exceptions:
- All fields are disabled
- Payment Authorization statement displays for all Payments
- The buttons change from Cancel and Review to Edit, Reset and Confirm
Confirm & Save will also display if the Tokenization is enabled at the merchant level, otherwise it will be hidden. Clicking on Confirm & Save button the user confirms the Payment and the card is saved for the future use.
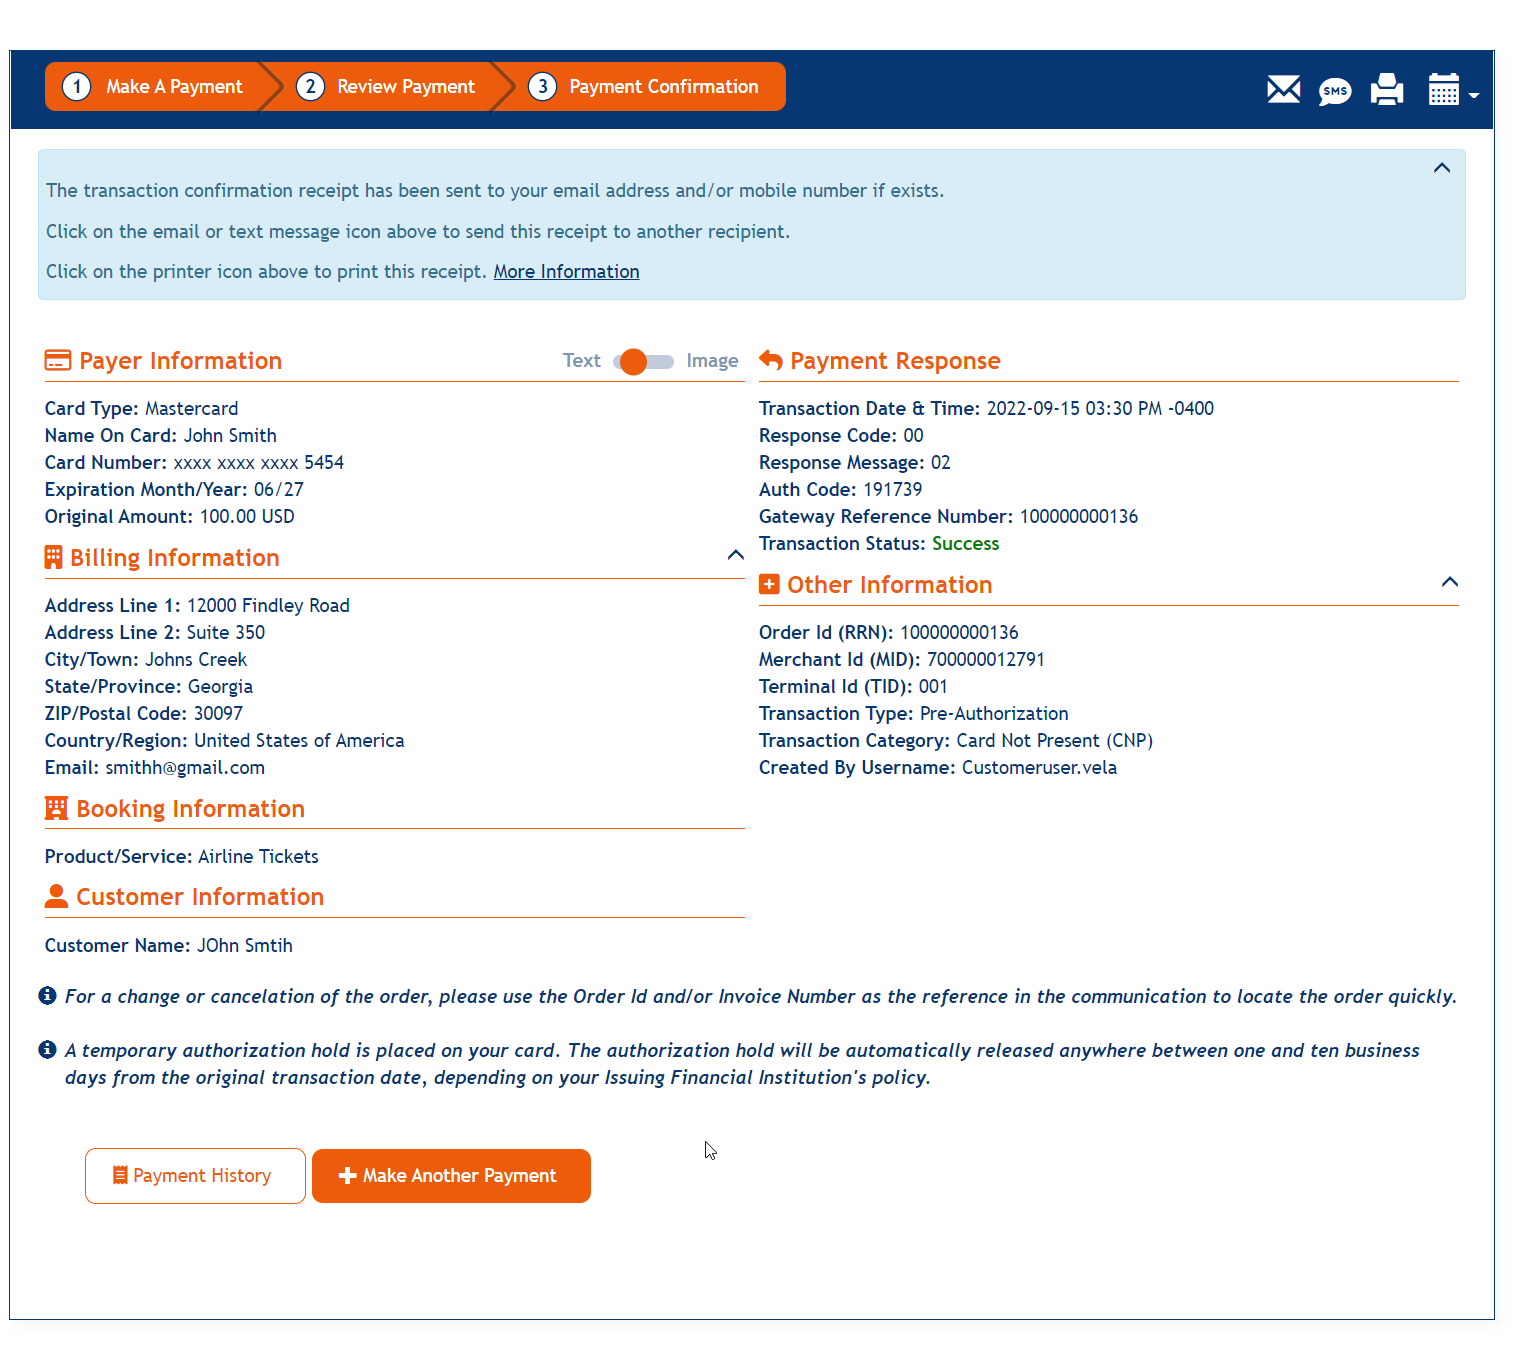
Clicking the Edit button will take the user back to the Make A Payment screen so that the payment details can be modified. All user-entered data will be preserved so that the user will not have to start over. Clicking the Confirm button will submit the final payment information and the screen looks as below:
Split Payment
The Make A Payment screen undergoes the following changes if the user selects Split Payment from the Payment Type dropdown:

The Amount field changes to Total Amount

Payer Information and Billing Information sections change to Payer Information 1/2 and Billing Information 1/2.


The amount field in Payer Information 2 is automatically calculated by subtracting Payer Information 1's value from Total Amount. The field is disabled so that users cannot change the value.
Clicking upon the Review button, the user is taken to the Review Payment page.
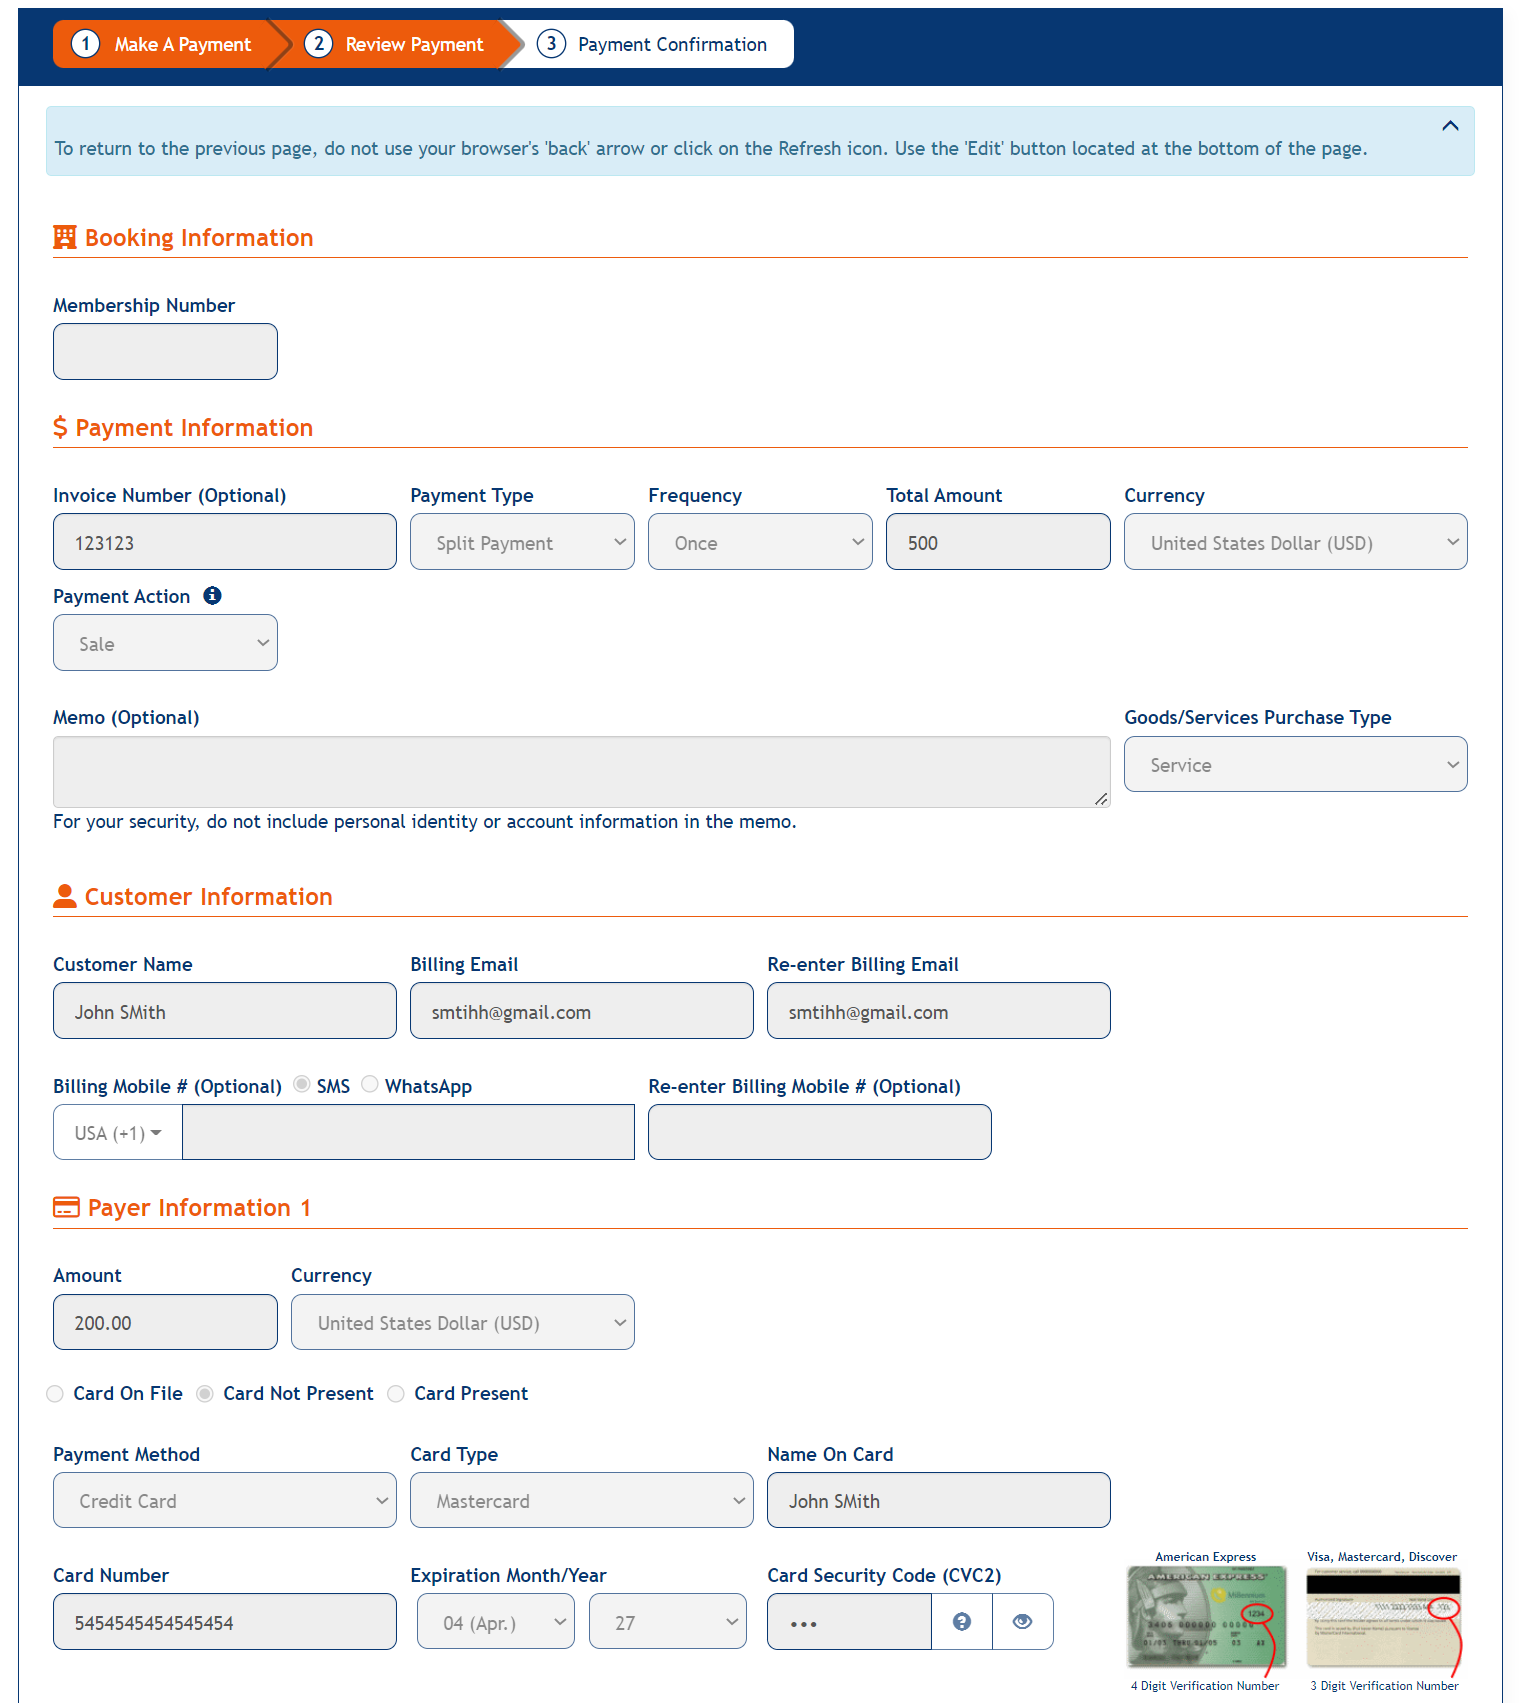
Clicking upon the Confirm button, the payments get confirmed.
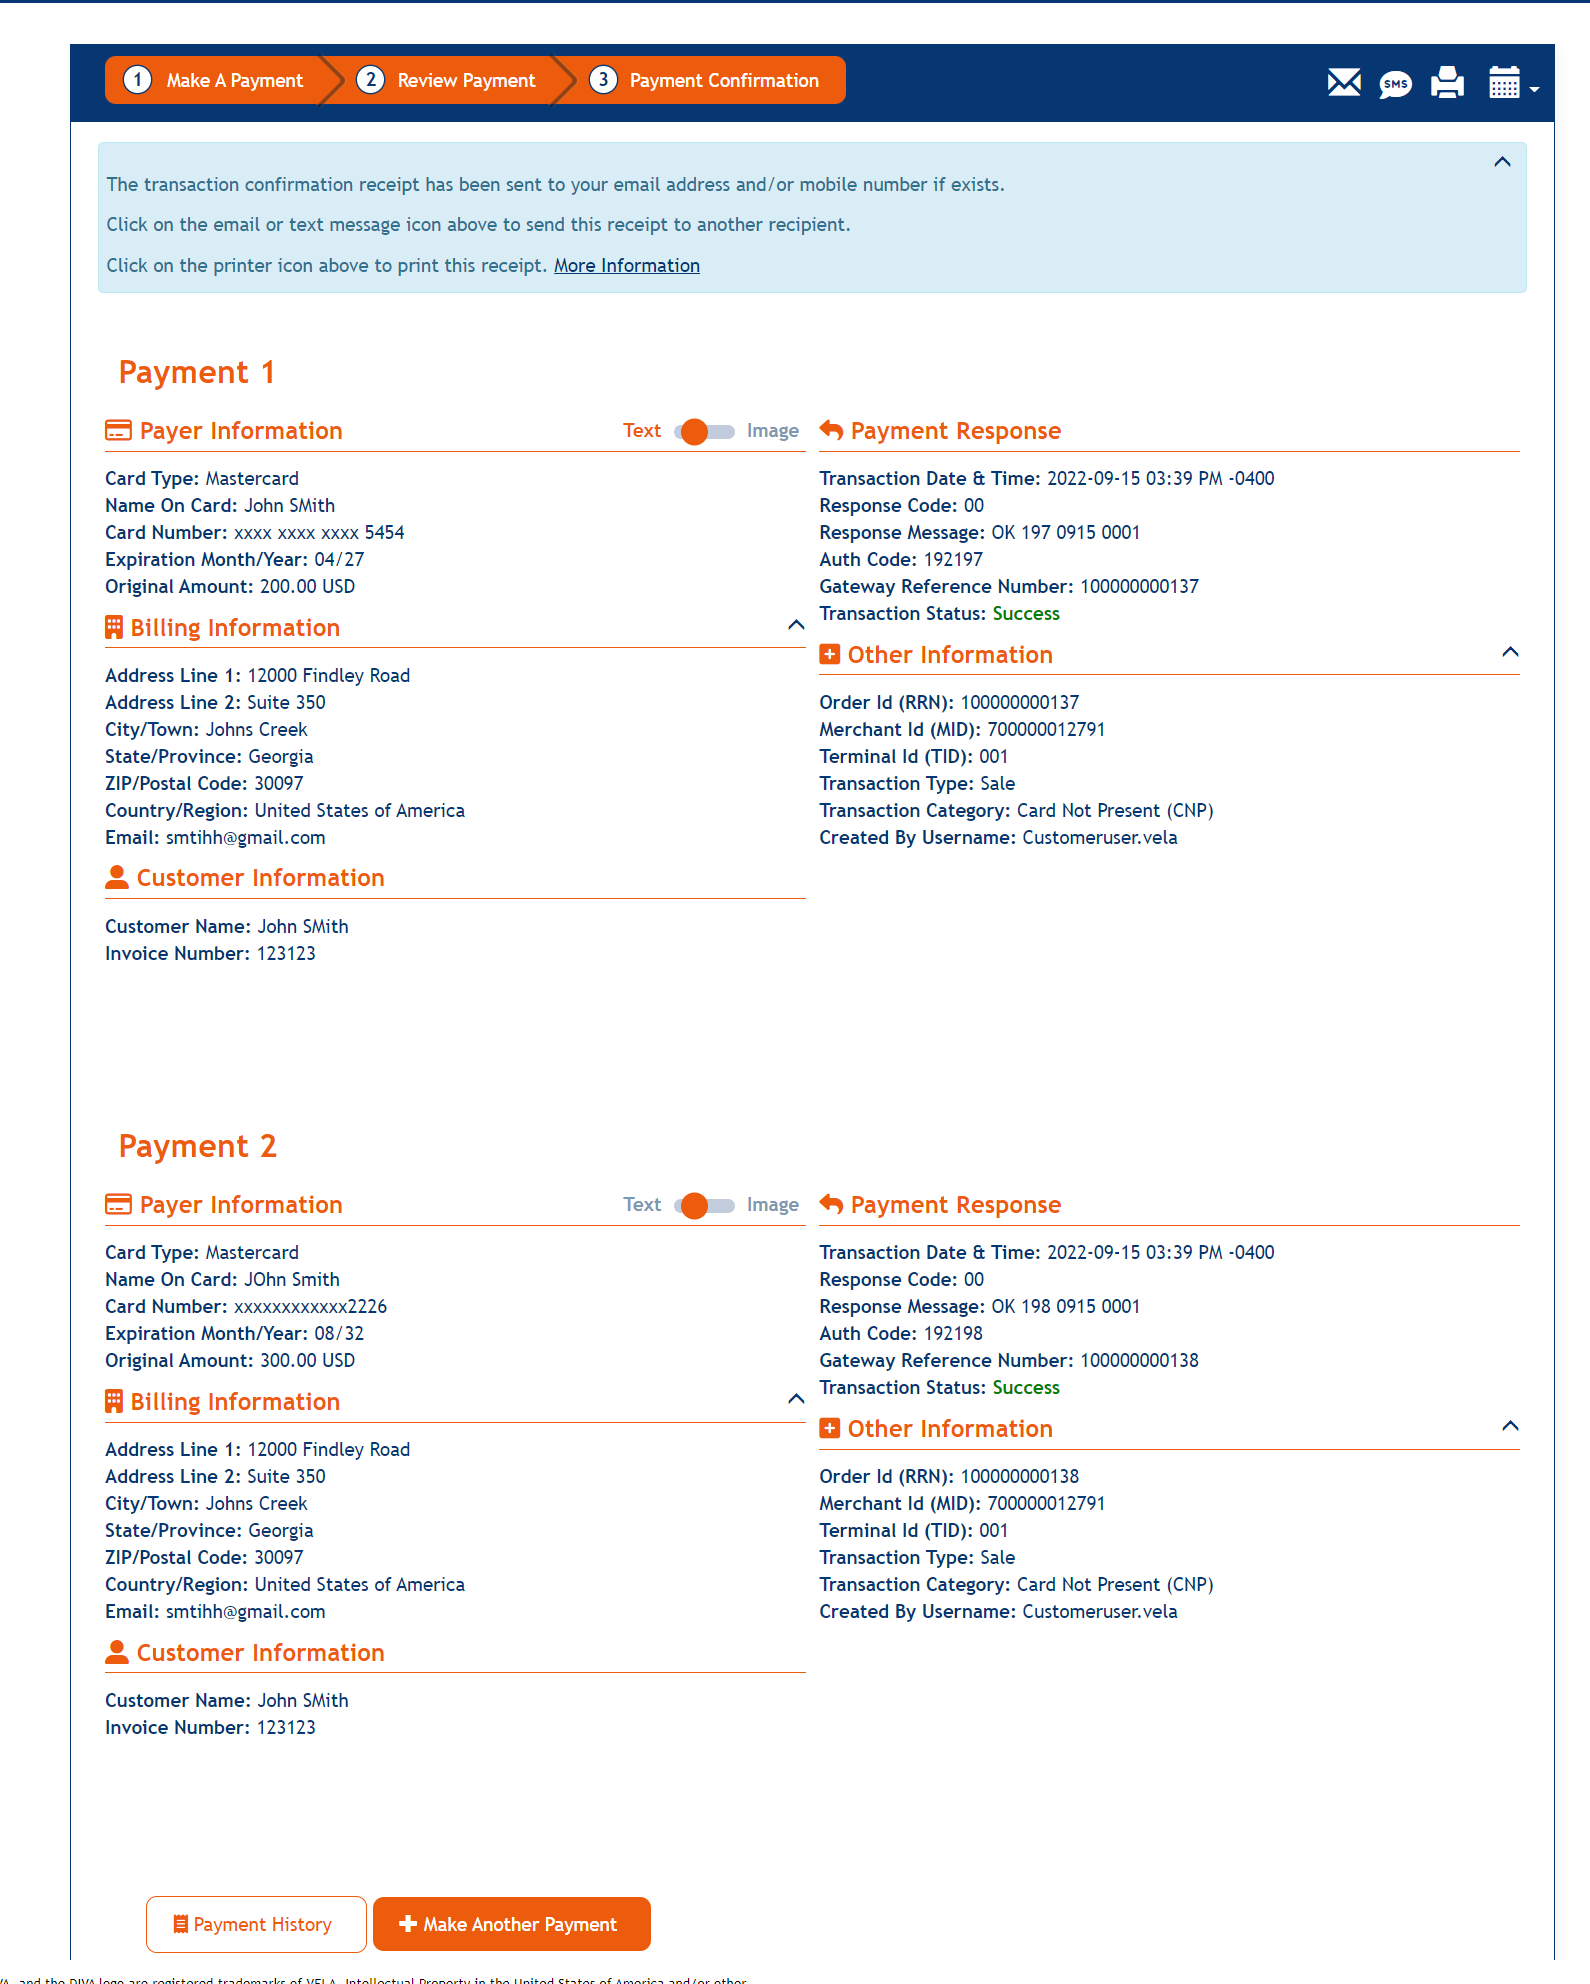
The Payment Confirmation screen for a split payment looks like the Payment Confirmation screen for a single payment, but has two sections for Payment 1 and Payment 2, as well as two authorization checkboxes and Void, Capture or Refund buttons if the Payment is of SALE.
Updated As Of Version 5.0.0.8